10
CLARKSON SLURRY KNIFE GATE VALVES
KGA+
10. Turn the valve over so the installed sleeve
ison the flat surface.
11. Apply a silicone base lubricant to the
sealing-nose radius of the installed sleeve.
Also apply it to the second sleeve sealing
nose and O.D. of seal end.
12. Install the second sleeve, following steps
1through 11. It may be necessary to use two
or more C-clamps to pull down the second
retainer flange. Do not fully tighten retainer
flange bolts until after checking the sleeve
bores for concentricity; using a straight
edge, check the sleeve position in four (4)
places, 90 degrees apart in relation to the
installed sleeve bore I.D. Adjust as required
to make the sleeve concentric with the
othersleeve.
13. Fully tighten retainer flange bolts per
Paragraph 9.
14. Remove C-clamps, if used.
15. The valve is now ready for installation.
Keep gate in the open position until valve
isinstalled.
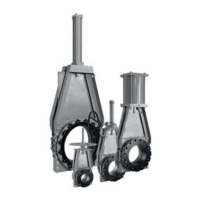
FIGURE 9
Example of a segmented retainer
10 SECONDARY SEAL REPLACEMENT
CAUTION
Since this procedure may be performed with the
valve in an active pipeline, plant standard safety
procedures must be followed. Use of personal
protective equipment, tag out or other plant
standard safety procedures must be followed.
Procedure SHOULD NOT be done with valve in
closed position. If valve is removed for this service,
assure line is not pressurized before removing
valve. Valve assembly and parts may be heavy,
use proper lifting and support techniques, refer
toLifting, Section 15.
Disassembly
1. Replacement of the secondary seal can be
accomplished without having to remove the
valve from service, however, this procedure
SHOULD NOT be done with valve in closed
position. If it is suspected that either one or
both of the elastomer sleeves have failed,
the valve should be removed from service
before secondary seal removal. If valve is
tobe removed, refer to Lifting section.
2. Open the valve, so the gate is in the fully
raised position.
Pivot frame
on bolt
For gate and or secondary seal replacement,
smaller valves may have the actuator frame
swung out of the way as illustrated here.
Remove frame bolts on one side only and
loosen the opposite side just enough to allow
movement. Be sure and properly support
weight of actuator assembly, taking care to
avoid injury.
3. For ease of reassembly, using a permanent
marker, draw a line on the gate face along
the top of the secondary retainer plate. If
marking gate is not an option, make note
of the dimension from top of valve housing
to top of gate in full open position (refer to
Table 5, Figure 13, dimension A).
4. Remove the cotter pin from the clevis pin
and remove the clevis pin from the gate. It
may be necessary to actuate the valve down
slightly in order to relieve pressure on the
clevis pin to facilitate removal.
5. Actuator assembly removal:
Smaller valves: remove the frame to
housing bolts of one side except for the
lowest bolt on the opposite side of the frame
(see Figure 10). This bolt will act as a pivot
point for the frame / actuator assembly.
While supporting the actuator assembly,
pivot the frame / actuator assembly away
from the valve. Continue to provide support
while actuator is in this position.
Larger valves: remove the frame to housing
bolts. Lift the frame and actuator assembly
off the housing assembly to allow secondary
seal and gate removal.
6. Loosen the secondary seal retainer plate
bolts.
7. Remove the gate by lifting it out of the
secondary seal.
8. Remove all fasteners and lockwashers that
retain the secondary seal retainer plate in
position.
9. Remove the secondary seal retainer plate
bylifting it up.
10. Remove the secondary seal by inserting a
flat blade screwdriver midway along the
outside of the seal, between the seal and the
valve housing. Pry the seal up and remove.
11. Inspect the gate for sharp edges or
excessive damage. Refer to ‘Gate
replacement’ section if gate requires
replacement.
FIGURE 10