7
emersonfans.com
Please contact 1-800-654-3545 for further assistance
U.L. Model No.: 42-CL
3. Ceiling Fan Assembly (Continued)
PIN
HANGER BALL
3.5" DOWNROD
PHILLIPS HEAD
SET SCREW
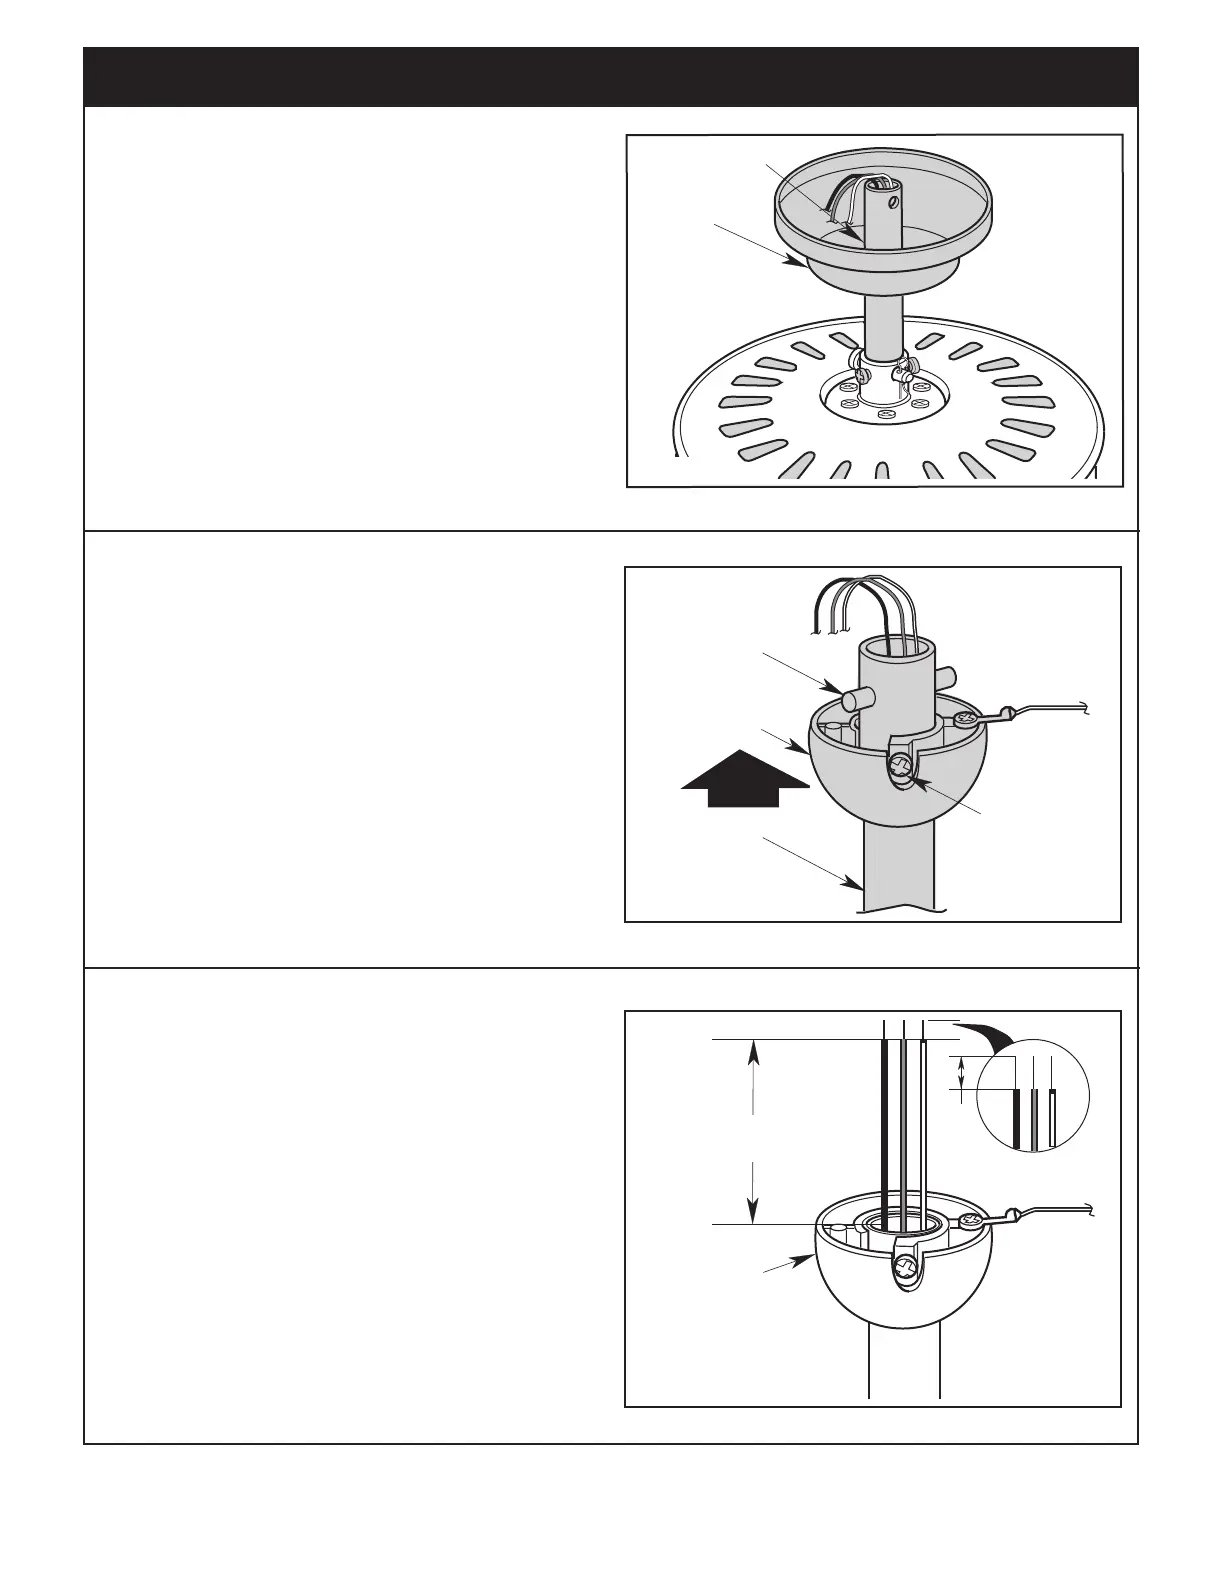
Figure 7
3.7
Route the three Motor Wires through the Hanger Ball
(Figure 7).
Reinstall the Hanger Ball on the Downrod as follows:
Position the Pin through the two holes in the Downrod
and align the Hanger Ball so the Pin is captured in the
groove in the top of the Hanger Ball (Figure 7).
Pull the Hanger Ball up tight against the Pin and
securely retighten the Phillips Head Set Screw in the
Hanger Ball (Figure 7).
A loose Phillips Head Set Screw could create fan
wobble.
CEILING
COVER
3.5" DOWNROD
Figure 6
3.6
Place the Ceiling Cover over the Downrod (Figure 6).
Be sure that the Ceiling Cover and the Coupler Cover
are both oriented correctly (Figure 6).
HANGER BALL
6 to 9
INCHES
1/2
INCH
3.8
The Fan comes with Blue, Black and White Wires that
are 42” long.
Measure up approximately 6 to 9-inches above top of
Hanger Ball / 3.5” Downrod Assembly (Figure 8).
Cut off excess Wires and strip back Insulation 1/2-inch
from end of Wires.
Figure 8