5.1.2 Performing periodic maintenance
If an on-site pressure test of the retrieval tool is required before the operation is started,
perform the back pressuring sequence with the plug in the fitting. The plug pilot does not
need to be mated with the plug.
Prerequisites
Ensure that the plug is in the fitting, and that the service valve and the retriever have been
properly installed.
Procedure
1. Connect a pump (or any other application pressure source) to the retriever bleed
valve with a suitable hose.
2. Open the bleed valve and pressurize the tool to at least 1.5 times the line pressure,
or maximum 6,092 psi (420 bar).
3. Close the bleed valve. No leaks should occur.
4. Open the bleed valve and release the pressure.
5. Continue with the operation or remove the tool.
5.1.3
Maintenance after use
After a series of retrieval operations are completed, before the mechanical retriever tool
and the service valve are stored, the mechanical retrieval tool and the service valve should
be disassembled, cleaned, and checked using the guidelines below.
Important
To clean the barrels of the Roxar Mechanical Retrieval Tool, use a clean, straight,
nonmetallic pole (made of wood, nylon, or a polymer) with a smooth surface. The pole
should have an external diameter between 25.4 mm and 31.75 mm, and a length that is
equal to the length of the retriever when it is collapsed. The cloth for cleaning the barrels
should be clean and not contain abrasive chemicals.
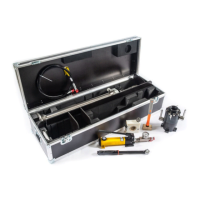
Mechanical retriever disassembly and cleaning
Prerequisites
A complete assembly drawing of the mechanical retriever tool can be found in Roxar
Mechanical Retriever Assembly, which contains the part numbers referred to
parenthetically in the following procedure.
WARNING
Risk to Personnel and Equipment: If the 3 main seals in the retriever are not assembled
in the same direction from when assembled, hot liquid or gas can escape and potentially
result in serious injury. Make sure that the 3 main seals in the retriever are assembled in
same direction on disassembly.
Procedure
1. Remove the handles (27), bleed valve (3) and pressure gauge (29).
2. Unscrew the nut (21) and remove the nut and washer (1) from the inner rod (23).
Maintenance
User Manual
June 2020 ROX000295904
36 www.Emerson.com/Roxar