9
e. Reassemble the various parts by reversing the steps laid
out above.
Reset Unit Maintenance
a. Trip the slam-shut controller OS/66 and remove impulse
connection. Then loosen and remove the screws (key 93
e 98) and take off the combined reset and controller unit.
b. Loosen the dowels (G) and slide out the slam-shut con-
troller from the reset unit.
c. Unscrew the plug (key 104).
d. Unscrew the stem (key 102) and remove the shaft
(key 91), the spring (key 103), the slam-shut spring
holder (key 105) and the O-Ring (key 106).
e. Unscrew the plug (key 96) and remove the spring
(key 94) and the balls (key 97 and 99).
f. Remove the elastic pin (key 78), unscrew the dowel
(key 89) and then slide out the shaft (key 85). Check the
antifriction rings (key 76 and 80) and the O-ring (key 79);
replace if required.
g. Clean and check all components and replace if worn.
h.
Lubricate moving parts and reassemble by reversing the
steps set out above. When reassembling the reset unit,
make sure that cam (key 75) is to the right of the operator.
Upon completion of maintenance procedure, check open-
ing of the slam-shut pad (key 39) by rotating the shaft
(key 85) anticlockwise.
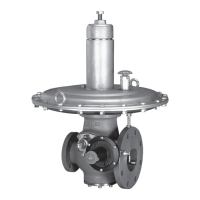
General Maintenance
a. Remove the seal pad (key 34) as described in the previ-
ous paragraph.
b. For the versions with slam-shut unscrew the screws
(key 93 and 98) and remove the reset unit and the slam-
shut controller OS/66 (key 134).
c. Unscrew the screws (key 22) and the eyebolt (Key 48)
and dismount the upper cover unit (key 61).
d. Lock the stem (key 32) by inserting a suitable wrench
in the appropriate slots (see letter A in Figure 7) and
unscrew the nut (key 66).
e. Dismount the plates (key 63, 62 and 17), dismount and
check the diaphragm (key 21) and replace it if is worn.
f. Unscrew the screws (key 14), slide out the plate (key 12)
and the diaphragm tube (key 10).
g. Dismount the assembly composed by the stem (key 32)
and the shaped diaphragm (key 9); unscrew the spacer
(key 6) and disassemble the various parts, check the
shaped diaphragm (key 9) and the O-ring (key 5 and 7).
Only for the AP, APA and PST version slide out the
piston (key 122) and the stem (key 32), check the O-ring
(key 123) and the guide bush (key 121).
h. Unscrew the screw (key 51), dismount the lower cover
(key 25) and the cup unit (key 44).
CAUTION
In case of the cup unit (key 44) being clogged due to
oxidation or dust, remove it by inserting a puller in the
appropriate threaded holes.
i. Check the O-ring (key 15) and the antifriction rings
(key 37).
j. For the versions with slam-shut dismount the elastic ring
(key 46) and disassemble the slam-shut parts; check the
pad (key 39), the O-ring (key 41) and the antifriction ring
(key 45), replace if required.
k. Unscrew the seat (key 35) with the appropriate wrench
and check the O-ring (key 36).
l. Clean the various metallic parts with petrol and with com-
pressed air. Replace worn parts.
For the OS/66 slam-shut controller maintenance please see
the 0048EN-OS66-IM instruction manual.
Reassemble the various parts by reversing the steps laid
out above. Attention should be made that each reassembled
part moves freely and without friction.
In addition, care should be taken with regards to:
a. Lubricating all moving parts and seals with “MOLYKOTE
55 M” grease and making sure that are not damaged dur-
ing reassembly.
b. Progressively and uniformly tightening all the screws so
as to guarantee maximum seal.
c. Setting the slam-shut valve and checking reset mode at
end of reassembly.
d. Checking for any leaks by using soapy water.
SPARE PARTS
Spare parts storage shall be done by proper procedures
according to national standard/rules to avoid over aging or
any damage.
 Loading...