Do you have a question about the Empava EMPV-24WO09 and is the answer not in the manual?
Step-by-step guide to lighting the oven burner, including safety warnings.
Procedure for lighting the broil burner, with safety precautions.
Critical warning about not covering slots or racks with foil due to fire/CO risks.
Emphasizes installation by qualified personnel and lists required tools.
How to install the oven into a cabinet, including dimensions and support.
Specific dimensions required for the cabinet cutout for the oven.
Details on required openings in the cabinet for gas and electrical connections.
Ensuring gas supply lines meet codes, using approved lines, and shut-off valves.
Requirements for pressure regulators for natural gas and manifold pressure checks.
Warnings about electrical shock hazards and requirements for proper grounding.
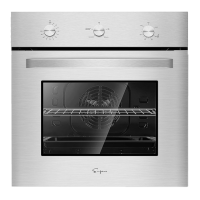
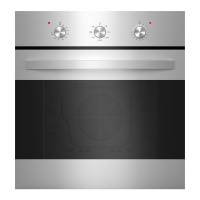
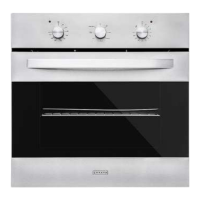
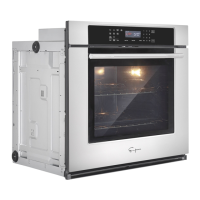
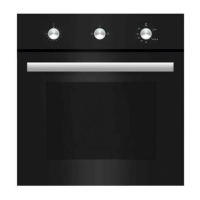
This document describes the operation, installation, and maintenance of a built-in gas oven designed for residential use. The oven is equipped with both an oven burner for general cooking and a broil burner for broiling, offering versatility in food preparation.
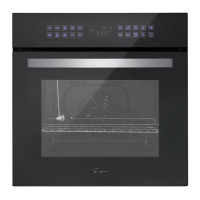
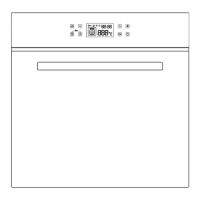
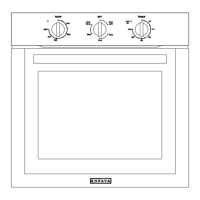
The oven primarily functions as a cooking appliance for domestic food. It features a gas oven/gas broil control knob to regulate temperature, an oven light control knob for interior illumination, and a 120-minute alarm control knob for timing. A digital timer is also integrated, providing additional timing functionalities such as an alarm clock, stop function, and end function, all serving as buzzer reminders without directly controlling the oven's heating or on/off state. The oven is designed to operate with natural gas, and specific instructions are provided for gas connection and pressure regulation to ensure safe and efficient operation.
The oven burner, located at the lower part of the oven, is responsible for normal oven cooking. Its gas flow is regulated by a thermostat to maintain a constant oven temperature. A thermostatic probe, positioned inside the oven, ensures accurate temperature control. The broil burner, situated at the upper part, generates infra-red rays for broiling. Both burners are equipped with a flame-failure device for safety, automatically shutting off the gas supply if the flame extinguishes.
Additional features include a convection fan, which ensures more uniform temperature distribution within the oven, and a rotisserie function, allowing for more complete and delicious cooking by rotating food. These functions are controlled by a dedicated switch knob.
Before first use, it is recommended to furnish the oven interior with wire racks, shelves, and trays, then turn the oven to its maximum temperature (MAX) for both the oven and broil burners to eliminate any traces of grease. After cooling, the interior should be cleaned with water and neutral detergent.
To ignite the oven burner, the oven door must be fully open to prevent explosion risks. The control knob is turned to the desired temperature within the MIN to MAX range. The oven automatically ignites within 5.5 seconds. If ignition fails after multiple attempts, the knob should be reset to OFF and the procedure repeated. Once lit, the door can be slowly closed, and the burner adjusted. Similarly, for the broil burner, the knob is turned to the BROIL position with the oven door fully open for ignition. It is crucial to always broil with the oven door closed once the burner is lit and adjusted.
The digital timer offers several modes:
When cooking, preheating the oven to the desired temperature before introducing food is advised. The tray should be introduced with the food once the oven has reached the set temperature. Cooking time should be checked, and the oven turned off approximately 5 minutes before the theoretical time to utilize stored heat.
For broiling, the broil burner must always be used with the oven door closed. The appropriate level for baking should be selected, and the oven preheated for about 5 minutes with the door closed before placing food on the broiler pan. Broiling should never be done without using the broiling pan.
Regular cleaning and maintenance are essential for the appliance's longevity and safe operation. Before any cleaning or maintenance, the appliance must be disconnected from the electrical mains supply. It is advisable to clean the oven when it is cold.
Enamelled Parts: Should be cleaned with a sponge and soapy water or other non-abrasive products, then dried with a microfibre or soft cloth. Alkaline or acidic substances (like lemon juice, vinegar, tomato sauce) should be avoided as they can damage the enamel if left for too long. Cleaning products with chlorine or an acidic base should also be avoided.
Painted Parts and Silk-Screen Printed Surfaces: Clean with an appropriate product and dry thoroughly. These parts require careful cleaning to avoid scratching and abrasion; a soft cloth and neutral soap are recommended.
Stainless Steel Elements: Rinse with water and dry with a soft and clean cloth. For stubborn dirt, a specific non-abrasive product or a little hot vinegar can be used.
Inside of Oven: The oven cavity should be cleaned after each use when it has cooled down, using a mild detergent solution and warm water. Proprietary chemical cleaners can be used after consulting manufacturer recommendations and testing on a small sample. Abrasive cleaning agents or scouring pads/cloths should not be used on the cavity surface. Special attention should be paid not to touch the hot heating elements inside the oven cavity.
Oven Door: Do not use harsh abrasive cleaners or sharp metal scrapers on the oven door glass to prevent scratching and potential shattering. The oven door can be removed for easier cleaning by following specific instructions: open the door completely, lift and turn small levers on the hinges, grip the door on the external sides, shut it slowly but not completely, then pull it out of its seat and rest it on a soft surface. Reassembly follows the reverse procedure.
Oven Light: Before replacing the oven light, disconnect the appliance from the power supply and allow the oven cavity and broil burner to cool down. Remove the glass cover of the lamp-holder, replace the lamp with a high-temperature resistant bulb (120V 60 Hz, 15W, E14), and then refit the glass cover. Note that oven bulb replacement is not covered by the guarantee.
For any issues, a troubleshooting guide is provided, suggesting possible reasons and solutions for common problems like baking effect not ideal, oven lamp not lighted, oven not lighting, oven combustion issues, flameout, abnormal oven temperature, cooling fan malfunction, hot air motor malfunction, abnormal fan sound, and complete power loss. These operations should only be performed by professionals.