7
"CAUTION: Accessible parts may be hot when the grill is in use. Young children should be kept away"
As shown in Figure 12, place the burner onto the burner base one by one and stuck, rotate left and right
to check if the burners are in place, the burner is placed correctly when it cannot be rotated. Finally
center placed the burner cap on the burner.
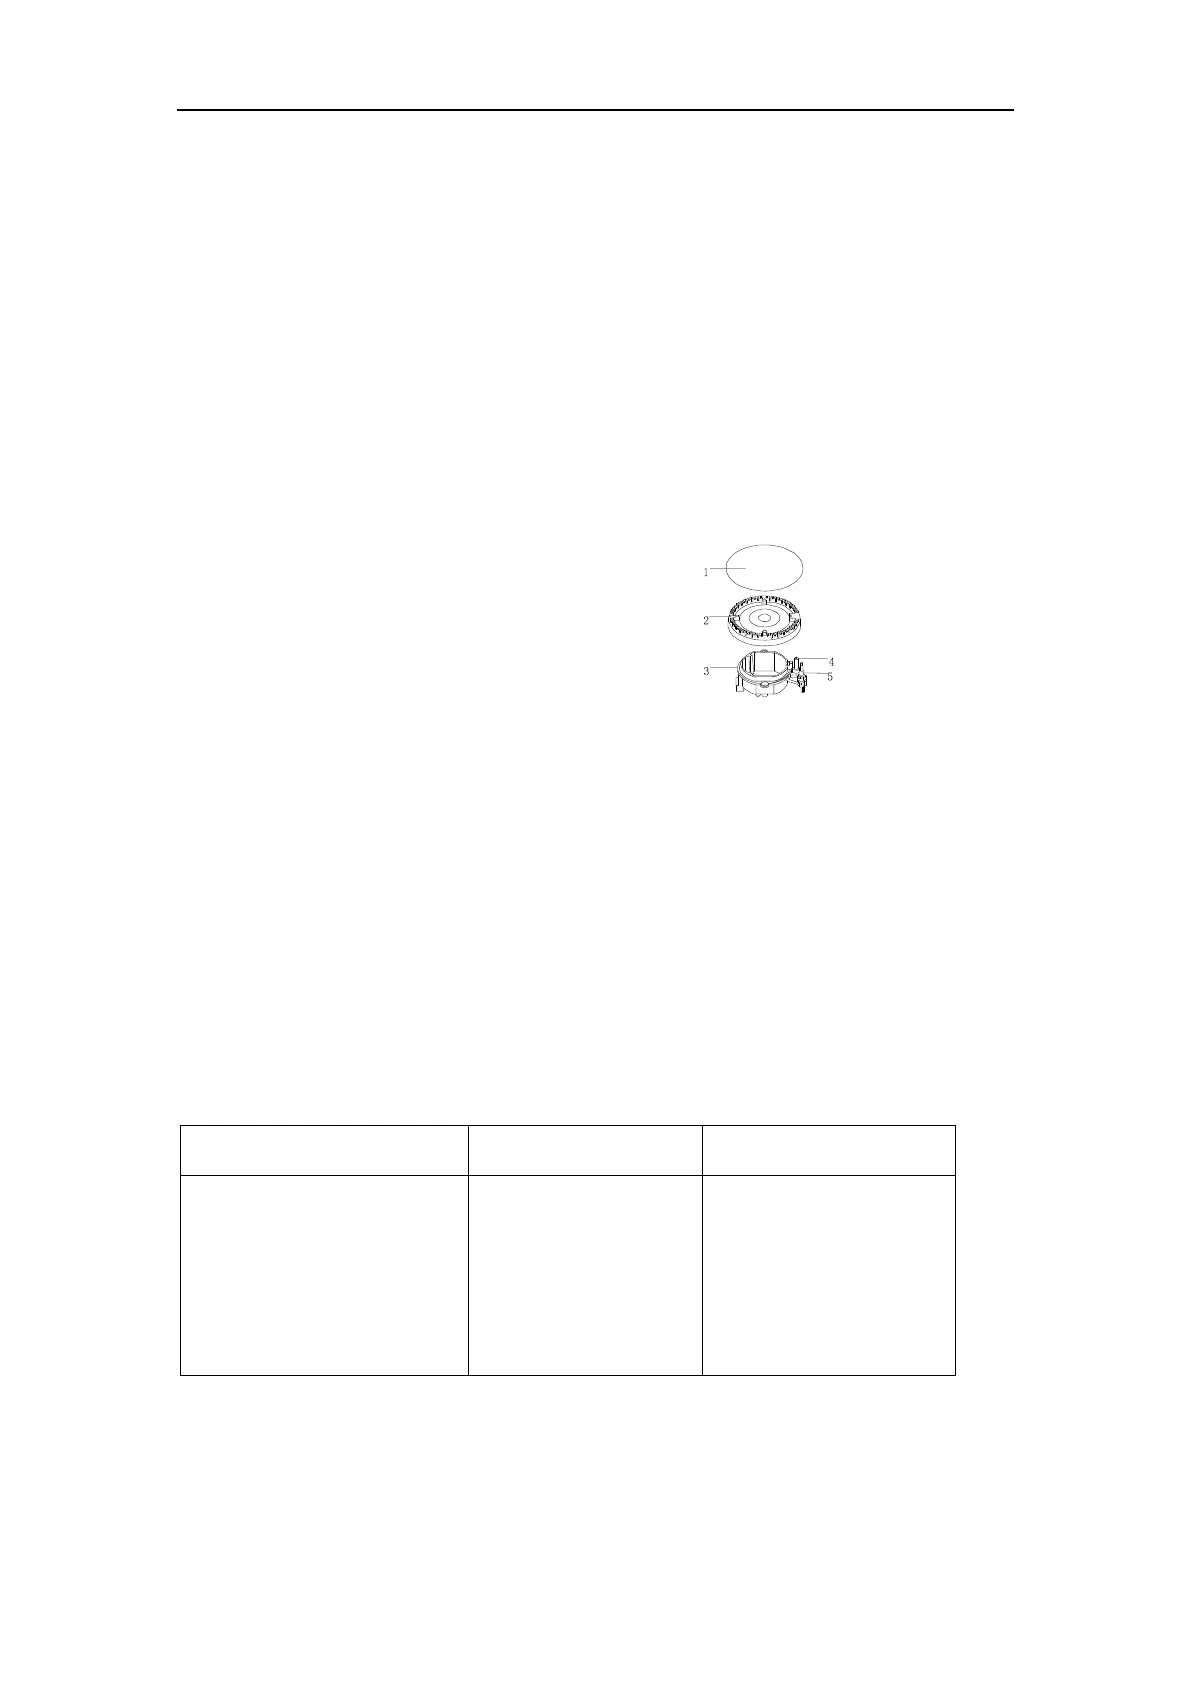
If you cannot light the flame even after several attempts, check the "cap" and “crown” (see diagram –
figure 10) if they are in the correct position. To put the flame out, turn the knob to the symbol “O”
Description:
1.Burner cap
2. Burner crown
3. Burner base
4. Ignition electrode
5. Thermocouple Figure 10
When switching on the mains, after installation or a power cut, it is quite normal for the spark generator
to be activated automatically.
To ensure maximum burner efficiency, you had better use pots and pans with a flat bottom fitting the
size of the burner used (see table).
Do not use rim based or convex-based vessels on the hotplate burners.
W
A
R
NI
N
G:
As
soon as a liquid starts boiling, turn down the flame so that it will barely keep the liquid simmering. If the
control knobs become difficult to turn, please contact your local service centre.
WARNING: Users could not use the cooking vessels on the hotplate that overlap its edges.
 Loading...