11
Table 3 , Z-Class Pressure Transducer Calibration, Firmware 7.x • Pump Types 1, 2, 3, 6, 8 and 10
Comments
Boot sequence.
psi is the current unit of pressure measurement.
Step into the hidden calibration mode.
Start of calibration process. The advance-solenoid will be powered up to access the pressure transducer
through valve-port A.
Calibrate the zero-offset, point “A”.
Confi rm the pressure data should be stored to memory.
Calibrating gain is done with two points, starting with point “B”.
First obtain the pressure value on the master gauge (ie 5000 psi). Then use the arrow buttons to match the
LCD value to the master gauge.
Confi rm the pressure data should be stored to memory.
Calibrating gain is done with two points, fi nishing with point “C”.
First obtain the pressure value on the master gauge (ie 8000 psi). Then use the arrow buttons to match the
LCD value to the master gauge.
Confi rm the pressure data should be stored to memory.
Re-confi rm calibration data. Leave “off” to proceed with new calibration data. Only set to “on” to change
calibration data back to factory default settings. Press Arrow button to change.
Save calibration data to permanent memory.
Calibration complete, motor stops and electric valve releases pressure.
LCD Reading
0 psi
psi
CODE
O psi
[O bar]
O psi
[O bar]
no
yes
5000 psi
[345 bar]
5000 psi
[345 bar]
no
yes
8000 psi
[548 bar]
8000 psi
[548 bar]
no
yes
off
O psi
[O bar]
O psi
[O bar]
FIRMWARE 7.x,
then “READY”
UNITS
ENTRY
CAL PT A
CAL PT A
SAVE A
SAVE A
CAL PT B
CAL PT B
SAVE B
SAVE B
CAL PT C
CAL PT C
SAVE C
SAVE C
USE DFLT
CAL PT A
READY
Operator action
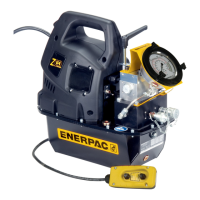
Connect a master gauge to port A (Advance port)
Connect electrical power to pump.
At main screen, press the Menu button once to display “UNITS” screen.
Press and hold the ON/OFF button for seven seconds.
Press and hold the Arrow-up and Arrow-down buttons together for seven seconds.
Open the pump’s user-adjustable relief valve and verify both pump LCD and master
gauge read zero.
Press the Menu button to accept the pressure value into temporary memory.
Press one Arrow button to change from “no” to “yes”.
Press the Menu button once.
Press and release the shroud’s ON/OFF motor-button to switch the pump motor on.
Reading the master gauge, apply a pressure of 5000 psi by closing the pump’s user-
adjustable relief valve.
Press the Menu button to accept the pressure value into temporary memory.
Press one Arrow button to change from “no” to “yes”.
Press the Menu button once.
Reading the master gauge, apply a pressure of 8000 psi.
Press the Menu button to accept the pressure value into temporary memory.
Press one Arrow button to change from “no” to “yes”.
Press the Menu button once.
Press the Menu button once.
Press and hold the Menu button for three seconds to step out of the calibration mode.
No.
1
2
3
4
5
6
7
8
9
10
11
12
13
14
15
16
17
18
19

 Loading...