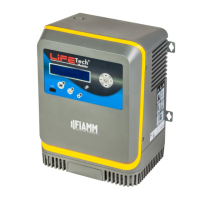
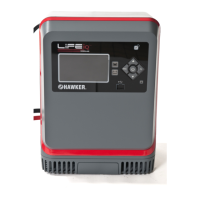
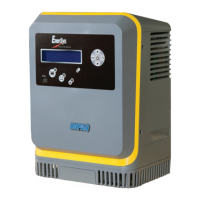
5
1
3
2
5 6
4
7
Single phase 3 bay cabinet (2-3kW) &
Three phase
MECHANICAL INSTALLATION
The charger can be wall or floor mounted.
If wall mounted make sure that the surface is free of
vibrations and the charger is mounted in a vertical position.
If floor mounted, make sure that the surfaces are free of
vibration, water, humidity.
You must avoid areas where the chargers may be splashed
with water.
The charger must be held by 2 or 4 xings suitable for the type
of support. The drilling pattern varies according to the model
of charger (please refer to the technical data sheet).
ELECTRICAL CONNECTION
To the mains supply
You may only connect to 1-phase 230Vac (+/- 10%)
or 3-phase 400Vac (+/- 10%) 50/60hz mains supply
(depending on the type of the charger) by means
of a standard socket and an appropriate circuit
breaker (not supplied ). The current consumption is shown on
the charger’s information plate.
To the battery
The charger must be connected to the battery by the cables
supplied:
• The RED cable to the battery’s POSITIVE terminal.
• The BLACK cable to the battery’s NEGATIVE terminal.
Polarity must be observed. Any reversal of polarity will blow
the output fuse, prevent charging and cause DF2 fault code to
be displayed. Please refer to the Messages and fault codes.
LCD DISPLAY
Off-charge display
With the charger in waiting mode, the display shows
information concerning the charger (top and bottom lines):
1. Charger type
2. Software version.
3. Waiting indication.
4. Date and time of the charge
Off charge screens (3 screens in alternation)
Initiating charging
1. Connect the battery. If Default setting (Autostart ON) then
the charge will start automatically or otherwise press the
Start/Stop button.
The display will show 3 different alternating screens
Ref Function
1 Ac input cable
2 DC output cable, only
3 Option port
4 Ventilation openings
5 LCD panel
6 Navigation buttons
7 Cable holder (only on single phase)
1
3
2
5
6
4
Line 1 Charge mode / charging prole /
equal symbol (if selected) or no blocking fault
Line 2 Charging current / total voltage / Ah+
Screen 1:
Line 1 Charge mode / charging prole /
equal symbol (if selected) or no blocking fault
Line 2 Charging current / voltage/cell / charging time
Screen 1:
Line 1 Charge mode / charging prole /
equal symbol (if selected) or no blocking fault
Line 2 Charging current / % state of charge /
estimated remaining time
Screen 1:
Charger type Date
Batt temp
(in menu)
Battery connected symbol
Charger type Date
Batt temp
(in menu)
Battery not connected symbol (animation
to indicate to plug the battery)
Charger type Time
Firmware
version
Charging prole selected

 Loading...


