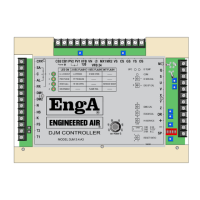
A DJM3
IOM-17 17 of 27 Mar 99 R3
HighFireSetUp
1. Turnontheserviceswitch(dipswitch5).
2. SettheServicePottohighfire.Adjustthehighfireinputtothecorrectclockedrate.Adjust
combustionairsliderorinletdamperuntilthehighfireO
2
readingisbetween3.5and4.2%.
LowFireSetUp
Ensurethatthereisaluminiumtubingconnectedfromthetopofthemodulatinggasvalvevent
connectiontotheburnerbox.Thisistoguaranteethatthevaryingburnerboxairpressureallowsthe
propergasflowratethroughthemodulatinggasvalve.Alsoensurethatthesmallventholeunderthe
ovalshapedcoverissealedoffwithsiliconeorTremcotape.Whendoingcombustionanalysisitis
importantthatthetopofthevalvebesealedbyeitherreinstallingthecapaftereachadjustment,or
placingyourfingerfullyoverthetoptosealtheopentoponthevalve.Thereasonforthisrequirement
isthatthevalveis“toploaded”whichmeansthatthevalveishavingpressurefromthecombustionfan
addedtothetopofthevalve’sdiaphragmthusincreasingthegasflowthroughthevalve,especiallyat
higherflow.
Series20/M420,M520andM620(HighTurndownBurner)
Thesevalveshave2lowfireadjustmentsthefollowingprocedureshouldbefollowedcarefully.
Oncethehighfirepressureandcombustionhasbeensetup,turntheServicePotfullycounter‐
clockwisetoachievelowfire.AdjusttheLowFirePotuntilthelowfirespeedonthecombustionfan
motoris1250RPM±10RPM(20.8Hz)for10:1setupor1195RPM±5(19.91Hz)for15:1turndown.
AtthispointtheDCvoltagereadingatthemodulatinggasvalveterminalsshouldbe0VDC.
UnderthecoverontheMaxitrolseries20valveisanadjustmentscrew(brassorsilver)thathasalock
ringwhichusesaspecialtool(twoverysmallholes)toloosenit.
1. Thelockringneedstobeloosenedfirst.TurnitfullyCCW(up)nowturntheslotscrewin
thecentreofthelockring(springactivatedlowfireadjustment)fullCCW(up).
Caution:Donotovertorquethisscrewatthetoporbottomofitsadjustmentoritwill
breakthe“c‐clip”insidethevalve,thusallowingthespringtoridefree.
2. AdjustthelowfirebypassscrewatthebottomsideofthevalvebodyuntiltheO
2
readingis
between16.0%to16.5%.(16.5to17.5%oxygenfor15:1turndown.)Atthesesettingsthe
turndownwillbeverycloseto10:1.ThemaximumCOatlowfireis80PPM.
3. AdjusttheServicePotupveryslowlyuntiltheDCvoltsatthe modulating gas valve
terminalsareabout2.25VDC.Ifthevoltagerisesover2.25VDCwhileadjustingthemanual
pot,turnitdownandstartagainfromlessthan1.5VDCuntil2.25VDCisreached.
4. ChecktheO
2
readingagainatthispoint.IftheO
2
hasincreased,adjustthespringactivated
lowfireadjustmentontopofthevalveuntiltheO
2
readingissameasthelowfirereading
at0VDC.