1413
3)Envertech microinverters begin to communicate through the power lines to EnverBridge.
The entire system will be detected within 10 minutes.
4)The voltage and frequency of EVT1200 can be adjusted on the site. If adjustments are
required by your local utility company, installers can use EnverBridge to manage grid parameters
after all microinverters have been detected.
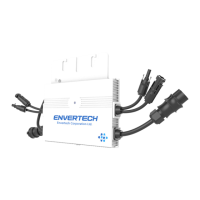
7.2 EVT1200 Operation
The Envertech microinverter is powered on when there is sucient DC voltage from the PV
module. The LED light of each microinverter will blink green to indicate normal start-up
operation approximately 1 minute after DC power is applied.
7.3 Monitoring through EnverPortal
1) Register a new account. Visit www.envertecportal.com.Click Sign Up. Fill in the account information
to nish registration.
2) EVB202 MI Binding
Option 1. Use Enverview app to bind MI
Step 1: Login your account on your mobile phone. Then go to “Settings”.
Step 2: Under “Device Management”, click “Add” and enter MI SN manually or click the QR Code icon on
the right to scan the MI SN automatically.
Step 3: Click “Conrm” to nish adding the MI.
Step 1: Login www.envertecportal.com with the newly-registered account, go to Settings--Management.
Step 3: Click“+”button behind the EnverBridge SN,
then enter the SN of microinventer, click OK to nish
binding.
Step 2: Click Add, then enter the SN of EnverBridge,
click OK to nsh adding monitor.
Option 2. Use EnverPortal to bind MI
Step 1: Please visit the Download Center on our website www.envertec.com and
download Set ID exe. in your computer.
Open the software as below.
Step2: Please make sure your EVB202 is connected to the same router as your computer is connected to.
And use the scanner to scan or manually input the EVB202 ID and the inverter IDs into the software as
below.
Option 3. Use your computer to bind MIs
Step4: Then you can press “Send” button in the software to complete the setting. Meanwhile, “ID Set OK”
will be also shown on the EVB202 screen. Thus the MI binding process is completed.
Step5: Click next and create your system. SN is your EnverBridge number which is mandatory.
Step3: Please press [Set MI ID], you will see the content shown as below.
You can nd more information on the user manual for EnverBridge.