assembly/installation procedure
Eye (Eye/Face) Wash Installaon Procedure
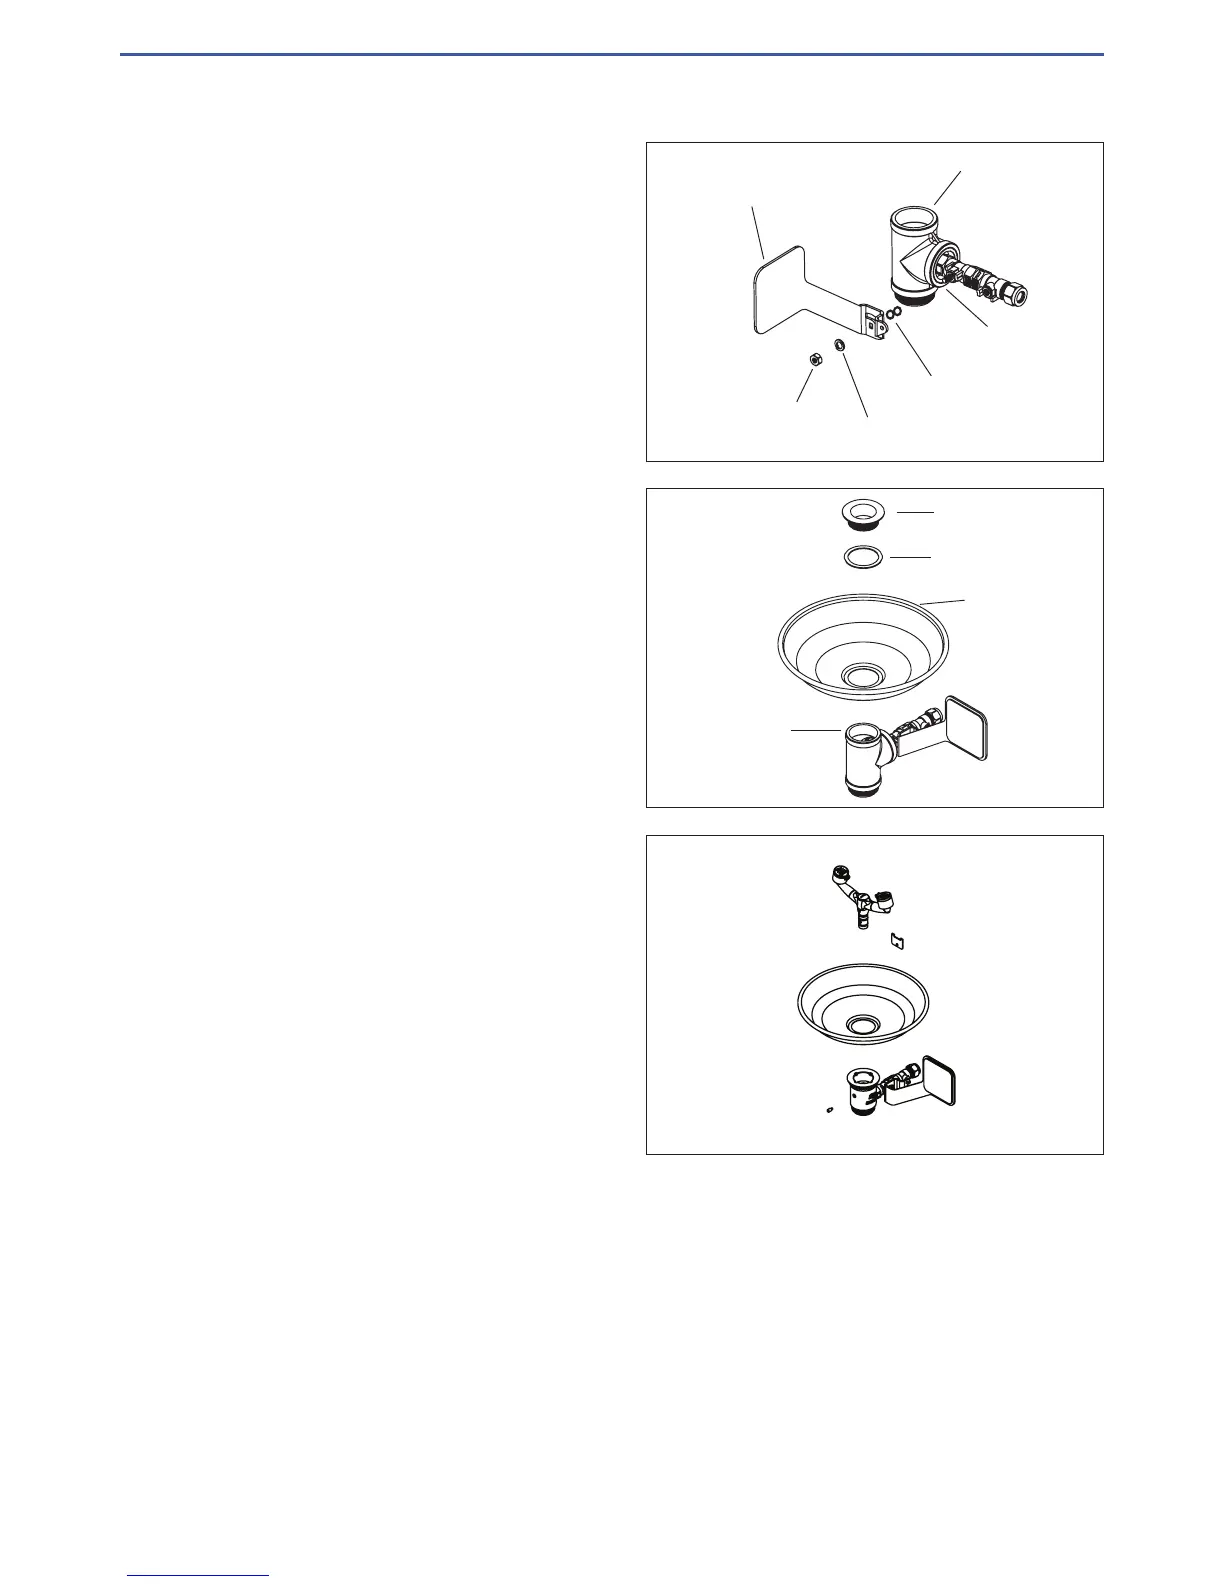
5. Aach the Eye or Eye/Face wash push handle
to the Acvaon Ball Valve using the spring
washer & hexagonal nut already on the ball valve.
SEE IMAGE 5.
6. If a bowl is to be included with the Eye (Eye/Face)
wash, place the Bowl on top of the Waste Adaptor.
Using the Washer and the Waste – screw in to the
Waste Adaptor to secure the bowl. Turn as ght
as you can with ngers, then turn Waste and Bowl
together using the outside edge of the bowl for extra
leverage. SEE IMAGE 6
7. Remove the grub screw from the front of the waste
adaptor.
Push the eye (eye/face) wash assembly into the
centre of the waste adaptor making sure the
direconal arrow is facing the front.
Re-t the grub screw and ghten unl it locates
within the eye wash frame.
8. Connect the water supply line to the 1” thread
located on the Upper Shower Assembly. Use thread
tape or Locte 577 on all threads.
9. Connect the drain line (if applicable) for the Eye
(Eye/Face) Wash Sink using the 1½” OD outlet located
on the Lower Shower Assembly. There should be
sucient clearance for the addion of a drain trap
if required.
Waste
Washer
Bowl
Waste
DRAWN
CHECKED
APPROVED
GENERAL NOTES:
- REMOVE ALL BURRS AND SHARP
EDGES UNLESS OTHERWISE STATED
- ALL THREADS TO BE CHAMFERED
- DIMENSIONS ARE IN mm's
- DO NOT SCALE OFF DIMENSIONS
TOLERANCE EXCEPT WHERE STATED:
NO DECIMAL POINT
+
-
2
ONE DECIMAL PLACE
+
-
1
ANGLES
+
-
1
ENWARE RESERVES THE RIGHT TO
AMMEND PRODUCT SPECIFICATIONS
AND DESIGNS WITHOUT NOTICE
FINISH:
SHEET: 2 OF 2
TITLE
S/S F/STND EYE WSH HAND
OPERATE
This drawing is the
property of Enware
Australia Pty Ltd and
may not be reproduced
in full or part without the
written consent of
Enware Australia.
9 Endeavour Rd,
Caringbah, NSW, 2229
Ph. 61-2-9525-9511
Fax. 61-2-9524-8421
LR
CL
KN
A
B
C
D
D
C
B
A
1
2
3
4
4
3
2
1
SIZE: A4
SCALE: 1:10
DRAWING
NUMBER:
Quality Endorsed
Company
AS/NZS ISO 9001
LIC No. 1213
Standards Australia
EEE180
 Loading...