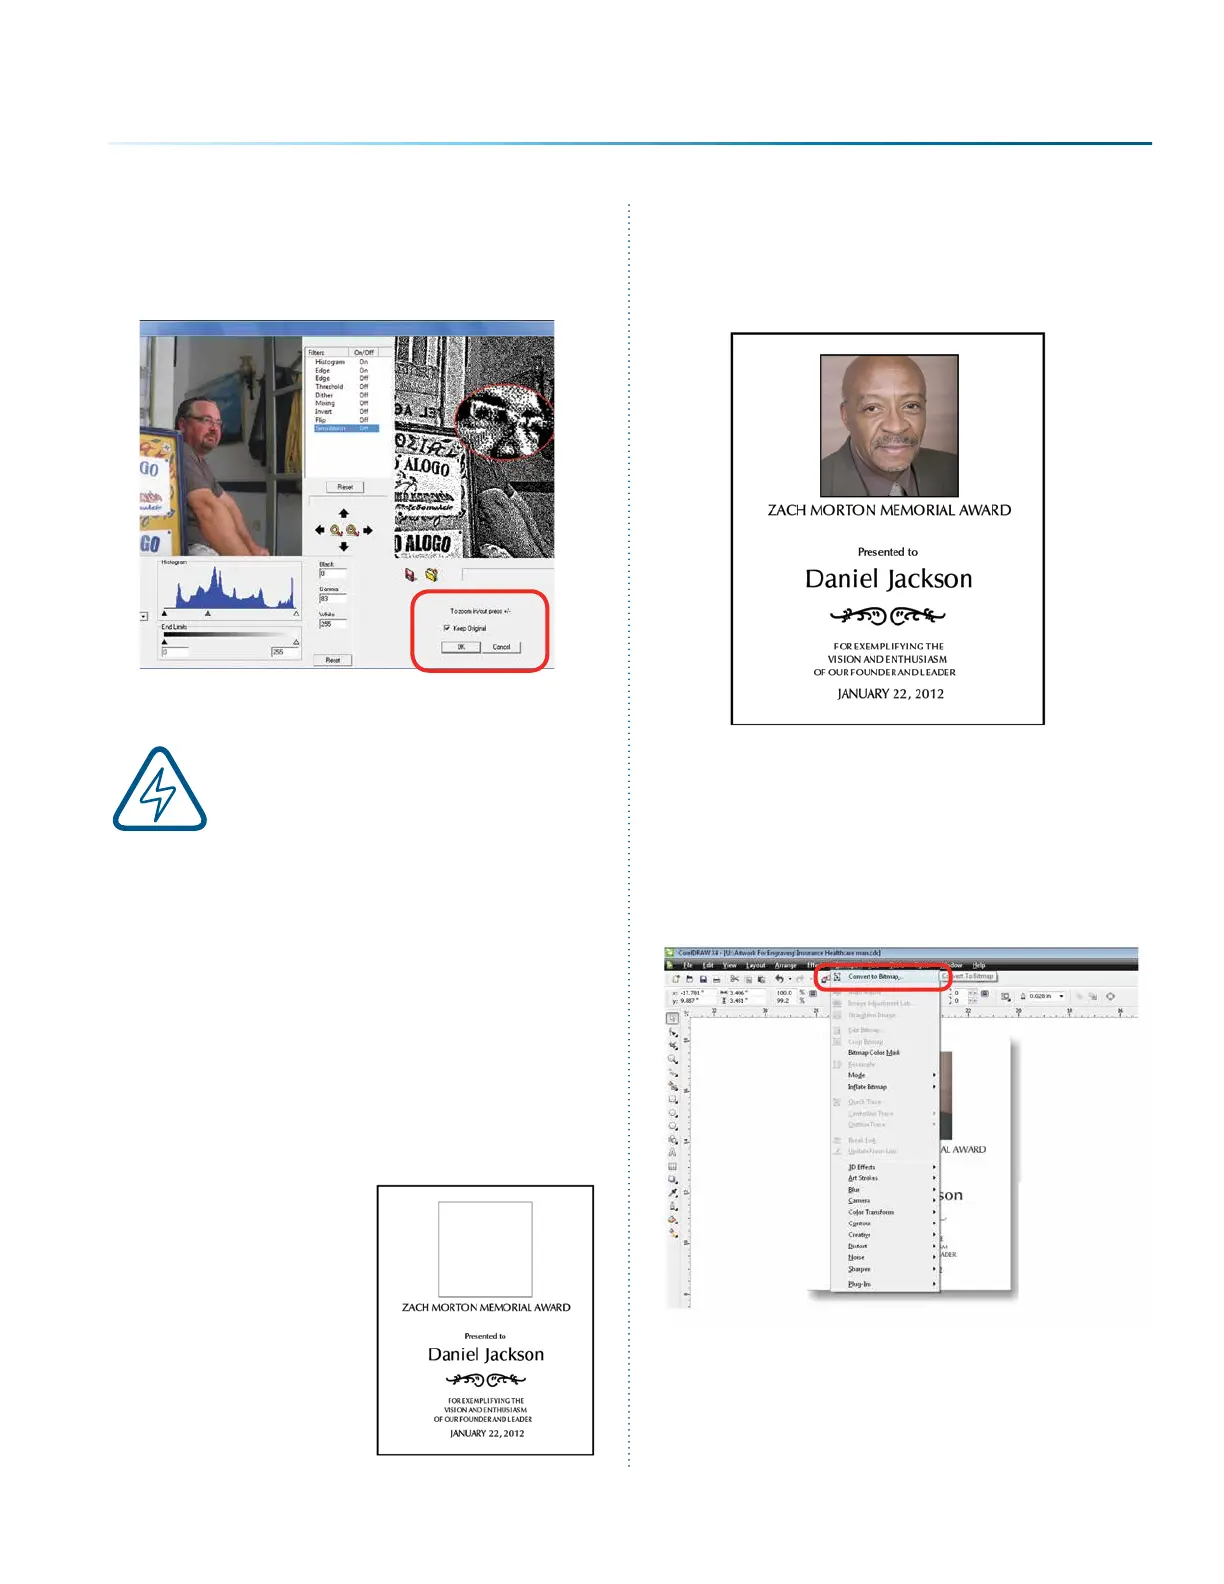
15. If you want to replace the photograph with
the new 1-bit photograph, uncheck Keep
Original, otherwise it will place the
transformed image next to your original on
the page. Press the OK key to finish.
16. You can now print the file to the laser.
Make sure you print the image at
the same resolution as you set in
step 6, or the image will not engrave
correctly!
Using CorelDRAW in Conjunction
with PLP
This section takes you through the steps to
prepare a file in CorelDRAW and use PLP to
transform the image. This allows you to use the
poweul layout features of Corel or other design
soware along with the photo transformation
capabilities of PLP.
1. Start by setting
up your file in
CorelDRAW. We’ve
designed an 8” x
10” plaque, added
the text and
placed a box as a
placeholder for the
photograph.
2. Crop the Photograph: Select the photograph,
then select from the menu bar Eects,
PowerClip, and Place Inside Container. Click
the outline of the photo placeholder to place
the photo inside the box.
3. To resize or move the photograph in the
powerclip box, right click the photo and
select Edit Powerclip. When you are finished
adjusting the image, right click and select
Finish Editing this Level.
4. Convert to Bitmap: With the photo selected
click Bitmaps, then Convert to Bitmap.
- 101 -
SECTION 9: OPTIONAL FEATURES
 Loading...