Controller Features
While in the service position, pressing the “Next” button will toggle between the time, current ow rate in
litres and the capacity remaining. Press and hold “Regen” to force an immediate regeneration. When the
valve is regenerating, it will show a countdown clock for each stage. Press “Regen” once to skip stages.
Warranty
This product is guaranteed for the period of one year from the date of purchase against mechanical and/
or electrical defects. This guarantee is only valid if the unit has been installed and used in accordance these
instructions.
Fig 1
Fig 2
Fig 3
Fig 4
Fig 5
Fig 6
Fig 7
Programming your water softener
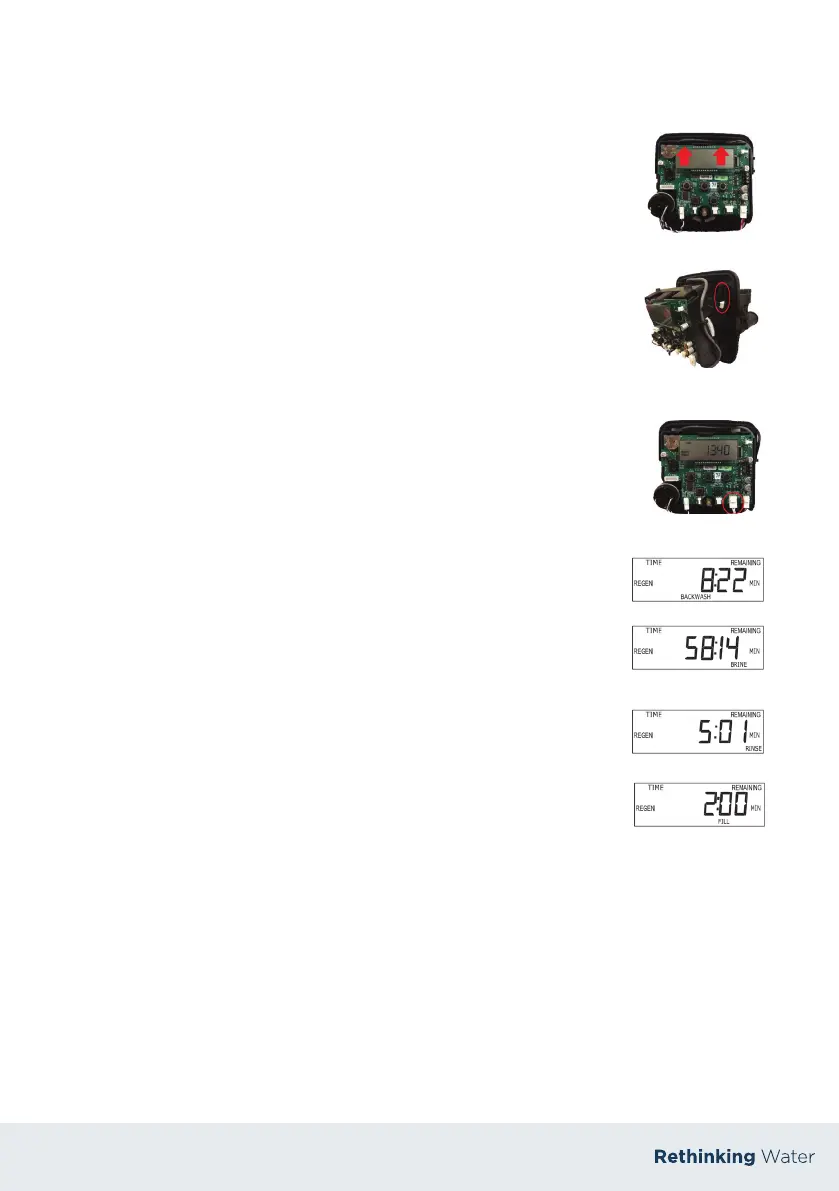
To connect the power cable you need to rstly remove the cover, then
remove the drive bracket assembly by pressing up on the drive brackets
release tabs and pulling towards you. (Fig 1)
Feed the cable through the back plate (Fig 2) and connect to PC
board (Fig 3). Its important that the bracket is reapplied with a loud snap to
ensure the gears meet the drive gear.
Press “Set Clock” button, hours will ash.
Use up and down buttons to set hours.
Press “Next” button, set minutes and press “Next”.
Press “Next” and “Up” buttons together and hold until screen changes.
Set hardness based on raw water hardness of water supply.
Press “Next”. Leave next setting at 2 - 0.
Press “Next”. Set the day override (preset at 4).
Press “Next”. Set the regeneration time (preset at 2am).
1.
2.
3.
4.
5.
6.
7.
8.
Commissioning your water softener
With the softener now programmed, press & hold “Regen” until the motor
begins to turn. When the motor stops, the screen will appear as in Fig 4.
Now, open the inlet valve slowly to allow the softener ll with water. At this
point water will discharge to the drain and purge any air from the system.
Manually ll the internal salt tank with 10 litres of water. When the air is
purged from the system, press “REGEN” once to advance to the next cycle,
the screen will appear as in Fig 5. The system is now drawing water from the
internal tank ans slowly discharging to the drain. . Take the time to observe
the water level dropping (which happens very slowly). This is vital as it
ensures the system can regenerate and operate correctly. If the system will
not draw water from the internal tank ensure the ttings are tight and re-do
steps 1 & 2.
Press “REGEN” once, when the motor stops, the screen will appear as in
Fig 6. Monitor this cycle for a moment to ensure water ows well to drain.
Press “REGEN” once, when the motor stops, the screen will appear as in
Fig 7. At this point the system is relling the internal salt tank. Take a
moment to ensure the water level rises sueciently.
Press “REGEN” once, when the motor stops it the system is in HOME position
and ready to oer softened water.
Fill the unit with salt. Monitor the salt level on a regular basis & ll if required.
1.
2.
3.
4.
5.
6.
 Loading...