•
Po
int Correction to adjust the gaps in the positions of the projected image.
•
Scale to crop and/or scale portions of the image.
•
e re
quired time for conguring tiling automatically varies depending
on the layout and number of projectors. It takes up to approximately 8
minutes.
•
e required time for screen matching varies depending on the layout
and number of projectors. It takes up to approximately 18 minutes.
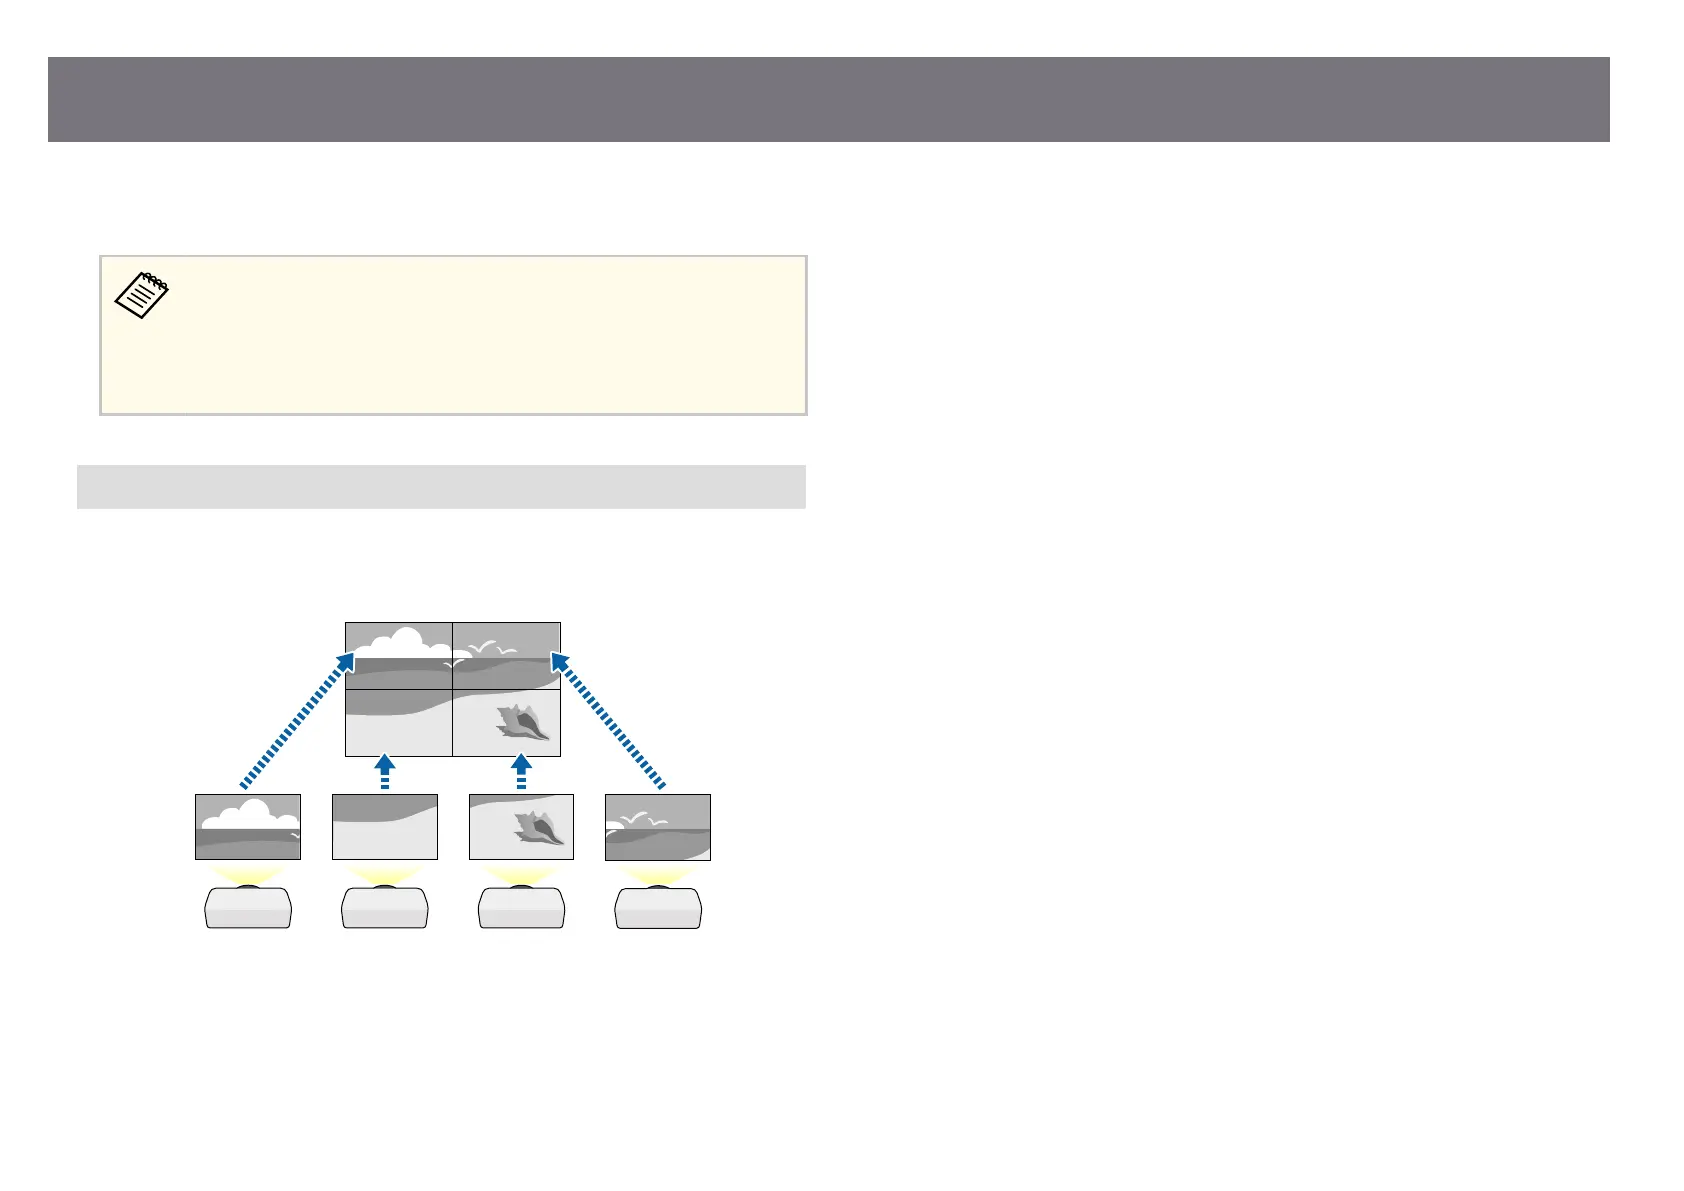
Tiling Using the Projector's Menu
If y
ou have not installed the optional external camera or the Epson Projector
Professional Tool soware is not available, you can project one large image from
up to 15 projectors using the projector's menu.
a
Select the M
ulti-Projection setting in the projector's Extended menu.
b
S
elect the P
rojector ID setting and give each projector a unique ID to
co
ntrol multiple projectors from a remote control.
c
Set the remote control's ID to match the projector's ID to operate only a
par
ticular projector. Set the remote control [ID] switch to On, press the
[ID] button on the remote control, and then press the numeric button
that matches the projector's ID within 5 seconds. (Enter a one-digit or
two-digit number.)
d
If you are combining images from multiple projectors on a network, select
th
e Projector Grouping setting on the primary projector and create a
group of projectors that you can control simultaneously.
e
Select the Tiling setting to adjust the arrangement of the images to create
o
ne large image.
•
If you have installed the optional external camera, select Auto on the
primary projector.
•
If you have not installed the optional external camera or tiling the
images automatically was unsuccessful, select Manual.
•
When selecting Manual, select Layout, and then select the number of
rows and columns you are setting up as the Row and Column settings.
Multi-Projection Features
136
 Loading...