EH-TW8000/TW9000/TW9000W Disassembly and Assembly CONFIDENTIAL
SEIKO EPSON 115 Revision A
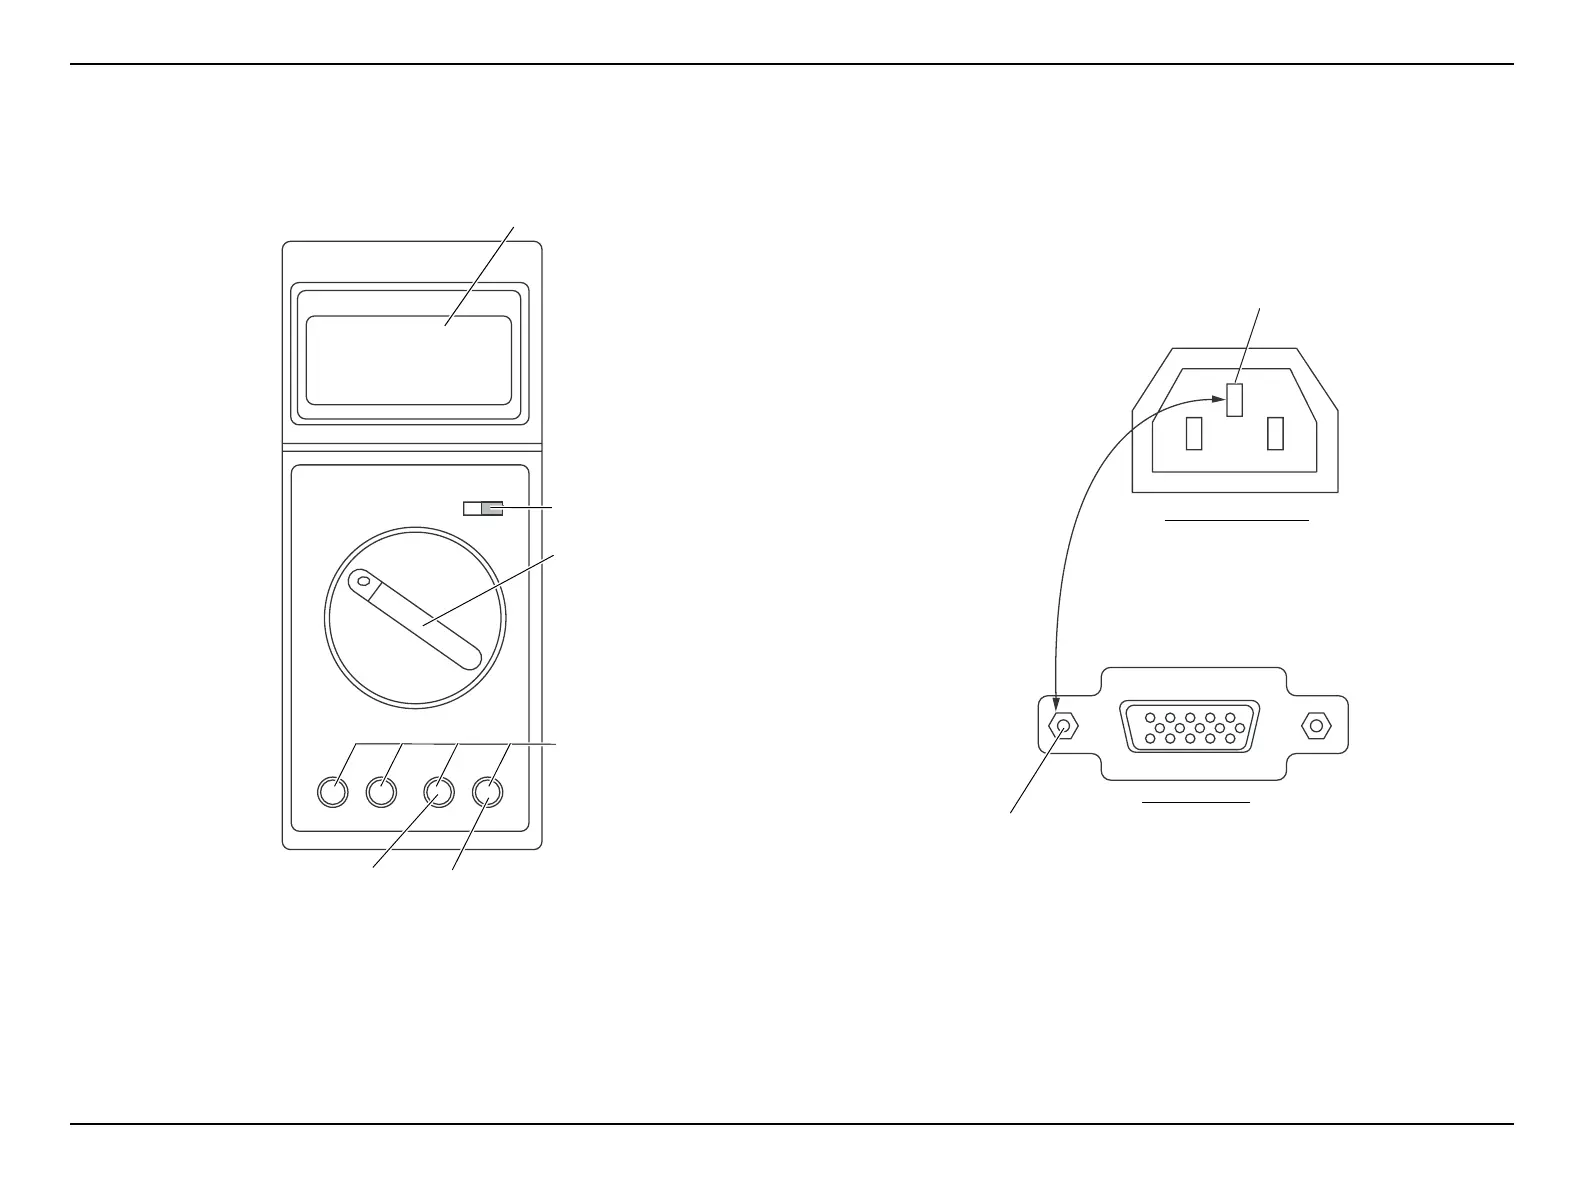
2. Ground continuity check
Testing apparatus
Multimeter (with sensitivity down to 0.1 Ω)
Standard/Judgment level
Should be no resistance (0.5 Ω or less)
Testing procedure
1.Turn on the power switch.
2. Set the range selection switch to Ω.
3. Connect the black lead wire to the COM terminal.
4. Connect the red lead wire to the V/Ω/Hz terminal.
5. Check that the resistance at (1) in the diagram below is 0.5 Ω or less.
Figure 3-47.
3. Illumination check
• Test conditions: Input a PC or video signal to the LCP and check the
illumination for about 5 minutes.
• Judgment : Projector should operate normally with no smoke or fire.
Display
DC/AC, SW
Range selection switch
Terminals
V, Ω, Hz
COM
Power supply lines
Projector AC inlet
PC connector
Exposed metal part of projector
(1)
 Loading...