EH-TW8000/TW9000/TW9000W Disassembly and Assembly CONFIDENTIAL
SEIKO EPSON 98 Revision A
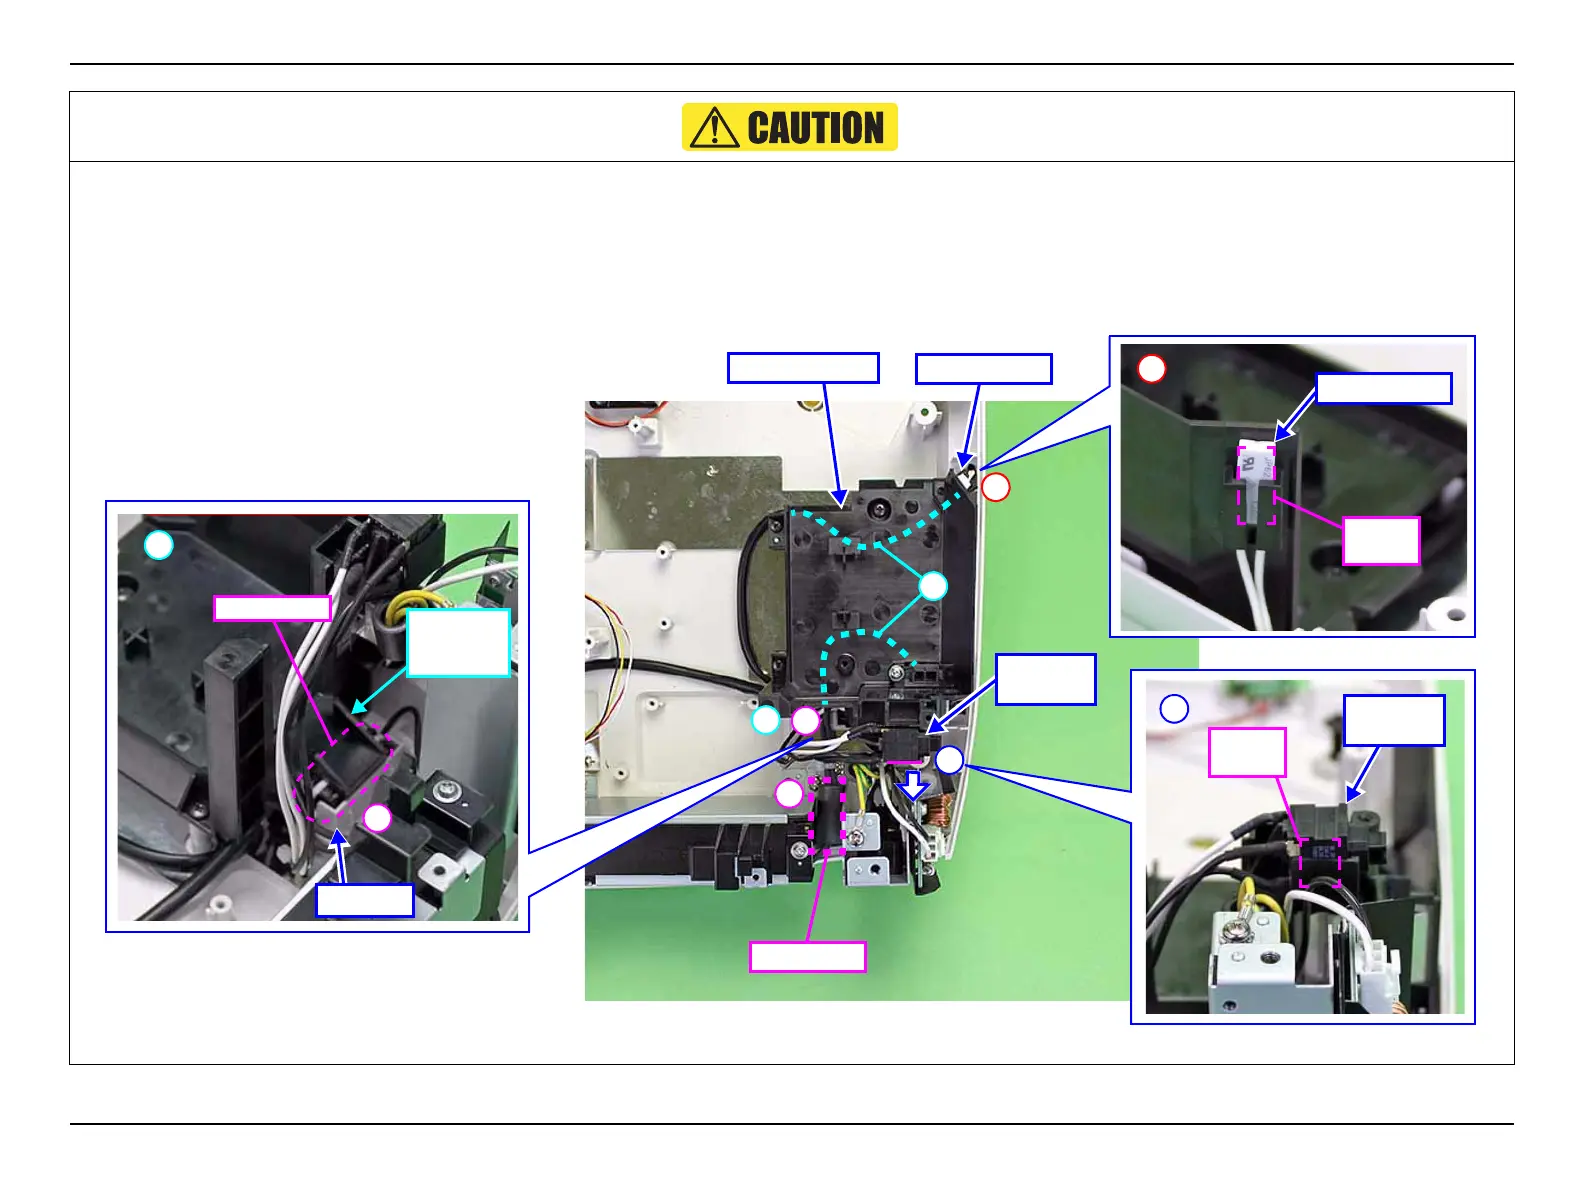
Install the Safety Switch, Interlock SW and ferrite core and route the excess portion of the cables as shown below.
1. Route the excess portion of the cables under the Inner EX Duct (1), and set the ferrite core in the position (2) shown below.
2. Set the Interlock Switch with the printed surface in the direction of the arrow (3).
3. Set the Safety Switch so you can see the printed surface as shown in the figure.(4)
4. Set the ferrite core into the fixing hole (5) shown below, and secure it with the rib of the Inner EX Duct.(6)
3
Printed
surface
Interlock
Switch
4
Safety Switch
Printed
surface
5
6
Fixing hole
Ferrite Core
Rib
(Inner EX
Duct)
2
1
3
Inner EX Duct
Safety Switch
Interlock
Switch
4
5
6
Ferrite Core
 Loading...