5 Load paper against the right edge guide and behind the
tab line on the left edge guide, with the printable side
faceup.
8½ × 11 inch
(216 × 279 mm)
4 × 6 inch
(102 × 152 mm)
Note: Don’t load the paper sideways; always load it short
edge first.
6 Slide the edge guide over, against the left edge of
the paper.
7 Flip the feeder guard back.
Read these instructions before using your product.
Note for Spanish speakers/Nota para hispanohablantes:
Para obtener instrucciones de confi guración en español, consulte la
Guía de instalación en www.epson.com/support/xp300sp (requiere una
conexión a Internet).
1
Unpack
Caution: Do not open ink cartridge packages until you are ready to
install the ink. Cartridges are vacuum packed to maintain reliability.
Remove all protective materials, including from inside the printer.
2
Turn on and adjust
1 Raise the paper support, then connect the power cord to
the back of the printer and to an electrical outlet.
Caution: Do not connect to your computer yet.
2 Raise the control panel, then press the power button.
Note: If you want to lower the control panel, squeeze the release
bar underneath.
Caution: Do not lower the control panel without first squeezing the
release bar underneath or you may damage the product.
3 To select English as your language, press OK.
If you want to change the language, press or to select
it, then press OK.
Note: You can change the language later using the product’s
control panel. For more information, see the online User’s Guide.
3
Install ink cartridges
Note: Don’t load paper yet.
1 Lift up the scanner unit, and wait until the ink cartridge
holder stops moving.
2 Shake the ink cartridges gently 4 or 5 times, then
unpack them.
3 Remove only the yellow tape from each cartridge.
Caution: Don’t remove any other seals or the cartridges may leak.
4 Insert the cartridges in the holder for each color, and press
each cartridge down until it clicks.
5 Lower the scanner unit.
6 Press OK to prime the ink delivery system. Priming takes
about 4 minutes.
Note: The cartridges included with the printer are designed for
printer set up and not for resale. After some ink is used for priming,
the rest is available for printing.
Caution: Don’t turn off the printer while it is priming or you’ll
waste ink.
4
Load paper
1 Flip the feeder guard forward.
2 Raise the paper support, if necessary. Then pull up the
extension and tilt it back slightly.
3 Pull out the output tray, then raise the paper stopper.
4 Slide the edge guide to the left.
*412494000*
*412494000*
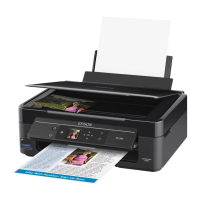
XP-300 Small-in-One
™
Printer
Start Here
4124940 Rev.0
1-F C
4124940 Rev.0
1-F M
4124940 Rev.0
1-F Y
4124940 Rev.0
1-F K