Epson Artisan 810/835/837/710/725/730/Epson Stylus Photo PX810FW/TX810FW/PX820FWD/TX820FWD/PX830FWD/PX710W/TX710W/PX720WD/TX720WD/PX730WD/TX730WD
Revision G
DISASSEMBLY/ASSEMBLY Disassembly Procedures 109
Confidential
4.2.2 Replacing the Head Supply Assy
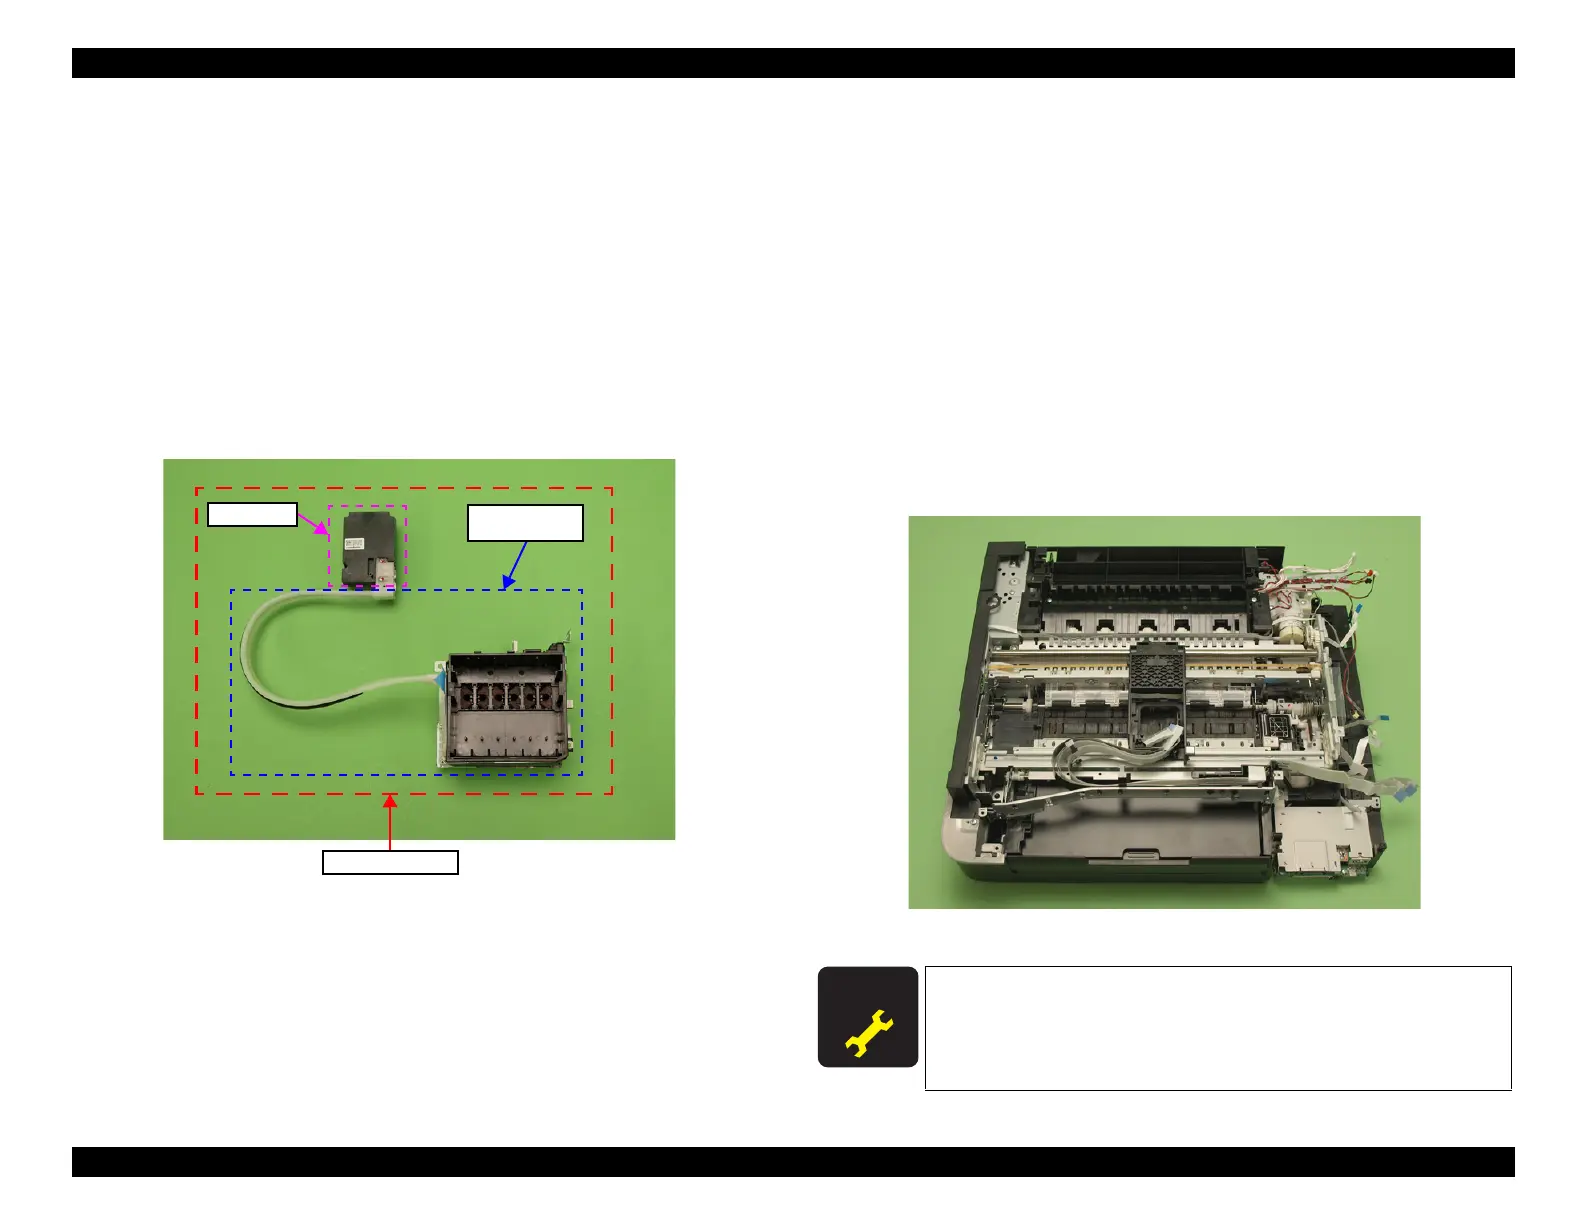
Head Supply Assy
When replacing the Printhead and Ink Supply IC Holder Assy individually for
repairing of print defect, the Leak check using the specified tools is necessary in order
to avoid ink leakage after reassembling.
The Leak check is not necessary for the Head Supply Assy because it is specified as
ASP parts including the Printhead and the Ink Supply IC Holder Assy, and the Leak
check has already been carried out.
The Head Supply Assy is supplied as ASP parts for the servicing site where the
specified tool cannot be prepared, or to shorten the repair time.
This section describes the procedure of replacing the Head Supply Assy.
Figure 4-1. Head Supply Assy
Parts/Components need to be removed in advance:
ADF Unit (p110)/Scanner Unit (p111)/Paper Guide Top Assy (p123)/Upper Left Housing /
Panel Lock Button (p114)/Hinge (p113)/Upper Housing (p115)/Rear Right FAX Housing
(p120)/Right Housing / Card Cover (p121)/Wireless LAN Board (p131)/Main Board /
Grounding Plate M/B (p126)CSIC Assy (p143)
Replacement procedure
1. Carry out Step1 (p134) to Step5 (p134) in " 4.2.5.1 Printhead (p133) ".
2. Carry out Step1 (p144) to Step5 (p145) in " 4.2.5.6 Ink Supply IC Holder Assy
(p144) ".
3. Remove the Printhead together with the Ink Supply IC Holder Assy. (See Fig.
4-2.)
4. Install the Ink Supply IC Holder Assy (p144), and carry out Step1 (p136) to
Step3 (p136) and tighten the screws given in Step11 (p139) in Assembling the
Printhead (p135) to install the Head Supply Assy.
Figure 4-2. After Removing the Head Supply Assy
Head Supply Assy
Ink Supply IC
Holder Assy
Printhead
A D J U S T M E N T
R E Q U I R E D
After removing/replacing the Head Supply Assy, make the specified
adjustments. (See
Chapter 5 "ADJUSTMENT".)
 Loading...


