(b)
Print a nozzle check pattern to check if the print head nozzles are clogged.
Select Menu > Maintenance > Nozzle Check.
If you notice any missing segments or broken lines as shown in (b), go to
step B.
A
B
Run the print head cleaning. Select Menu > Maintenance > Head
Cleaning.
The cleaning uses some ink from all cartridges, so run the cleaning only if
print quality declines on your prints.
(a)
Print Quality Help
Maintenance
A
B
Black / Color
215
Ink Cartridge Code
Replacing Ink Cartridges
C
Press the OK button.
D
A code is displayed on the LCD screen if there is an error or information. Use the
following table to solve the problem.
E-01
Remove any paper or protective material in the printer. If the
error message is still displayed even after turning o and then on
again, contact Epson support.
E-12
Turn the power o. Refer to the steps in “Replacing Maintenance
Box” section to replace the maintenance box.
E-13
Turn the power o, and then install the maintenance box.
E-14
Turn the power o, and then install the maintenance box again. If
the message continues to be displayed even after reinstalling the
maintenance box, replace it with a new maintenance box.
E-21
Battery error. Contact Epson support.
E-22
Use the battery at a temperature of 10 to 35 °C.
E-23
E-24
Charge the battery or connect the AC adapter to the printer.
W-01
Remove the paper from the printer and press the OK button. See
the “Clearing Paper Jam” section.
W-02
W-11
Contact Epson or an authorised Epson service provider to replace
the ink pad. Press the OK button to resume printing.
W-12
Press down each of the ink cartridges gently. Make sure they click
into place.
I - 81
The print speed may be slower when the printer is in battery
mode. Connect the AC adapter to the printer when you do not
want to change the print speed.
Recovery mode
The rmware update has failed. Follow the steps
below to try to update the rmware again.
1. Connect the printer with the AC adapter.
2. Connect the computer and the printer with a
USB cable. (During recovery mode, you cannot
update the rmware over a network connection.)
3. Visit your local Epson website for further
instructions.
Error Indicators
Q
See the online User’s Guide for more information on what to do
when an other error is displayed.
oUsing AC adapter
Connect the power cord to the AC adapter, connect the AC adapter to the
printer, and then plug in the power cord.
oUsing PC
A
Battery Charging
Press the d button to turn o the printer.
C
B
Connect the printer to the computer using a micro USB cable.
Q
The battery charging light turns on when the battery is charging,
and turns o when the battery charge is nished.
Make sure that the computer is on. Wake the computer if it is in hibernate
or sleep mode.
Press the
d button to turn on the printer.
D
Q
O If battery charging does not start, select Menu > Battery >
Battery Settings on the control panel, enable USB Power
Supply via PC, and then try again.
O You can charge the battery when the printer is in sleep mode
even if you do not turn o the printer.
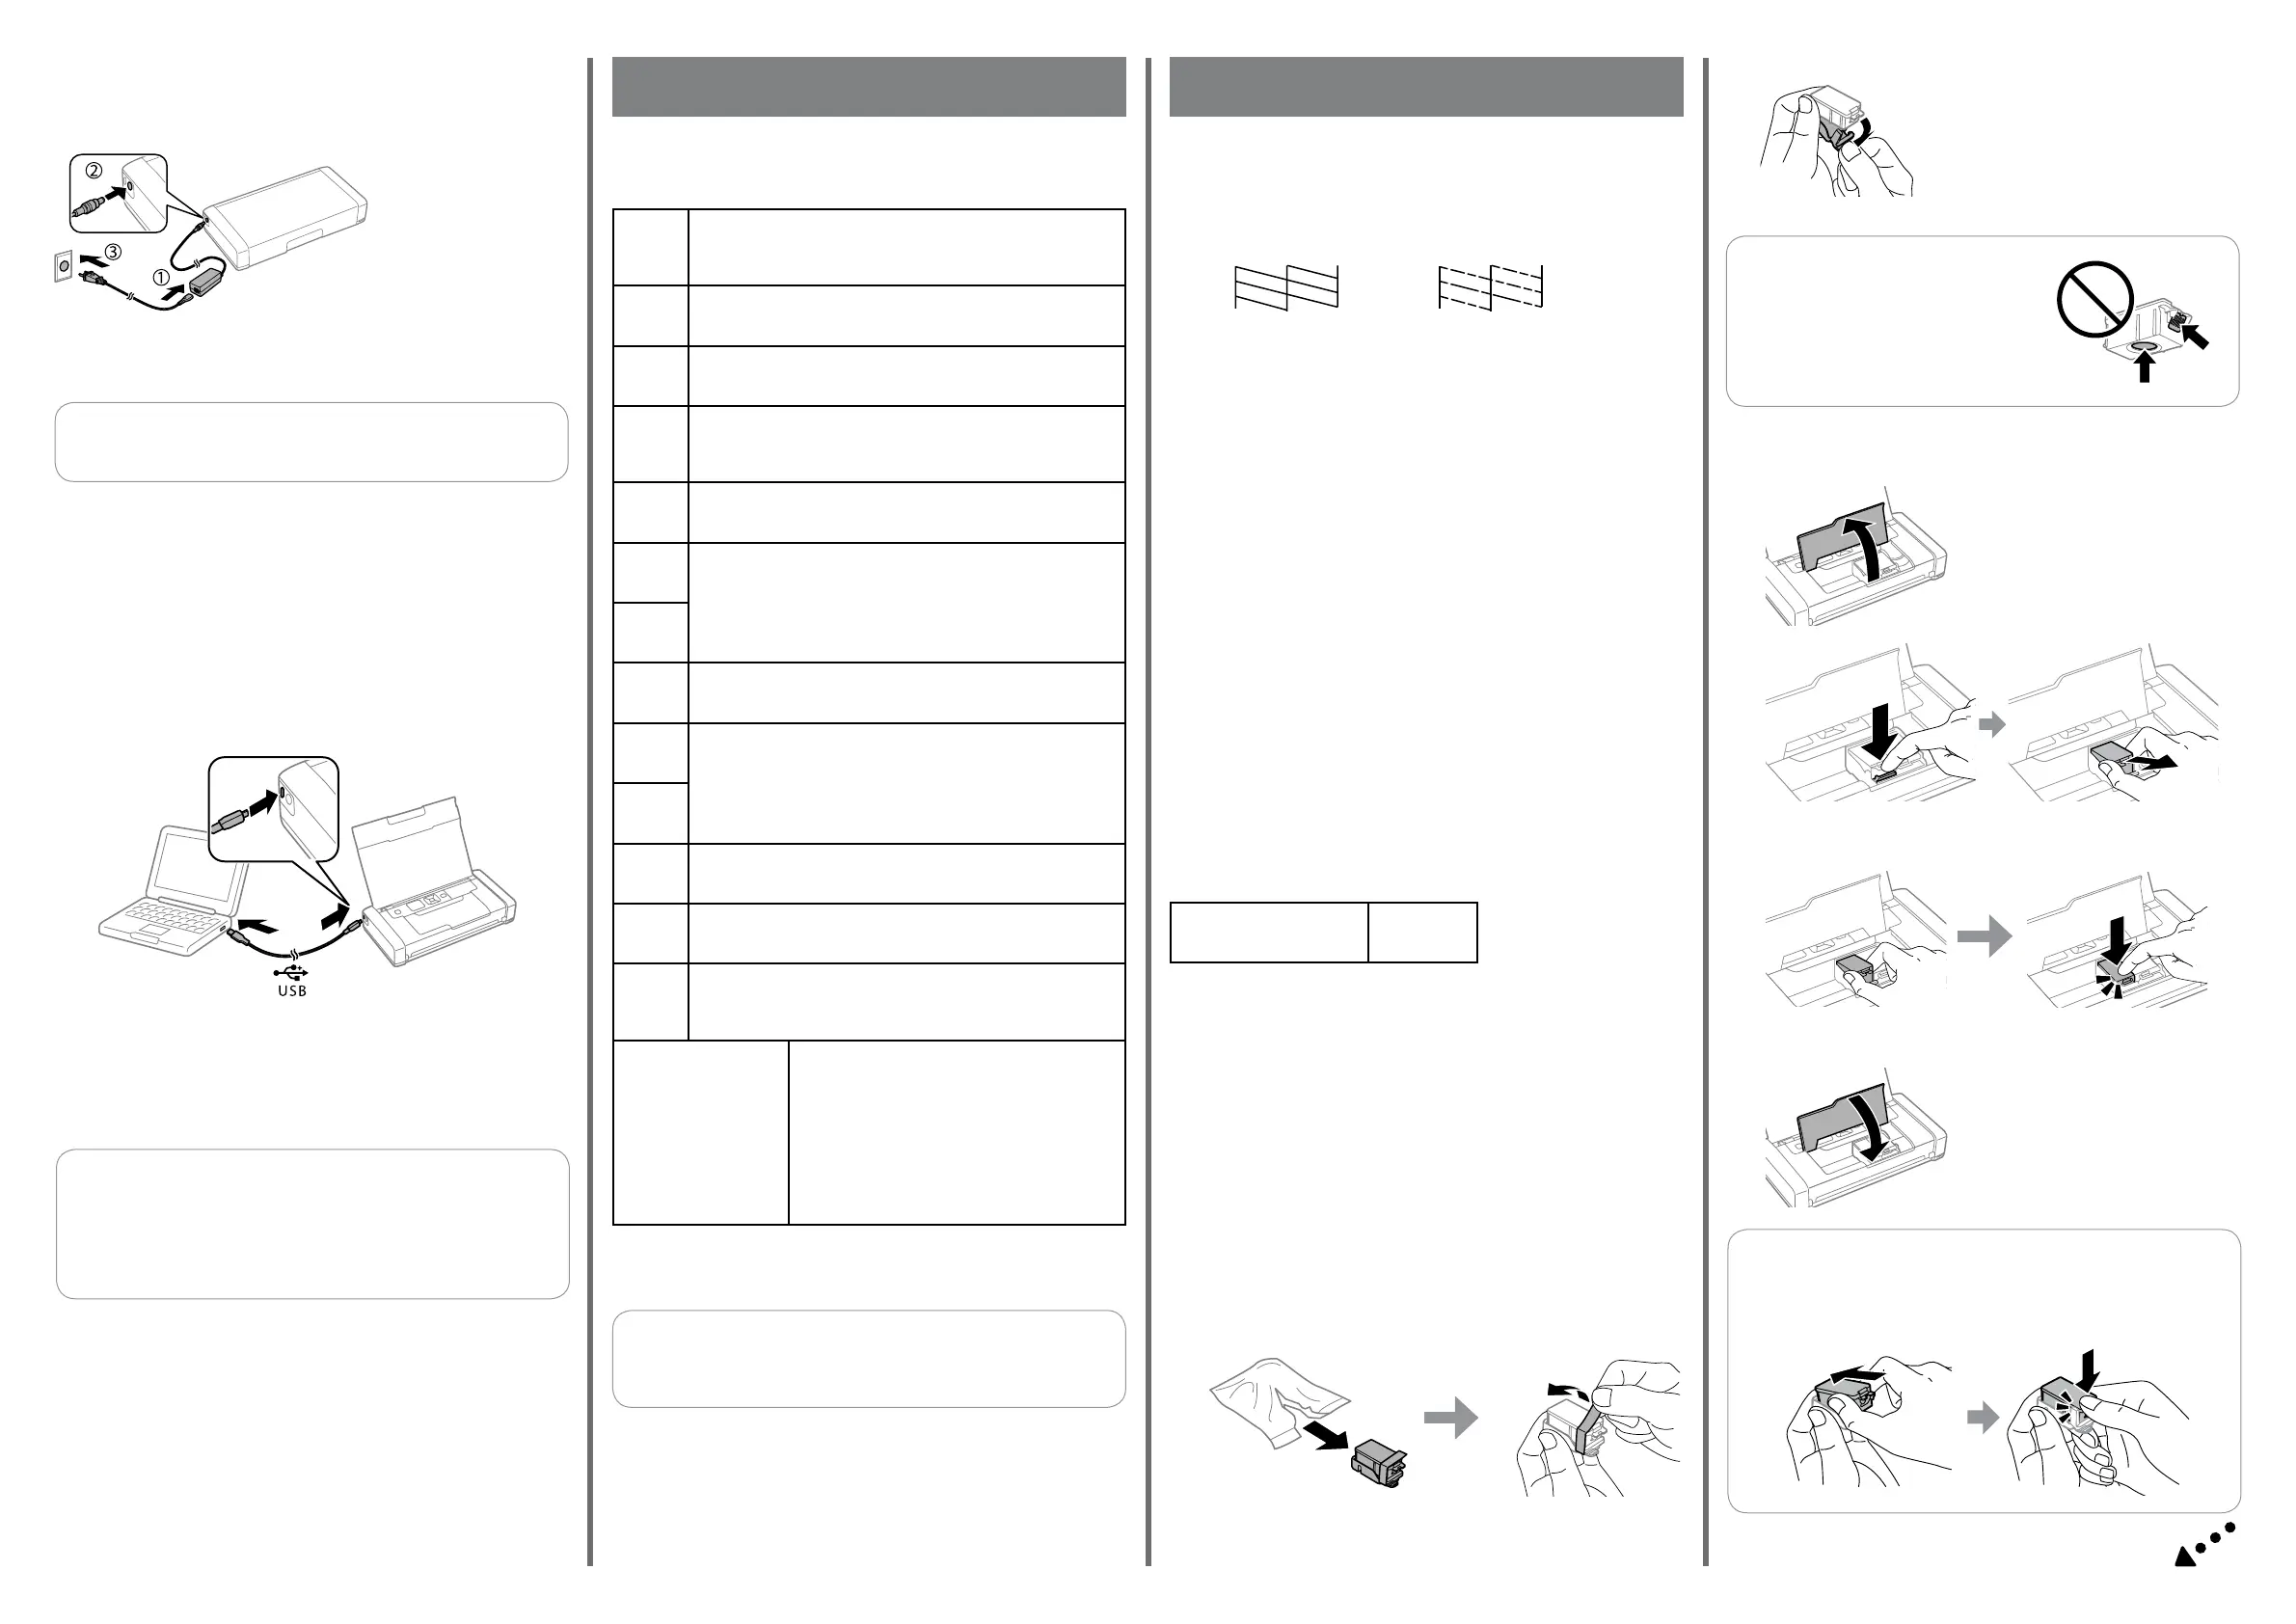
Prepare a new ink cartridge.
O When prompted to replace ink cartridges
Check which ink cartridge needs to be replaced, and then press the OK
button. Select Replace now, and then press the OK button.
O When replacing ink cartridges before they are expended
From the home screen, select Menu > Maintenance > Ink Cartridge
Replacement, and then press the OK button.
Remove from the package and then remove only the yellow tape.
Remove the cap.
c
Do not touch the sections.
E
Open.
F
Push the lever to unlock the ink cartridge, and then pull out the cartridge
diagonally.
G
Insert the new ink cartridge diagonally into the cartridge holder and
gently push it down until it clicks into place.
oIf you see missing segments or broken lines in your printouts, try the
following solutions.
O Select Menu > Plain Paper Density Setting on the control panel, and
then adjust the density.
O Select Menu > Color Adjustment on the control panel, and then
adjust the color.
H
Close and press the OK button.
c
If you remove the cartridge from the printer for later use or to
dispose of it, make sure you put the cap back on the cartridge’s
ink supply port to prevent ink from drying out or to prevent
surrounding areas from getting smeared by ink.
oYou can adjust the density and color on the printer’s control panel.
 Loading...