EasyManua.ls Logo

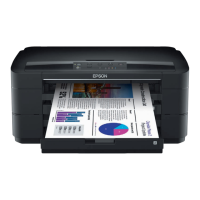
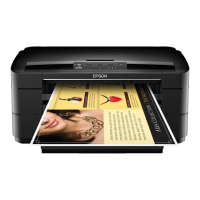
Epson Work Force 7110 User Manual

Epson Work Force 7110
2 pages
To Next Page IconTo Next Page
Page #1 background imageLoading...
Page #1 background image
Refill system for
EPSON Work Force 7110
INSTALLATION GUIDE
Thank you for choosing our products. Before the installation read ca-
refully this instructions. For any clarification or tecnical support
contact our costumer service: www.cheapoffice.it
3) Manually move the printer trolley in
the cartridges change area, gently
remove the trolley cover levering with
a flat-blade screwdriver. Photo 2
4) Place the ink tanks on the
right side of the printer using
the adhesive velcro. Photo 3
5) Unscrew the bottle and
screw the measuring spout.
Photo 4
2) To facilitate assembly operations is necessary turn on the printer, wait a few
seconds and remove the power cable while the trolley moves to the left. After
removing the power cable, the printer trolley might be easly moved with your
hands.
1) Open the printer cover and insert a small piece of paper or plastic in the
closing sensor to allow the printer to work with the cover open without repor-
ting errors. Photo 1
6) Fill the tanks K/C/M/Y
following the colors sequen-
ce (photo 5).
NB: On the tanks upside the-
re are 4 big holes to refill
and 4 small holes that du-
ring the operation will must
be open, eventually you can
insert in them an air filter.
7) Reverse the cartridge
group. With a pen tip pierce
the plastic operulum that
protects the valves (Photo 6).
Pag 1/2
1
2
3
4
5
6
Question and Answer IconNeed help?

Do you have a question about the Epson Work Force 7110 and is the answer not in the manual?

Epson Work Force 7110 Specifications

General IconGeneral
Print TechnologyInkjet
Maximum Print Resolution5760 x 1440 dpi
ConnectivityUSB, Ethernet, Wi-Fi
Monthly Duty Cycle30, 000 pages
Ink TypeDURABrite Ultra Ink
Input Capacity250 sheets
Printer TypeInkjet
Print Speed (Black)15 ppm
Paper SizeA4
Maximum Print Size13 x 19"
Duplex PrintingYes
Ink Cartridge ConfigurationIndividual Ink Cartridges
Output Capacity30 sheets
DisplayLCD
FunctionsPrint, Copy, Scan

Summary

EPSON WorkForce 7110 Refill Installation Steps

Prepare Printer for Access

Open printer cover, disable sensors with paper, and move trolley.

Access and Move Trolley

Manually move printer trolley to cartridge area and remove cover.

Position Ink Tanks

Place ink tanks on the right side of the printer using adhesive velcro.

Prepare Ink Bottles and Spouts

Unscrew ink bottles and attach the measuring spout.

Fill Ink Tanks

Fill tanks K/C/M/Y sequentially via large refill holes.

Prepare Cartridge Valves

Pierce the plastic operculum protecting the cartridge valves.

Ink Suction and Transfer

Use syringe to aspire ink, return excess to tank.

Install Refilled Cartridges

Place cartridges in trolley and secure until click.

Connect Ink Delivery Pipes

Attach adhesive clip and ink pipes to the system.

Test Ink Pipe Movement

Ensure pipes do not hinder trolley movement by manual testing.

Maintain Printer Lid Open

Keep the printer lid open during operation for proper function.

Reset Cartridge Status

Press reset button for 10s when prompted for empty cartridges.

Important Operational Notes

Printer Jam Recovery

Recover printer from jams by removing paper and resuming trolley.

Prevent Ink Depletion

Verify ink levels in tanks before printing to avoid running dry.

Related product manuals