Do you have a question about the Epson WorkForce Pro WF-7820 and is the answer not in the manual?
Remove all protective materials from the product before proceeding with setup.
Lift the scanner unit until it locks into place and remove all protective materials from inside.
Connect the power cord to the product and an electrical outlet, then raise the control panel and turn on the product.
Lift the scanner unit, open the ink cartridge cover, and insert cartridges until they click.
Insert each cartridge into the holder for its color, pressing down until it clicks.
The product starts charging the ink, which takes approximately 5 minutes.
Insert paper with the glossy or printable side down, against the front edge of the cassette.
Make sure the product is NOT CONNECTED to your computer before installing software.
Download or use the product CD to run the software package and follow on-screen instructions.
This document serves as a comprehensive guide for setting up, operating, and maintaining the Epson WF-7820/WF-7840 series of multifunction printers. It covers initial unpacking, power-on and configuration, ink cartridge installation, paper loading, fax setup, software installation, and troubleshooting common issues, along with information on paper and ink supplies, and support resources.
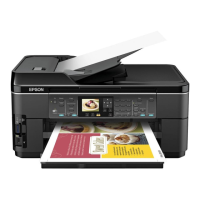
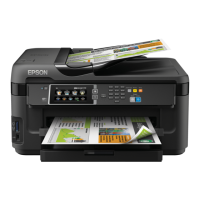
The Epson WF-7820/WF-7840 is a multifunction printer designed for both home and office use, offering printing, scanning, copying, and faxing capabilities. It is engineered to deliver reliable performance and high-quality output for a variety of document types. The printer supports various paper sizes and types, including plain paper, specialty papers, and envelopes, making it versatile for different printing needs. Its design emphasizes ease of use, with a clear LCD screen for navigation and status updates. The device is compatible with both Windows and Mac operating systems, and it supports mobile printing and voice-activated printing for enhanced convenience. Network connectivity options, including wired (Ethernet) and wireless (Wi-Fi), allow for flexible placement and shared use within a network environment.
The initial setup process begins with carefully unpacking the printer. Users are instructed to remove all protective materials, including tapes and inserts, from both the exterior and interior of the device. Special attention is drawn to not opening ink cartridge packages until ready for installation, as they are vacuum-packed for reliability. After removing protective materials, the scanner unit is lifted to access the interior, where additional protective items must be removed. The document explicitly warns against touching the flat white cable during this process to prevent damage.
Once unpacked, the printer is connected to an electrical outlet using the provided power cord. A crucial instruction is to not connect the printer to a computer at this stage. The control panel, which features an LCD screen, is then raised, and the product is powered on. The LCD screen guides the user through selecting the language, country, date, and time. The manual notes that these settings can be adjusted later via the control panel. If an error code appears during this stage, users are advised to turn off the product and recheck for any remaining protective materials inside.
The printer is designed exclusively for use with Epson cartridges. Users are instructed to gently shake each ink cartridge before removing it from its packaging. Only the yellow tape should be removed from the cartridges; other seals should remain intact to prevent leaks. The manual warns against touching specific areas of the cartridges, as this could impair normal operation and printing. Cartridges are then inserted into their respective color-coded holders and pressed down until they click into place, ensuring they are fully seated. After all cartridges are installed, the ink cartridge cover is closed, and the scanner unit is lowered. The printer then initiates an ink charging process, which takes approximately 5 minutes. During this time, it is critical not to turn off the printer or raise the scanner unit to avoid wasting ink. A completion message on the LCD screen indicates when charging is finished. The document also clarifies that the included initial cartridges are for setup purposes and cannot be used as replacements or resold, though remaining ink is available for printing after setup.
The guide provides instructions for loading paper into the cassette. Users must ensure that the ink charging process is complete before proceeding. The paper cassette is pulled out, and the side edge guides are extended. The front edge guide is adjusted to the desired paper size. Paper is then inserted with the glossy or printable side facing down. A key detail is to ensure the paper is positioned under the arrow mark for the specific paper type and loaded against the front edge of the cassette. The side edge guides are then adjusted snugly against the paper, but not too tightly. Finally, the cassette is inserted back into the printer, keeping it flat, and the paper settings are selected on the product's control panel. The manual refers to the online User's Guide for more detailed information on loading capacity, available paper types and sizes, envelopes, and using the rear paper feed slot or ADF.
To set up the fax function, the printer needs to be connected to a telephone wall jack and to a telephone line. The document directs users to the online User's Guide for more information on this process. After connecting, users select "Proceed" to set up the fax or "Close" to skip it.
Software installation is crucial for full functionality. Users with a CD/DVD drive can install the software from the included disc. Alternatively, software can be downloaded from the Epson support websites (www.epson.com/support/wf7820 for U.S. and www.epson.ca/support/wf7820 for Canada for the WF-7820, and similar links for the WF-7840). The document emphasizes that an internet connection is required for downloads. During installation, users are instructed not to connect the printer to their computer until prompted by the software. The guide also highlights the importance of firmware updates, which address issues, improve functionality, and ensure compatibility. It notes that non-Epson branded or genuine Epson cartridges may not function properly after an update.
The printer supports mobile printing from smartphones and tablets via Epson iPrint, Epson Email Print, and other Epson Connect solutions. Users can print directly from their device by selecting the print option and choosing the printer. For voice-activated printing, users can link their product to an Epson Connect account and use voice assistants like Siri, Google Assistant, or Alexa. The manual provides links to Epson's support websites for more information on these features.
The guide includes a "Any problems?" section to help users resolve common issues.
The document strongly recommends using Epson specialty and plain papers, along with Epson Genuine Ink, for optimal results. It provides information on where to find these supplies (www.epson.com or www.epson.ca) and lists the replacement ink cartridge numbers for both standard-capacity, high-capacity, and extra high-capacity options for Black, Cyan, Magenta, and Yellow inks (812, 812XL, 812XXL series).
The guide directs users to various support resources:
The document includes important safety instructions, such as not using the product near water, keeping the guide handy, avoiding telephone use during electrical storms due to lightning risk, and not using a telephone to report a gas leak in the vicinity of the leak. It also specifies using only a No. 26 AWG or larger telecommunication line cord to reduce fire risk.
The document clarifies that the illustrations primarily show the WF-7840, but the steps apply to the WF-7820 unless otherwise specified. It also includes legal disclaimers regarding trademarks and copyright information. The information provided is subject to change without notice.
| Print Technology | Inkjet |
|---|---|
| Scan Resolution | 1200 x 2400 dpi |
| Connectivity | USB, Ethernet, Wi-Fi, Wi-Fi Direct |
| Duplex Printing | Yes |
| Display | 4.3" color touchscreen |
| Functions | Print, Copy, Scan, Fax |
| Input Paper Capacity | 250 sheets |
| Fax Speed | 33.6 Kbps |
| Print Speed (Black) | 25 ppm (ISO) |
| Print Speed (Color) | 12 ppm (ISO) |
| Max Print Size | 13" x 19" |
| Scanner Type | Flatbed |
| Automatic Document Feeder | Yes (50 sheets) |
| Mobile Printing | Apple AirPrint, Google Cloud Print, Mopria |
| Ink Cartridges | Black, Cyan, Magenta, Yellow |
| Monthly Duty Cycle | 50, 000 pages |