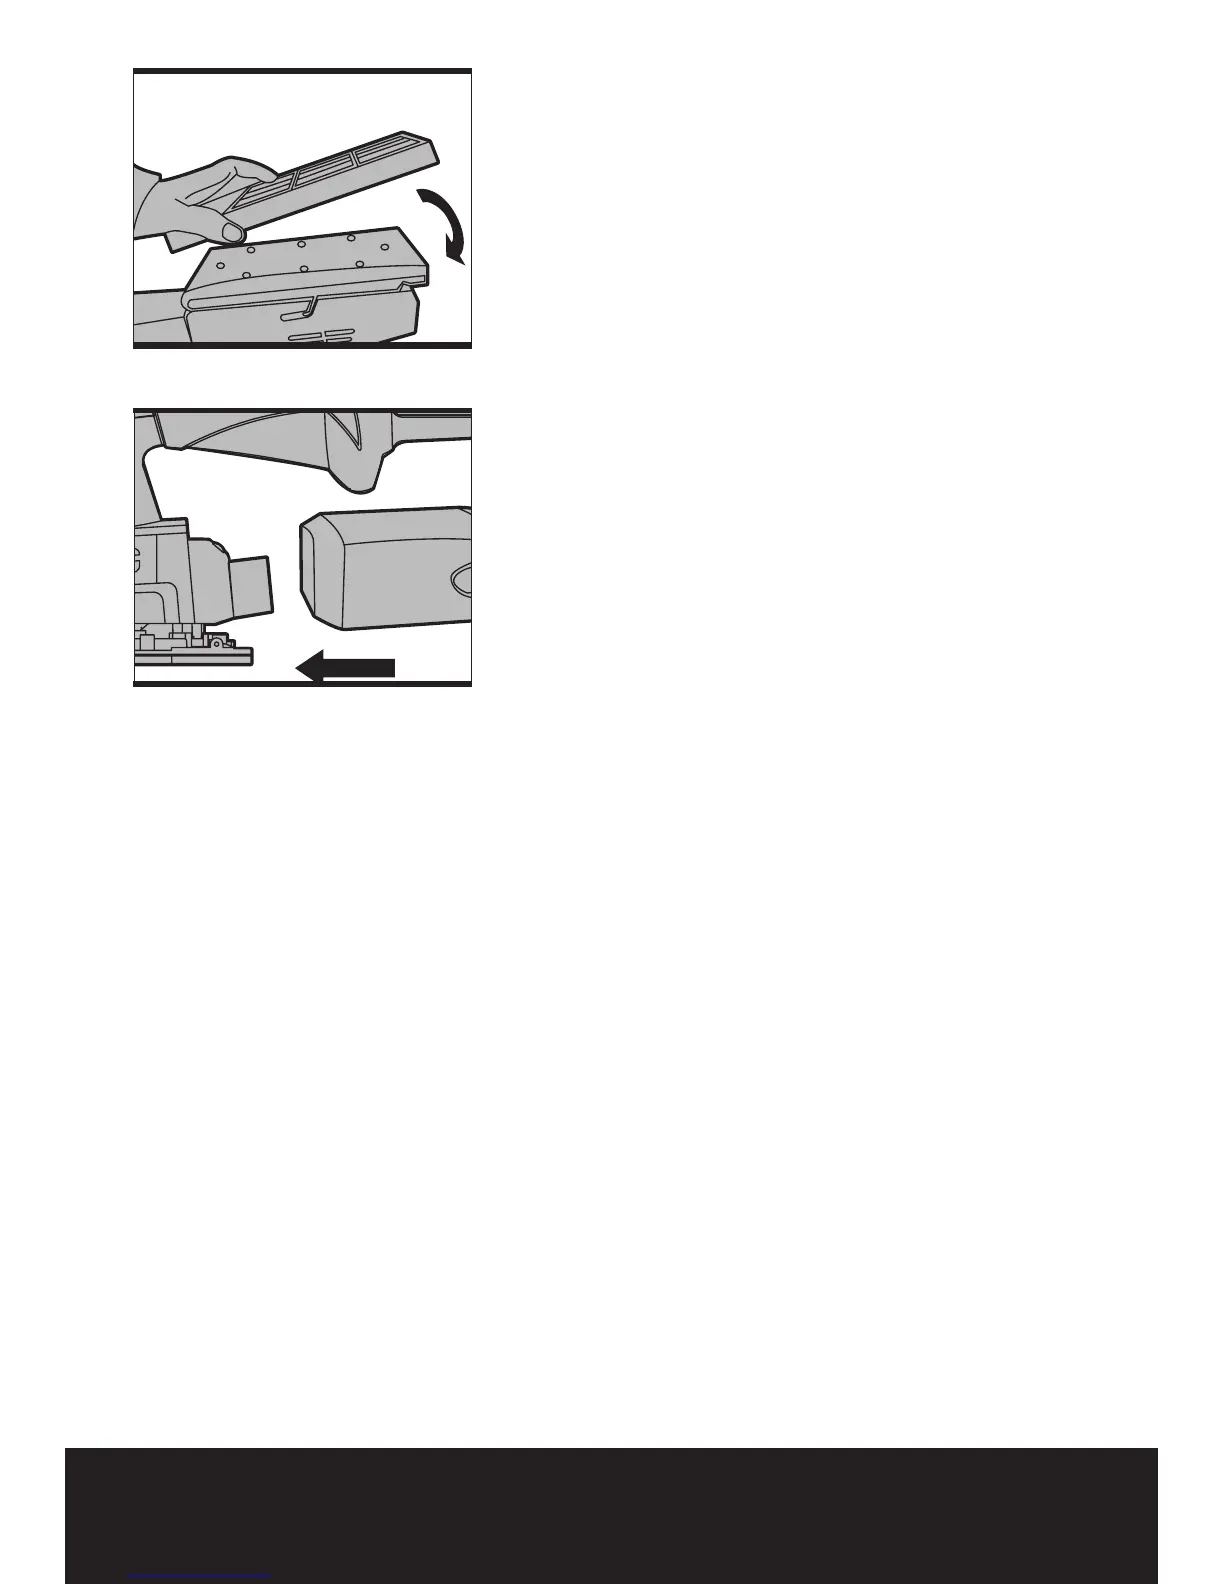
4. PAPER PUNCH (SEE FIG H)
If using sanding paper without dust holes, use
the paper punch to perforate the holes to ensure
correct dust extraction. Position the punch (7)
over the base plate with the punch sides on the
edges of the base plate. Press the punch into
the base plate to punch holes into the sanding
paper. Then remove the punch and check all the
holes have been formed correctly.
5. ATTACHING SANDER TO VACUUM (SEE
FIG I)
Your sander is equipped with a dust tube (6),
which is designed for collect dust task. Insert
the dust tube (6) into the rear dust outlet of
sander. Then pull the dust tube and make sure
it is tightened securely on the dust outlet. Then
connect the hose of a vacuum cleaner.
First please turn on the vacuum cleaner, and
then turn on the sander. If you stop sanding, first
turn off the sander, then turn off your vacuum
cleaner.
6. USING THE SANDER
The workpiece to be sanded must be secured.
If it is small or it may move during sanding, it
must be held in a vice or suitably clamped.
Be sure to hold the sander firmly whilst it is on
and apply it gently to the work, it may “kick”
on first contact. Hold the sander so that it is
flat on the work and move slowly, preferably
with a smooth, circular motion. Regularly check
the condition of the sanding paper and replace
when worn for best results.
7. FLUSH SANDING FACILITY
Your sander can sand flush on three sides of the
baseplate which allows easy access to corners
and edges of mouldings.
8. ORBITAL SANDING
Your sander operates in small a circular rotation
which allows efficient material removal. Operate
your sander in long sweeping movements
across your workpiece and even across the
grain. For a finer finish, always use a fine grain
sanding paper and only move the sander in the
direction of the grit and never across the grain.
Do not allow your sander to remain in the same
Fig I
Fig H