24
the wheel. For thicker grinding wheels the raised part of the outer ange is tted facing
towards the wheel to provide improved support for the wheel hole. Always ensure your
wheel is securely clamped.
3.
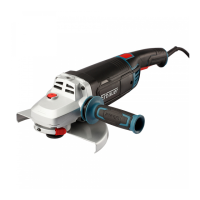
Grinding/Cutting Wheel ( B3 )
Pay attention to the dimensions of the grinding wheel. The mounting hole diameter must
t the inner ange (10) without play. Do not use reducers or adapters.
When using a diamond cutting wheel, take care that the direction-of-rotation arrow on the
diamond cutting wheel and the direction of rotation of the machine (direction-of-rotation
arrow on the machine head) agree.
Screw on the outer ange (11) and tighten with the two-pin spanner (14).
ADJUSTING THE SAFETY GUARD ( C )
For work with grinding or cutting wheels, the safety guard must be mounted.
Open the clamping lever (9). Place the safety guard (8) with coded projection into the
coded groove on the spindle of the machine head and rotate to the required position
(working position).
To fasten the safety guard (8), close the clamping lever and loosen the clamp adjustment
screw (13), if necessary. The closed side of the safety guard (8) must always point to the
operator.
NOTE:
With the clamping lever (9) open, the clamp adjustment screw (13)
can be adjusted to ensure the guard is securely clamped after the clamping
lever (9) is nally closed.
WHEEL GUARD FOR CUTTING ( D )
WARNING!
For cutting metal, always work with the wheel guard for
cutting. For grinding, always work with the wheel guard for grinding.
For cutting-off application, position the front cover with the closed side on the cutting
guard and push it on until it engages
.
CONNECT TO POWER SUPPLY
1. Make sure the on/off switch(7)is not pressed.
2. Connect the plug with a suitable power socket.
WARNING!
Check the voltage! The voltage must comply with the
information on the rating label!
3. Your product is now ready to be used.