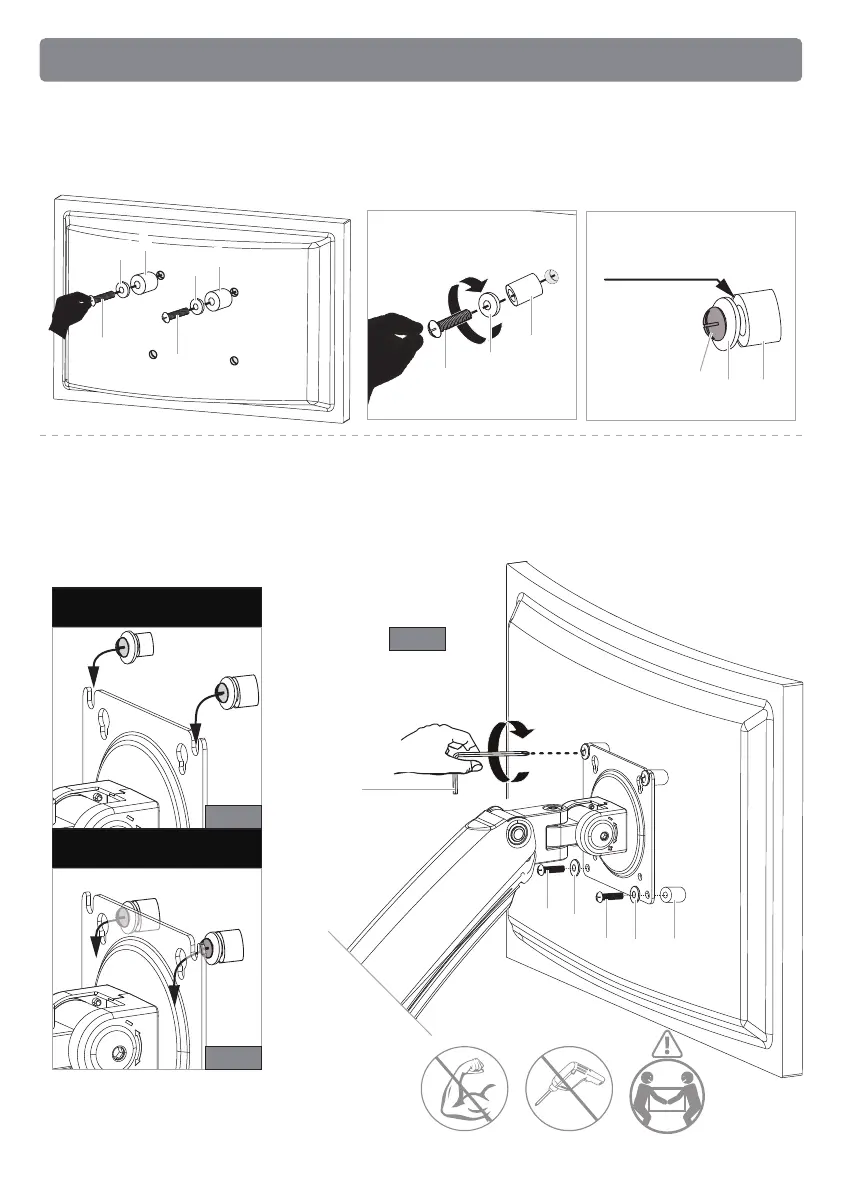
For Monitor Hole Pattern:
100 x 100mm (3.9 x 3.9”)
Fig. A
For Monitor Hole Pattern:
75 x 75mm (3 x 3”)
Fig. B
Fig. C
M3M3
0.1-0.2" (3-5mm)
spacing left
Option B (For Curved Back Monitor)
5B-1 Slide the washers [K] and spacers [L] over the bolts [J]. Turn the top two bolts
[J] CLOCKWISE until about 0.1-0.2" (3-5mm) of space is left between the washer
[K] and the spacer [L].
5B-2 Hang the monitor from the monitor plate with the top two bolts [J] (see Fig. A
or Fig. B). Place the spacers [L] between the monitor plate and back of monitor.
Screw the remaining two bolts [J] into the bottom holes (see Fig.C). Tighten all
bolts evenly.
KK
LL
JJ
KK
LL
JJ
JJ
KK
LL
JJ
JJ
KK
LL
KK
JJ
KK
LL
13