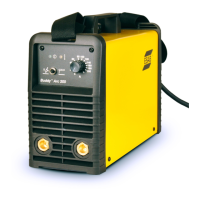
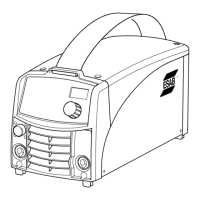
This document describes the ESAB AK 400 and AK 600 Fully Thyristorised MIG/MAG Welding Power Sources, providing instructions for installation, operation, and general maintenance.
The AK 400 and AK 600 are fully thyristorised MIG/MAG welding power sources designed for various welding applications. These units are intended for arc welding and are equipped with features that allow for precise control over the welding process.
Function Description
The welding power source is designed to provide a stable and controlled output for MIG/MAG welding. It utilizes a fully thyristorised system, which allows for stepless control of welding voltage and current. The unit works in conjunction with a wire feeder and a remote control unit to facilitate comprehensive control over the welding parameters.
Key functional aspects include:
- Gas Supply Management: The unit allows for checking the shielding gas flow before welding. A SHIELD GAS switch can be set to "CHECK" to initiate gas flow, and it automatically returns to the "WELD" position upon release. The welding method can be set for CO2 or Ar-CO2 shielding gas, depending on the application.
- Self-Hold Function: When the "Self hold / Crater" switch is ON, the arc is produced when the torch switch is activated. The self-hold function maintains the arc even if the torch switch is released. To activate the crater control condition, the torch switch needs to be triggered a second time. If the self-hold function is turned OFF, the arc is maintained only as long as the torch switch is pressed.
- Crater Control Function: This feature allows for filling the arc crater at the end of a weld without defects. The crater current and crater voltage can be adjusted using knobs on the front panel of the power source.
- Remote Control Unit: Welding voltage and current can be adjusted from a dedicated remote control unit. The current adjustment knob allows for setting the welding current, with fine-tuning possible by observing the ammeter on the power source's front panel during an experimental arc. Similarly, the voltage adjustment knob on the remote control unit provides an indicative voltage value, with precise adjustment made by observing the voltmeter on the front panel during an experimental arc.
- Preflow ON and OFF Changeover Terminals: A preflow timer, approximately 0.6 seconds, is integrated into the control circuit. The machine is factory-set with preflow in the OFF position. However, the preflow of the shielding gas can be toggled ON or OFF using changeover terminals on the Printed Circuit Board (PCB). When preflow is ON, welding voltage and wire feed action are delayed by about 0.6 seconds.
- FTT "ON" and "OFF" Changeover Terminals: The FTT (Fast Trigger Time) circuit is designed to prevent globule growth at the end of the wire, enhancing arc striking when restarting welding. The FTT circuit can be turned ON or OFF via changeover terminals on the PCB and is set to ON as standard. In scenarios with frequent welding repetitions, if FTT is ON, sparks may occur due to the wire touching the base metal immediately after welding (due to an extended burn-back time limit). In such cases, FTT should be set to OFF.
- Jig Terminals: These signal terminals are provided for convenient integration with welding jigs, such as turn tables. They also allow for separate operation of a gas valve. These terminals are located on the PCB, visible when the front panel cover is removed. The gas valve operates by short-circuiting terminal lines 17-38. Current detection contacts (CR3) are also fixed on the PCB.
- Power Saving Circuit: Approximately 25 seconds after releasing the torch switch, a power saving circuit activates to turn off the electromagnetic contactor, conserving energy.
Usage Features
The AK 400 and AK 600 are designed for ease of use and adaptability in various welding environments.
- Installation Flexibility: The units should be installed in areas with minimal moisture and dust, away from direct sunlight and rain, maintaining an ambient temperature between -10°C and 45°C. A minimum distance of 20 cm from walls is recommended, and if multiple units are installed side-by-side, a 20 cm distance between them is advised. A separate stand for the gas cylinder is also recommended.
- Ventilation: Adequate ventilation is crucial for optimal operation. For large areas (over 300 square meters per unit) that are not completely air-tight, no specific ventilation may be required. However, for smaller areas or continuous welding operations in fixed conditions, a vent fan or exhaust duct is recommended.
- Grounding: Proper grounding of the equipment should be performed by a skilled electrician.
- Shielding Gas Protection: In cases of excessive air draft, a shield should be used to protect the welding arc.
Maintenance Features
Regular maintenance and inspection are essential for ensuring the longevity and safe operation of the welding power source. All maintenance should be performed only after the switches in the switch box are turned OFF.
- Regular Inspection (Every 3-6 months):
- Fuse Box: Check for fastening and looseness at connections and confirm the use of the proper fuse type.
- Input and Output Terminals: Inspect for fastening and looseness at connections, and confirm insulation. Fasten any loose connections and tape them securely.
- Electro-magnetic Contactor: Confirm any abrasion at contact points and replace with new ones if necessary.
- Interior of Welding Power Source: Check for dust sedimentation and signs of overheat. Blow off dust using compressed air.
- Cautions for Insulation Voltage-Proof Test & Insulation Resistance Measurement Test: Careless execution of these tests can damage the power source due to the presence of thyristors, transistors, and other semiconductor parts. If these tests are required by company bylaws, the following precautions must be observed:
- Disconnect cables from the switch box connected to the three input terminals and short-circuit the three input terminals.
- Disconnect the cable from the two output terminals and short-circuit them.
- Short-circuit between the anode and cathode of thyristors SCRI-6.
- Remove the two grounding conductors (one near the electro-magnetic contactor and the other grounding the leg of the DC reactor).
Fault Finding and Rectification:
The manual provides a comprehensive fault-finding guide to address common operational issues.
- Welding automatically stopped, "INDICATOR WARN" lamp ON: This could be due to a blown control fuse (replace with rated fuse) or exceeding the duty cycle/welding current limits. In the latter case, allow the cooling fan to run for at least 10 minutes after the warning lamp turns OFF, and reduce welding current or duty cycle before restarting.
- Wire not feeding even when torch switch is pressed: Possible causes include the power switch being OFF (turn ON), single-phase operation (check fuses and power switch), lowest welding current setting (increase current), blown motor fuse (replace), disconnected or imperfectly connected wire feeder control cable (check continuity, ensure machine is OFF), or a fault in the Control PCB/Crater PCB (replace).
- Wire feeds in inching but not when torch switch is pressed "ON": This may indicate a fault in the torch switch or control cables (check continuity, machine OFF), or a fault in the main PCB/Crater PCB (replace).
- No wire feeding and no output voltage when torch switch is pressed: Check if the power switch is OFF (turn ON), or if power fuses in the supply lines are blown (check switch box's fuse and power fuse). It could also be a faulty torch switch or disconnected control cable (check continuity, machine OFF).
- Current adjustment not working: This could be a fault in the current control potentiometer in the remote control unit (check and replace), a fault in the Control PCB/Crater PCB (replace), or a disconnected/imperfectly connected control cable in the remote control unit (fasten plug socket firmly).
- Voltage adjustment not working: Similar to current adjustment, this could be a fault in the voltage control potentiometer in the remote control unit (check and replace), or a fault in the Control PCB/Crater PCB (replace).
- No Gas flow: Possible causes include a disconnected or improperly connected control cable in the remote control unit (fasten connector firmly), a damaged gas hose (replace), mingled impurities in the gas passage (blow off by raising gas pressure), a faulty solenoid valve (check and replace), or a fault in the Control PCB/Crater PCB (replace).
The manual emphasizes that users of ESAB welding equipment are responsible for observing all relevant safety precautions and that only trained personnel should carry out work on the equipment. It also provides guidance on weld defects, their possible causes, and corrective actions, covering issues like weld metal cracks, inclusions, lack of penetration, and porosity.