-- 2 9 --ba10d12e
1.4 OPERATION
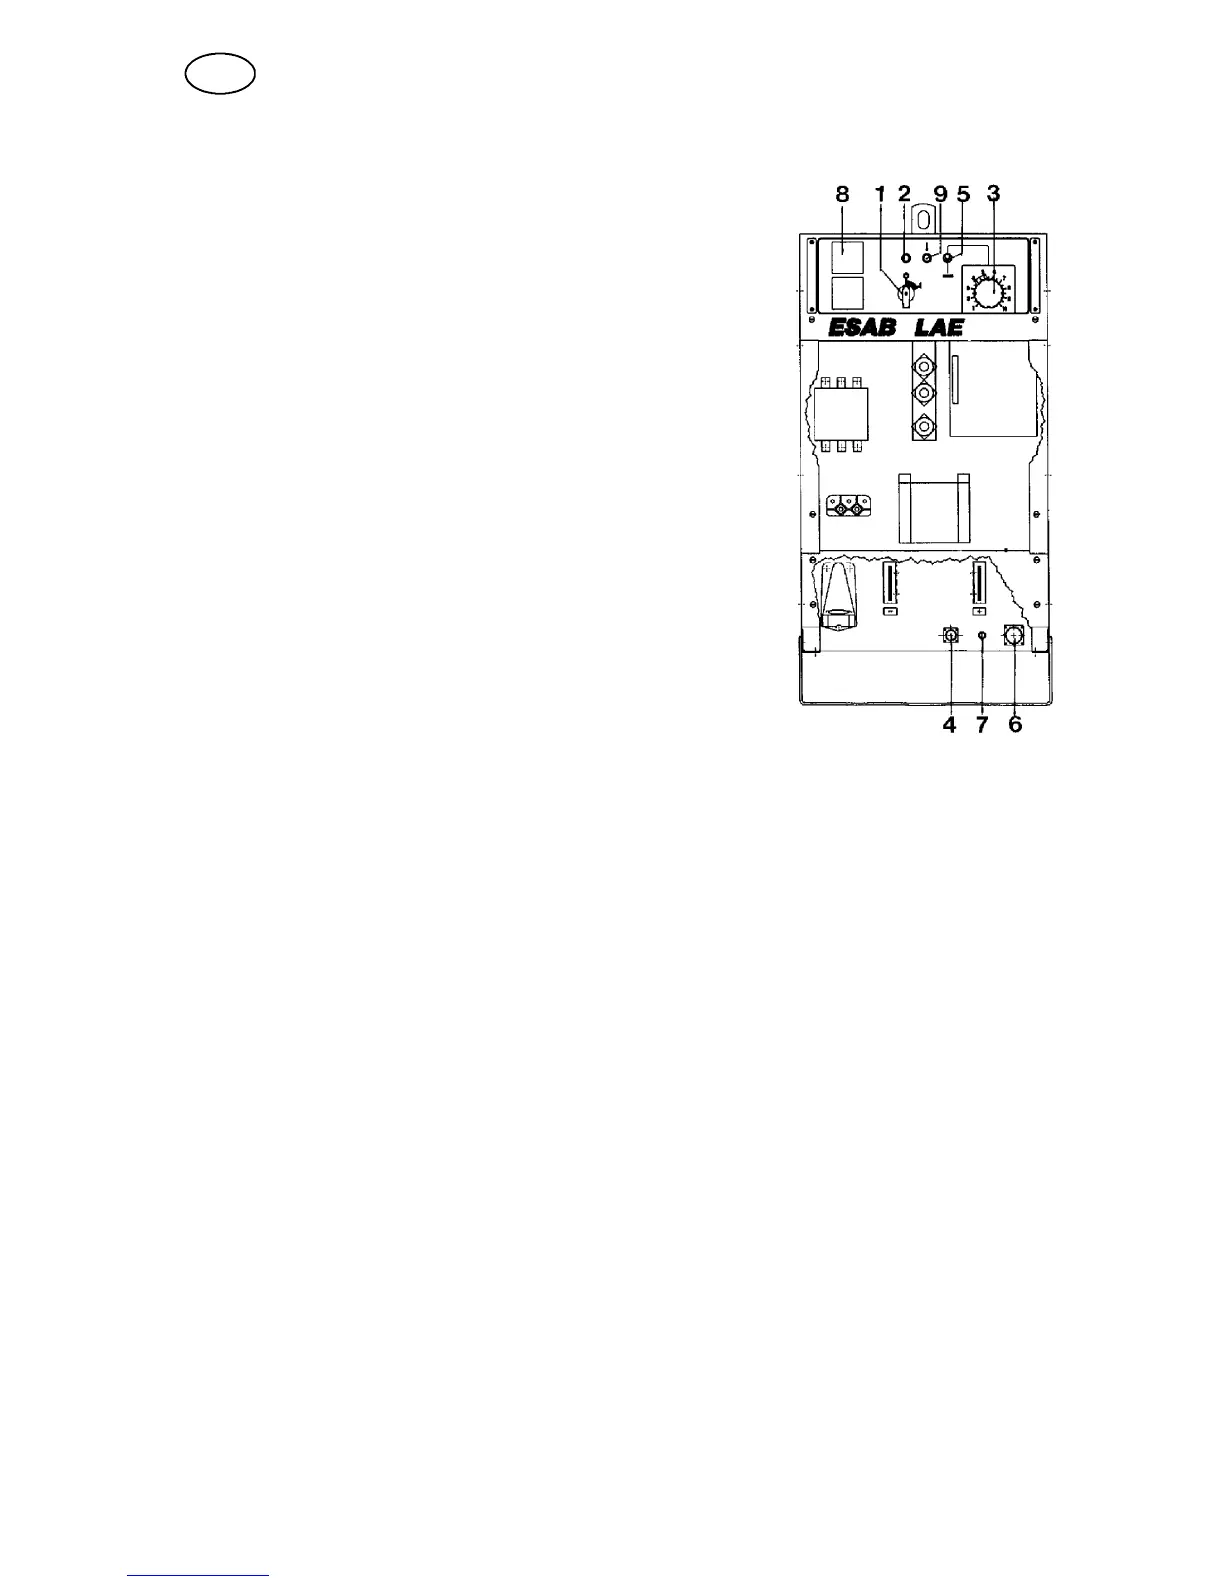
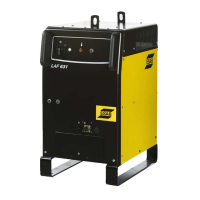
S Turn the switch (1) to setting ”I”. The whi-
te lamp (2) should light up and the fan will
start.
S Adjust the welding voltage using the knob
(3) on the front panel.
S If you are using a remote connect it to the
socket (4) on the front panel and set the
toggle switch (5) to the remote setting.
S Choose a suitable welding cable and re-
turn cab le and connect these to + and --
on the front of the machine. Connect the
return cable to the work piece.
S T he rectifier is now ready for welding.
S 8 pin socket for external control (6)
S 1 pin socket for meter cable (7)
S Space for digital meters (8) (optional)
S Yellow lamp (9) (overload cut--out)
1.5 MAINTENANCE
Blow the power source clean at least once a year using dry compressed air at
reduced pressure.
If the power source is used in a dusty or dirty environment it should be blown clean
more often.
Ordering sp are parts
When ordering parts please state the machine model, serial number and name and
spare part number as shown in the list of spare parts.
This facilitates dispatch and ensures a correct delivery.
GB
ba10d001