11
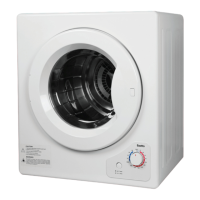
EXHAUST DUCT INSTALLATION
• Connect one end of the ex tube to the bck vent, then
x it rmly until it's tight.
• The other end of ex tube cn be extended externlly
outdoors, for the proper ssembly plese refer below.
WALL HANGING INSTALLATION
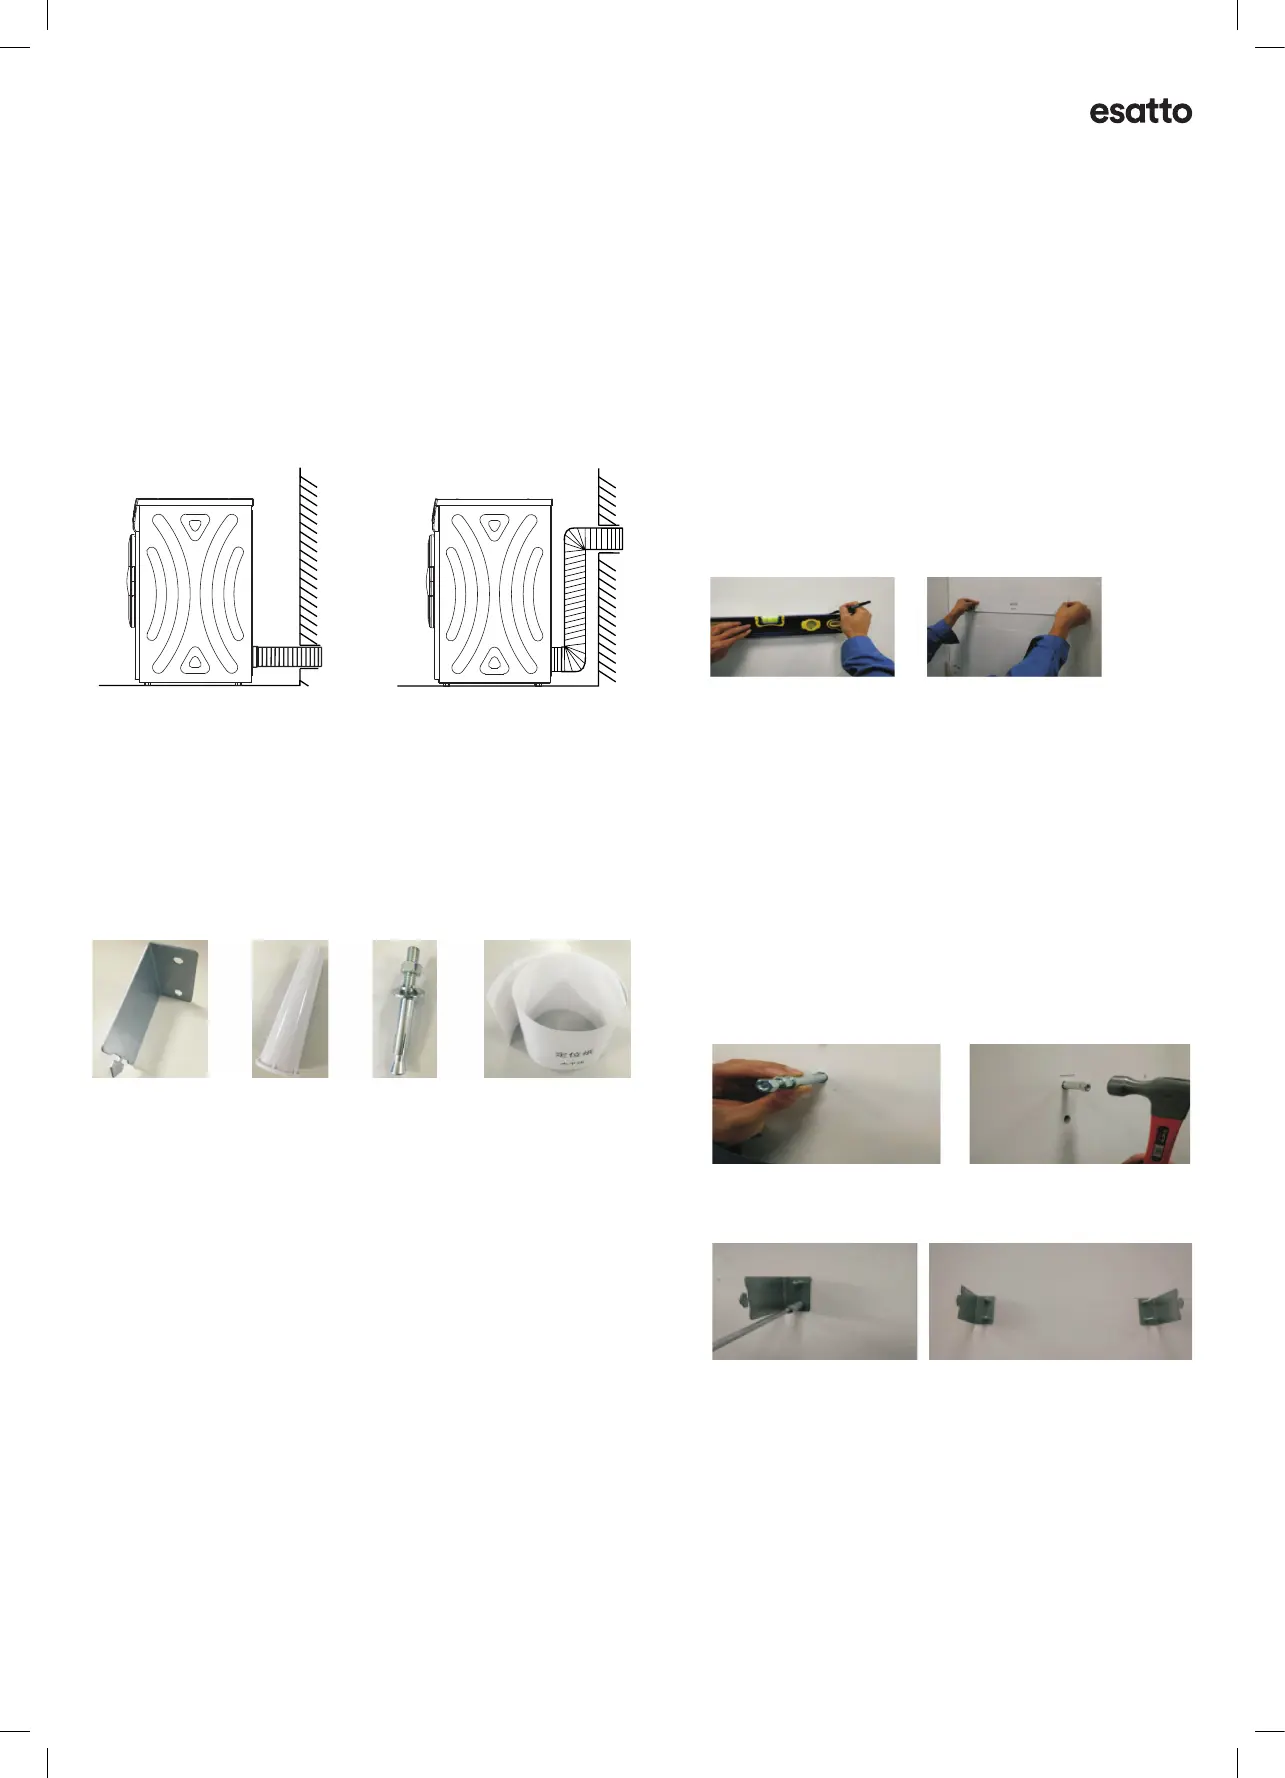
Step 1: Included Accessories
Conrm the following components re ll within
the included ccessories:
A. 2 × Hooks
B. 2 × Holders
C. 4 × Expansion bolts
D. 1 × Horizontal Screw Positioning Template
Step 2: Hnging Procedure
1 Conrm the construction type of the wll nd the
suitble position for instlltion.
. The wll must be solid concrete. Tip: Knock the wall
with the shank end of a rubber hammer. If the wall is
solid concrete, the sound will be crisp; if it is cavity
wall, the sound will be mued. For cvity wll,
tlk to professionl builder before ttempting
instlltion.
b. Do not hng the dryer on the wll if the wll is
not solid.
c. CAUTION: Ensure power cord nd plug is ccessible
nd reches power source.
2 The distnce in front of the wll must be more
thn 150cm.
3 Pste the instlltion positioning pper to the solid
concrete wll.
. Drw line with level, nd ttch the positioning
pper bsed on the line. Note: Ensure the screw holes
do not overlap with power outlets or taps nearby.
b. The bottom edge of the positioning pper must be
45cm+ higher thn the oor. Remove the dhesive
pper behind the positioning pper, nd pste the
positioning pper to the wll horizontlly.
4 Fix the hook to wall and then x the hook with an
expansion bolt to the wall.
a. Take out the expansion bolt from the accessories.
Insert the bolt and expansion tubular into the drilled
holes. Insert one nut into the bolt. To prevent the
thread being damaged, don't expose the end-thread
of the bolt. Then hammer the 4 bolts into the
holes orderly.
b. After the bolts are hammered into the wall, screw
o the nuts and expose the bolts. Then insert one
auxiliary tube to the bolt, and hammer the tube until
the expansion tubular is ush with the wall surface.
The expansion tubular should now be fully expanded.
c. Next, take out the hook and insert it to the bolt.
Fasten the hook with a socket or a wrench.
9
INSTALLATION
work properly.
If the dryer is not placed horizontally (tilt angle more than 2°), the dryer may not
Notice when installing:
•
Do not install the dryer in the open air or a place where
it can be damaged easily by rain;
•
Do not place the back of dryer near curtain or something
moved by wind;
•
Do not place the dryer near gas or flammable materials.
•
• Connect one end of the flex tube to the back vent, then fix it firmly until it's tight.
• The other end of flex tube will be extended to outdoor, for the proper assembly please
refer to the below pictures.
Exhaust duct installation:
Note!
• Level Adjusting
Once in its permanent operating position,
check that the dryer is absolutely level with the aid
of a spirit level. If it is not, adjust the feet with a tool.
A B C D

 Loading...