12
Instlltion (Continued)
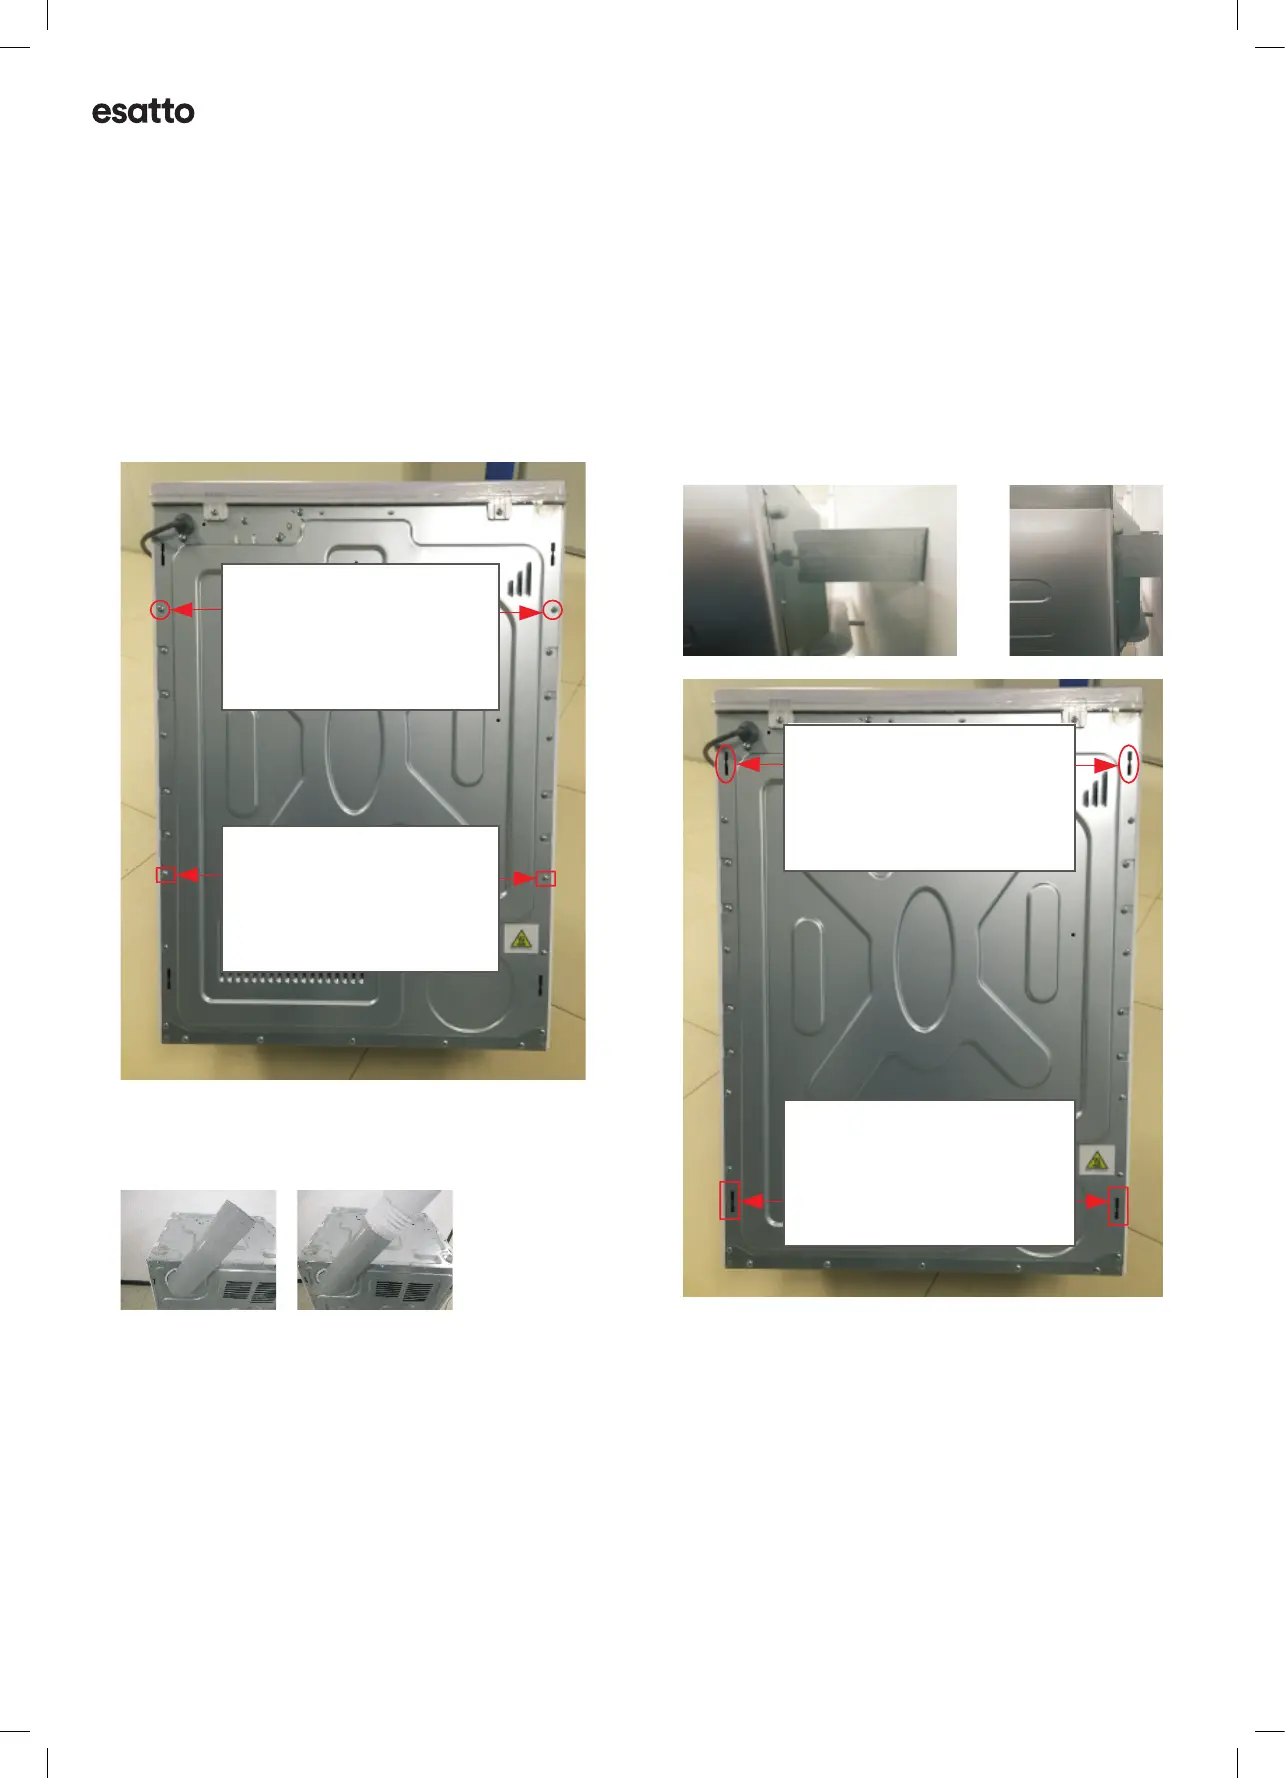
5 Fix the holder to the machine. Place the unpackaged
dryer on the oor. Unscrew the two screws* at the back
of the machine with a cross screwdriver. Take out the
holder in the kit. Press the screws* into the holes on the
holder and then fasten them into the original screw holes.
6 Transfer nozzle and air outlet extension pipe installation
steps (when the machine is mounted upside down)
a. Take out the nozzle, aligning with the rear air outlet,
and then push the nozzle into the air outlet.
b. Align one end of the air outlet extension pipe with
the card slot of the rotary nozzle, and force the air
outlet extension pipe into the rotary nozzle while
rotating. Install the air outlet extension pipe correctly
to prevent machine anomalies and hidden dangers
caused by incorrect installation.
7 Lift the dryer (two people) and direct the slots at the
back of the washing machine to the hooks. Lastly, insert
the hooks with some force to the slots.
CAUTION: WEIGHT HAZARD!
Two or more people required to lift nd instll the dryer.
Step 8: When ll of the instlltion procedures re nished,
test the mchine by powering it on.
IMPORTANT!
Plese ensure tht the dyer is only ever instlled in
n internl environment only (nd not outside), or n
environment where the dryer could become wet. Never
plce the dryer ner combustible surfces (such s curtins)
nd ensure the dryer isn’t operting ner gs or other
mmble mterils. Refer to Sfety Instructions within this
user mnul.
NOTE: The imges in this user mnul re for reference
only. Your pplince my pper dierently.
Wall Hanging Installation Manual
1. Accessories include components:
hooks (2), holders (2), expansion bolts (4), installation
positioning paper (1), and installation manual (1).
Hook
Holder
Expansion
Bolt
Installation
Positioning Paper
When hang
straight,Hang the
hooks into the
two holes.
When hang
upside down,
Hang the hooks
into these two holes.
When hang upside
down, Fix the holder
at the position of the
two screws.
When hang straight,
Fix the holder at the
position of the two
screws.
(Applicable to 6kg and 7kg models)
Hng the hooks
into these two holes
for inverted wll
mount instlltion.
Hng the hooks
into these two holes
for upright wll
mount instlltion.
Wall Hanging Installation Manual
1. Accessories include components:
hooks (2), holders (2), expansion bolts (4), installation
positioning paper (1), and installation manual (1).
Hook
Holder
Expansion
Bolt
Installation
Positioning Paper
When hang
straight,Hang the
hooks into the
two holes.
When hang
upside down,
Hang the hooks
into these two holes.
When hang upside
down, Fix the holder
at the position of the
two screws.
When hang straight,
Fix the holder at the
position of the two
screws.
(Applicable to 6kg and 7kg models)
Fix the holders t
these two screw
positions for inverted
wll mount instlltion.
Fix the holders t
these two screw
positions for upright
wll mount instlltion.
a b

 Loading...