10
Installing the Motherboard
Connecting Case Components
After you have installed the motherboard into a case, you can begin connecting the
motherboard components. Refer to the following:
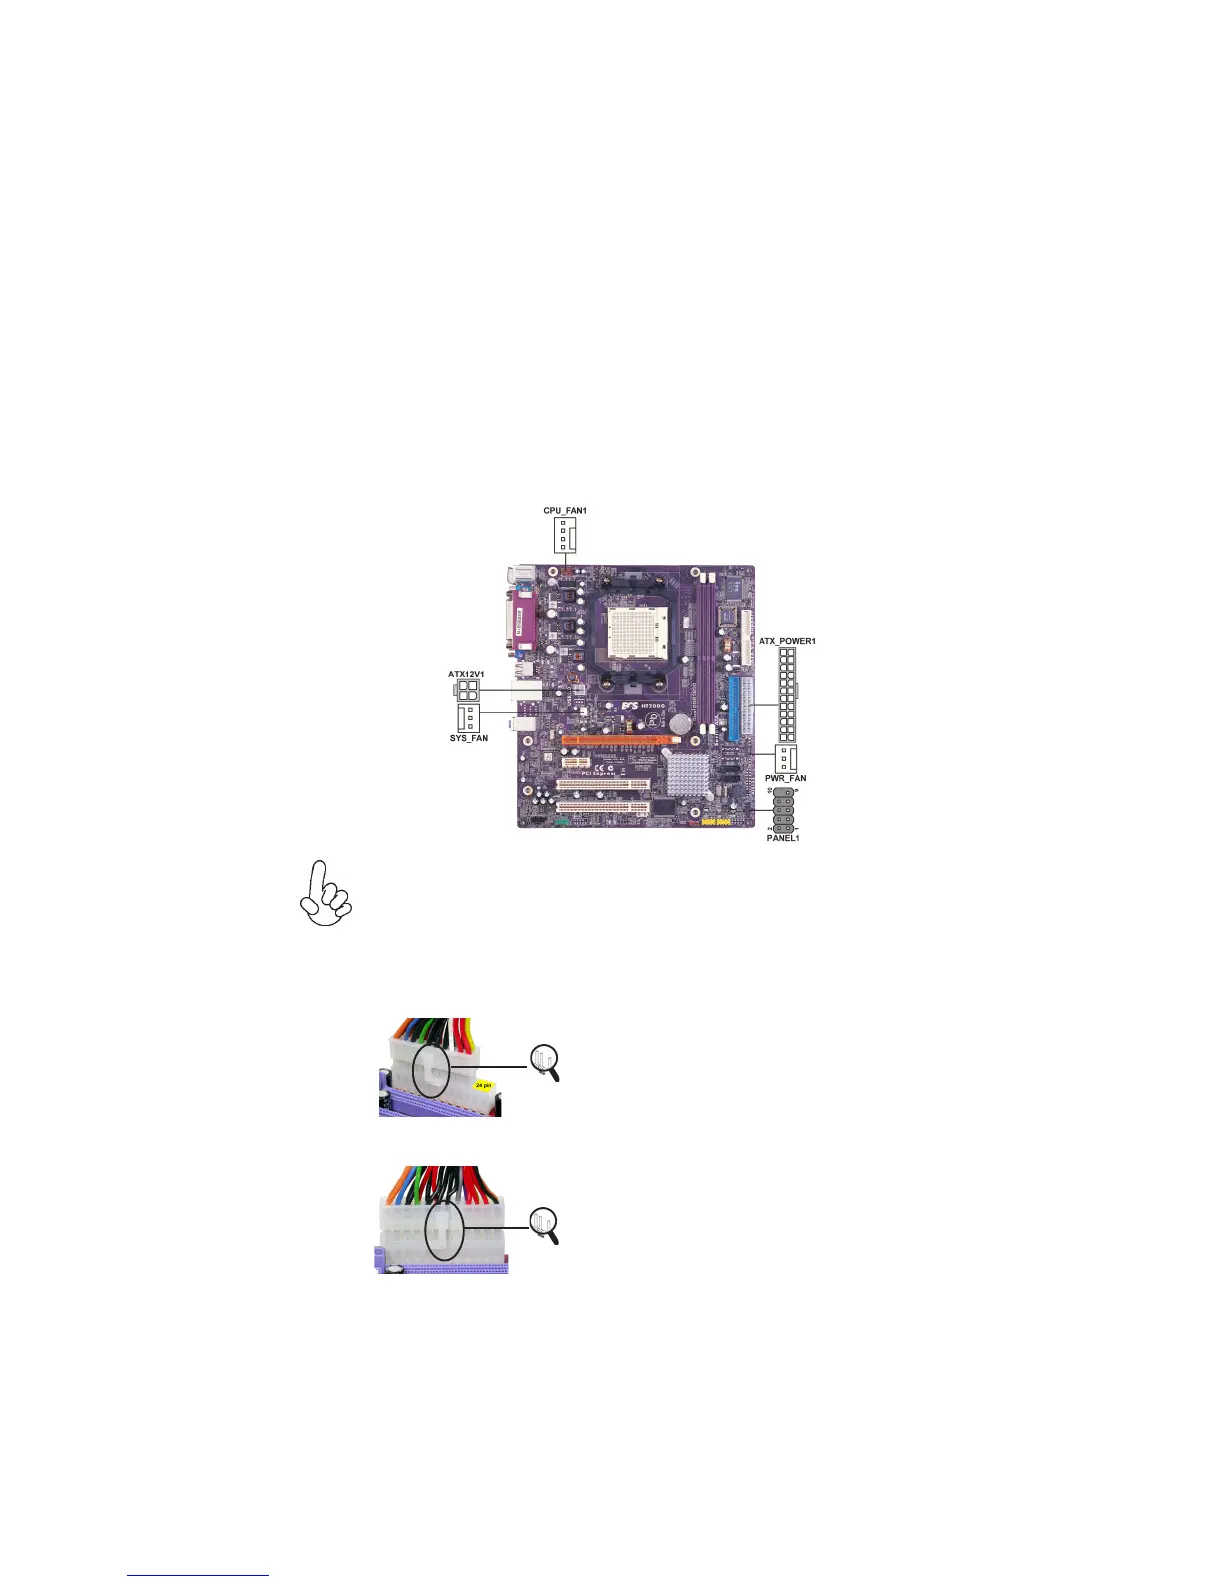
1 Connect the CPU cooling fan cable to CPU_FAN1.
2 Connect the power cooling fan connector to PWR_FAN.
3 Connect the system cooling fan connector to SYS_FAN1.
4 Connect the standard power supply connector to ATX_POWER1.
5 Connect the auxiliary case power supply connector to ATX12V1.
6 Connect the case switches and indicator LEDs to the PANEL1.
Connecting 20/24-pin power cable
Users please note that the 20-pin and 24-pin power cables can both be connected
to the ATX1 connector. With the 20-pin power cable, just align the 20-pin power
cable with the pin 1 of the ATX_POWER1 connector. However, using 20-pin
power cable may cause the system to become unbootable or unstable because of
insufficient electricity. A minimum power of 300W is recommended for a fully-
configured system.
20-pin power cable
24-pin power cable
With ATX v2.x power supply, users please note
that when installing 24-pin power cable, the
latches of power cable cling s to the right side
of the ATX_POWER1 connector latach.
With ATX v1.x power supply, users please note
that when installing 20-pin power cable, the
latche of power cable falls on the left side of
the ATX_POWER1 connector latch, just as the
picture shows.


 To Next Page