Do you have a question about the Esko Kongsberg V-Series and is the answer not in the manual?
Explains the manual's main sections and their content.
Explains conventions for text styles, buttons, and symbols used in the manual.
Explains how to interpret orientation in diagrams and illustrations.
Notes manual availability in multiple languages, with English illustrations.
States table conforms to safety regulations; hazards if instructions are not followed.
Outlines responsibilities of manufacturer, customer, and operators.
Lists requirements for personnel operating the system.
Defines 'Intended Use' and 'Non-intended Use' with examples and consequences.
Introduces danger zones around moving parts and their markings.
Details hazards from moving parts, laser radiation, and high voltage.
Advises against loose clothing and recommends hearing protection.
Warns of risks from breaking bits or ejected material.
Warns about potential epileptic reactions from LED strobing light.
Explains various safety warning symbols used in the manual.
Provides an overview of safety devices with a diagram and list.
Explains the function and positions of the Emergency Stop button.
Describes the meaning of the warning lamp's states (Off, On, Flashing).
Explains the DynaGuard system, its components, and operation.
Recommends specific protective equipment for operators.
States that troubleshooting and repair require authorized personnel.
Mentions residual safety risks to be aware of despite precautions.
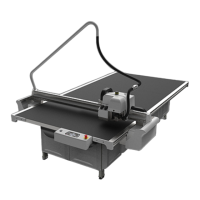
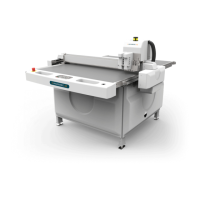
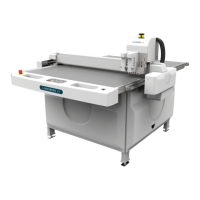
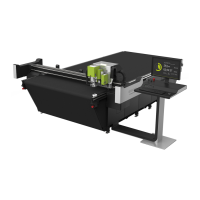
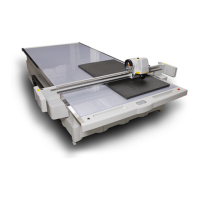
Explains component names and axis conventions with diagrams.
Describes the main power switch and its positions.
Details the buttons and indicators on the operator panel.
Explains functions of Start, Pause, Vacuum, Jog, and other buttons.
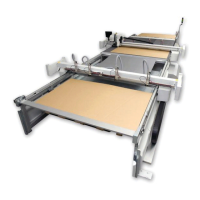
Explains the Blow Back function for conveyor belts and material handling.
Describes the high-pressure air system components and requirements.
Lists available application programs like iPC, SysLoad, and HWT800.
Step-by-step guide to powering up the system.
Instructions to reset the safety system using the Pause button.
Step-by-step guide to powering down the system.
Procedures to resume operation after a safety system activation.
Safety precautions and overview of job preparation steps.
Steps to create a new job from an existing file.
Instructions to access and ensure proper layer setup.
Verifies production setup parameters like copies, speed, and registration.
Specifies job as High Accuracy or High Speed.
Verifies flute/grain direction corresponds to material.
Configures vacuum area for the job.
Checks job readiness, positions material, starts vacuum and job.
Pre-execution check for the vacuum cleaner.
Procedure for preparing and executing a pen plot.
Explains manual and automatic tool height measurement using X-Pad.
Step-by-step guide for calibrating the X-Pad measuring pad.
Rules for cutting materials 45-50mm thick.
Procedure for preparing hard board materials using specific tools.
Explains multi-pass milling for thicker materials.
Describes using reverse operation for alignment and creasing.
How to select and use different reference point settings.
Explains functions and parameters important for V-system operation.
Wizard to obtain correct angle between X and Y axes.
Wizard to measure table size by moving the tool head.
Sets ruler positions for accurate material alignment.
Establishes the main reference point on the cutting table.
Measures table top surface to create a map for depth control.
Explains reference points and coordinate system origins.
Configures table speed for jobs and tools.
Adjusts table acceleration for jobs and tools.
Configures continuous and incremental jog speeds and directions.
Calibrates table top reference for tool height.
Configures router type and COM port for communication.
Notes that the board size feature is not implemented yet.
Introduction to the tool configuration and adjustment dialog.
How to access tool adjustment wizards and general adjustment procedures.
Step-by-step guide for calibrating tool height.
Procedure for setting lag for rotating tools and performing lag tests.
Explains wizard and manual procedures for rotation adjustment.
Explains wizard and manual procedures for center offset adjustment.
Fine-tuning center offset and angle using a dialog.
Adjusting tool offset relative to the laser pointer.
Options to ignore, delete, or add tools to the tool list.
Guidelines for handling and caring for precision tools.
Information on tool inserts with built-in motors.
Overview of FlexiHead and MultiCUT tool heads and their capabilities.
Procedures for mounting and dismounting tool heads.
Introduction to the FlexiHead tool head.
Describes the components of the FlexiHead tool head.
Instructions for replacing tool inserts in the FlexiHead.
Introduction to the MultiCUT special purpose tool head.
Information on available chucks and how to replace them.
Details the components and functions of the MultiCUT tool head.
Safety precautions for unattended operation and vacuum cleaner use.
Safety advice regarding eye protection, hearing, spindle speed, and bits.
Precautions for chuck valve operation, air quality, and bit clamping.
Instructions for long term storage of spindles.
Recommendation to have a replacement spindle for regular production.
Advice on using milling bits, especially for thin materials.
Guidelines on milling bits, feed rates, passes, and material hold-down.
Step-by-step guide on how to insert or replace a router bit.
Explains the use of sleeve adjustment tools for milling bits.
Procedure for cleaning the chuck and taper regularly.
Identifies issues with chucks and when to replace them.
Guidelines for bit length and position for optimal performance.
Explains the false air valve and its use for reducing suction force.
Details tool adjustments for FlexiHead and router positions.
Rules for adjusting table top and tool height for MultiCUT.
Covers warm-up procedures and suction house cleaning.
Introduction to Chiller 1 for MultiCUT-HP.
Lists common error signals and conditions for the chiller.
Operation instructions for the optional chiller heater.
Introduction and specifications for Chiller2016.
Prerequisites and steps for chiller startup.
Lists monitored error conditions for the chiller.
Describes the functions of the measuring foot.
Information on the Class II laser pointer and its use.
Procedure for calibrating the X-Pad measuring pad.
How X-Pad works and how to add depth for tool measurements.
Lists tools that can and cannot be measured using X-Pad.
Description, assembly, and pressure adjustment of the Ball Point Pen tool.
Description of the Bevel Knife and how to replace its blade.
Description of the Bevel Knife U20, a tool for 20-degree cuts.
Description of the Braille Tool for creating braille signage.
Details the operation and components of the Braille Tool.
Setup for braille patterns, including tool height and offset calibration.
Guidance on creating braille job files and setting parameters.
Description of the CorruSpeed Knife for cutting corrugated materials.
Tool adjustment parameters for the CorruSpeed Knife.
Description of the Crease Tool for creasing wheels.
Description of the 60mm Crease Tool for liner cracking.
Tool adjustment parameters for Crease Tools.
Introduction to drill tools.
Description of the Flexi Drill Tool.
Description of the Reboard Drill Tool for paper-based materials.
Drill bit requirements for proper tool operation.
Tool adjustment parameters for drill tools.
Information on using Drill Tool with ArtiosCAD.
Description of the Foam Knife for cutting foam materials.
Introduction to Liquid Ink Tool and Fibertip Tool.
Description of the Liquid Ink Tool for ink drawing on foil.
Description of the Fibertip Tool for ink drawing.
Tool adjustment parameters for Ink Tools.
Description of the KissCut tool for vinyl cutting.
Details KissCut components and procedures for replacing the knife blade.
Covers KissCut tool pressure, foot solution, and adjustments.
Description of the MicroCut tool for precise cutting depth.
Explains MicroCut cutting depth setting and blade change.
Description of the Psaligraphy Knife for fine detail cutting.
Tool adjustment parameters for the Psaligraphy Knife.
Description of the RBI 90-16 tool for rigid boards.
Covers RBI 90-16 knife blade insertion and tool adjustment.
Description of Reciprocating Knife models and their use.
Tool adjustment parameters for the Reciprocating Knife.
Description of the Rigid Material Knife.
Covers Rigid Material Knife blade insertion and tool adjustment.
Description of the RotaCut tool for light materials like fabric.
Procedure for replacing the RotaCut knife blade.
Covers RotaCut layer setup, lag, width, and tool adjustment.
Description of the Static Knife, a multipurpose tool.
Covers static knife operation and blade insertion.
Tool adjustment parameters for the Static Knife.
Description of the VI30-16 Knife Tool.
Procedure for mounting and adjusting VIxx Knife Tools.
Description of the VI45 Knife Tool.
Description of the VI45-10/12 Knife Tool.
Covers cutting depth and adjustment for VIxx/VI45 Knife Tools.
Routine daily checks and cleaning tasks for the equipment.
Weekly cleaning and lubrication of guide-ways and bearings.
Maintenance for external equipment like PC and vacuum pump.
Location and procedure for replacing MPU fuses.
Location and procedure for replacing X1 amplifier fuses.
Location and procedure for replacing X2 amplifier fuses.
Location and procedure for replacing Y/Z amplifier fuses.
Location and procedure for fuses related to tool rotation/knives.
Procedure for replacing fuses in the Chiller2016 unit.
Lists specific fuse details for Chiller2016 at different voltages.
How to use the Zefiro vacuum cleaner, including filter shaking and container management.
How to use the TB ESKO high-capacity vacuum cleaner.
Introduction to the Compact Vacuum Cleaner.
Procedure for emptying the container of the Compact Vacuum Cleaner.
FAQs related to machine power, safety system, and servo errors.
FAQs related to tool cutting quality, offset, and alignment.
FAQs related to iPC connection issues with the machine.
Checking firmware and PC/IPC version compatibility.