EasyManua.ls Logo

ESPEC SU-222,242 - User Manual

ESPEC SU-222,242
4 pages
Print Icon
To Next Page IconTo Next Page
Loading...
Operation manual / Option
Product name / Option
No. 4009304005810
Bench-top type temperature (and humidity)
chamber / Dew tray
PREP 09.10.2013
REV 01.10.2014
This option operation manual has priority over standard operation manual when found in disagreement.
1 ESPEC CORP.
1. Application In the event that water leaks from the equipment, this pan-shaped dew tray will prevent the
spread of leaked water on the site. Place the chamber on this tray..
2. Equipment Dew tray for chamber/Dew tray for stand
Material: 18-8 Cr-Ni stainless steel
Model For chamber
For stand
C,H,L stand
SU/SH-222,242 W560 x D850 x H40
W690 x D970 x H40
SU/SH-262,242-5 W560 x D940 x H40
SU/SH-642,662 W660 x D1085 x H40 W790 x D1105 x H40
* Dew tray is installed at site.
Installation charge is not included. Contact the purchased distributer or ESPEC CORP.
3. Accessories
Name For chamber
For stand
C stand, L stand, H stand common
Chamber fastening
bracket
4
Stand fastening
bracket (for C,L stand)
2
Stand fastening
bracket (for H stand)
2
Screw M5 8
Screw M4 4
Silicon sealant 2
Aluminum tape 3m
Accessory of stand (option) fixing bolt (M8): x4
Question and Answer IconNeed help?

Do you have a question about the ESPEC SU-222,242 and is the answer not in the manual?

Overview

This document describes the installation and features of a dew tray option for bench-top temperature and humidity chambers, designed to prevent water leakage from spreading.

Function Description

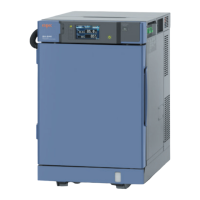
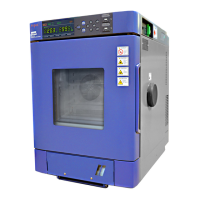
The dew tray serves as a containment unit for any water that might leak from the main chamber or its stand. By placing the chamber on this tray, any spilled water is collected, preventing it from spreading across the installation site. This is particularly useful for bench-top type temperature and humidity chambers where water leakage, though infrequent, could cause damage or inconvenience.

Important Technical Specifications

Product Name: Bench-top type temperature (and humidity) chamber / Dew tray Document Number: 4009304005810 Revision Dates: 09.10.2013 (PREP), 01.10.2014 (REV) Material: The dew tray is constructed from 18-8 Cr-Ni stainless steel, ensuring durability and corrosion resistance.

Dew Tray Dimensions (For Chamber):

  • SU/SH-222,242: W560 x D850 x H40
  • SU/SH-262,242-5: W560 x D940 x H40
  • SU/SH-642,662: W660 x D1085 x H40

Dew Tray Dimensions (For Stand - C, H, L stand common):

  • SU/SH-222,242: W690 x D970 x H40
  • SU/SH-262,242-5: W690 x D970 x H40
  • SU/SH-642,662: W790 x D1105 x H40

Accessories Included:

  • Chamber fastening bracket: 4 units
  • Stand fastening bracket (for C, L stand): 2 units
  • Stand fastening bracket (for H stand): 2 units
  • Screw M5: 8 units
  • Screw M4: 4 units
  • Silicon sealant: 2 units
  • Aluminum tape: 3m
  • Accessory of stand (option) fixing bolt (M8): x4

Drainage:

  • A water drain pipe is included for the dew tray.
  • The suitable hose size for connection is I.D. φ12 mm.

Usage Features

Installation Procedure (Dew Tray for Chamber):

  1. Place the chamber dew tray in the desired location.
  2. Position the chamber directly on top of the dew tray.
  3. Insert the chamber fastening brackets into the chamber's adjuster feet.
  4. Secure the brackets and adjuster feet using two screws for each of the four positions.

Installation Procedure (Dew Tray for Stand):

  1. Place the dew tray for the stand in the intended location.
  2. Apply silicon sealant (10mm wide, 3mm thick) to the shaded area of the dew tray. It is crucial to degrease the area with alcohol or paint thinner before applying the sealant.
  3. Secure the front frame of the dew tray to the main dew tray using four screws.
  4. Connect the front frame and the main dew tray with aluminum tape, avoiding areas covered by silicon sealant. If sealant remains, clean it with alcohol or thinner before applying the tape.
  5. Apply silicon sealant to the corner formed by the front frame and the dew tray.
  6. Secure the stand bracket to the stand using two M8 fixing bolts (two places). There are different types of brackets for C, L, and H stands, so the appropriate type must be used.
  7. Anchor bolts (M12) for fixing the stand to the floor are to be provided by the customer.

Drainage System:

  • The dew tray includes a drain pipe to manage collected water.
  • Users can connect a hose (I.D. φ12 mm) to this drain pipe to direct water to a container or a suitable drainage system.

Maintenance Features

Water Level Monitoring:

  • Regularly check the water level in the dew tray.
  • If water is collecting, ensure it does not overflow.
  • If using a continuous water supply or an optional additional water tank, it is essential to drain water into a container to prevent overflow.

Preventing Backflow and Ensuring Proper Drainage:

  • To prevent backflow into the chamber, do not share the drainage line with other equipment.
  • Always leave the water tank drain hose and drain pipe ends open to the atmosphere.
  • The drain pipe should be raised about 5 cm or more off the floor or the chamber's supporting surface. This creates a pocket in the line, which prevents proper drainage and can cause backflow into the dew tray or mechanical parts compartment.
  • If any part of the drain pipe is higher than the drain outlet, water will not drain smoothly, potentially flooding the test area floor.

Cleaning:

  • Before applying silicon sealant, degrease the area using alcohol or paint thinner to ensure proper adhesion.
  • If silicon sealant remains on areas where aluminum tape is to be applied, clean it with alcohol or thinner.

ESPEC SU-222,242 Specifications

General IconGeneral
BrandESPEC
ModelSU-222, 242
CategoryClimate chamber
LanguageEnglish

Related product manuals