2 ESPEC CORP.
No. 4009304005810
4. Assembly procedure
4-1. Dew tray for chamber
< Procedure >
1) Place the chamber dew tray
①
where the chamber is to be placed. Place the chamber on the dew
tray.
2) Insert the chamber fastening bracket
②
to the chamber’s adjuster foot, and fix the brackets and adjuster
foot with two screws
③
for each position. (4 places)
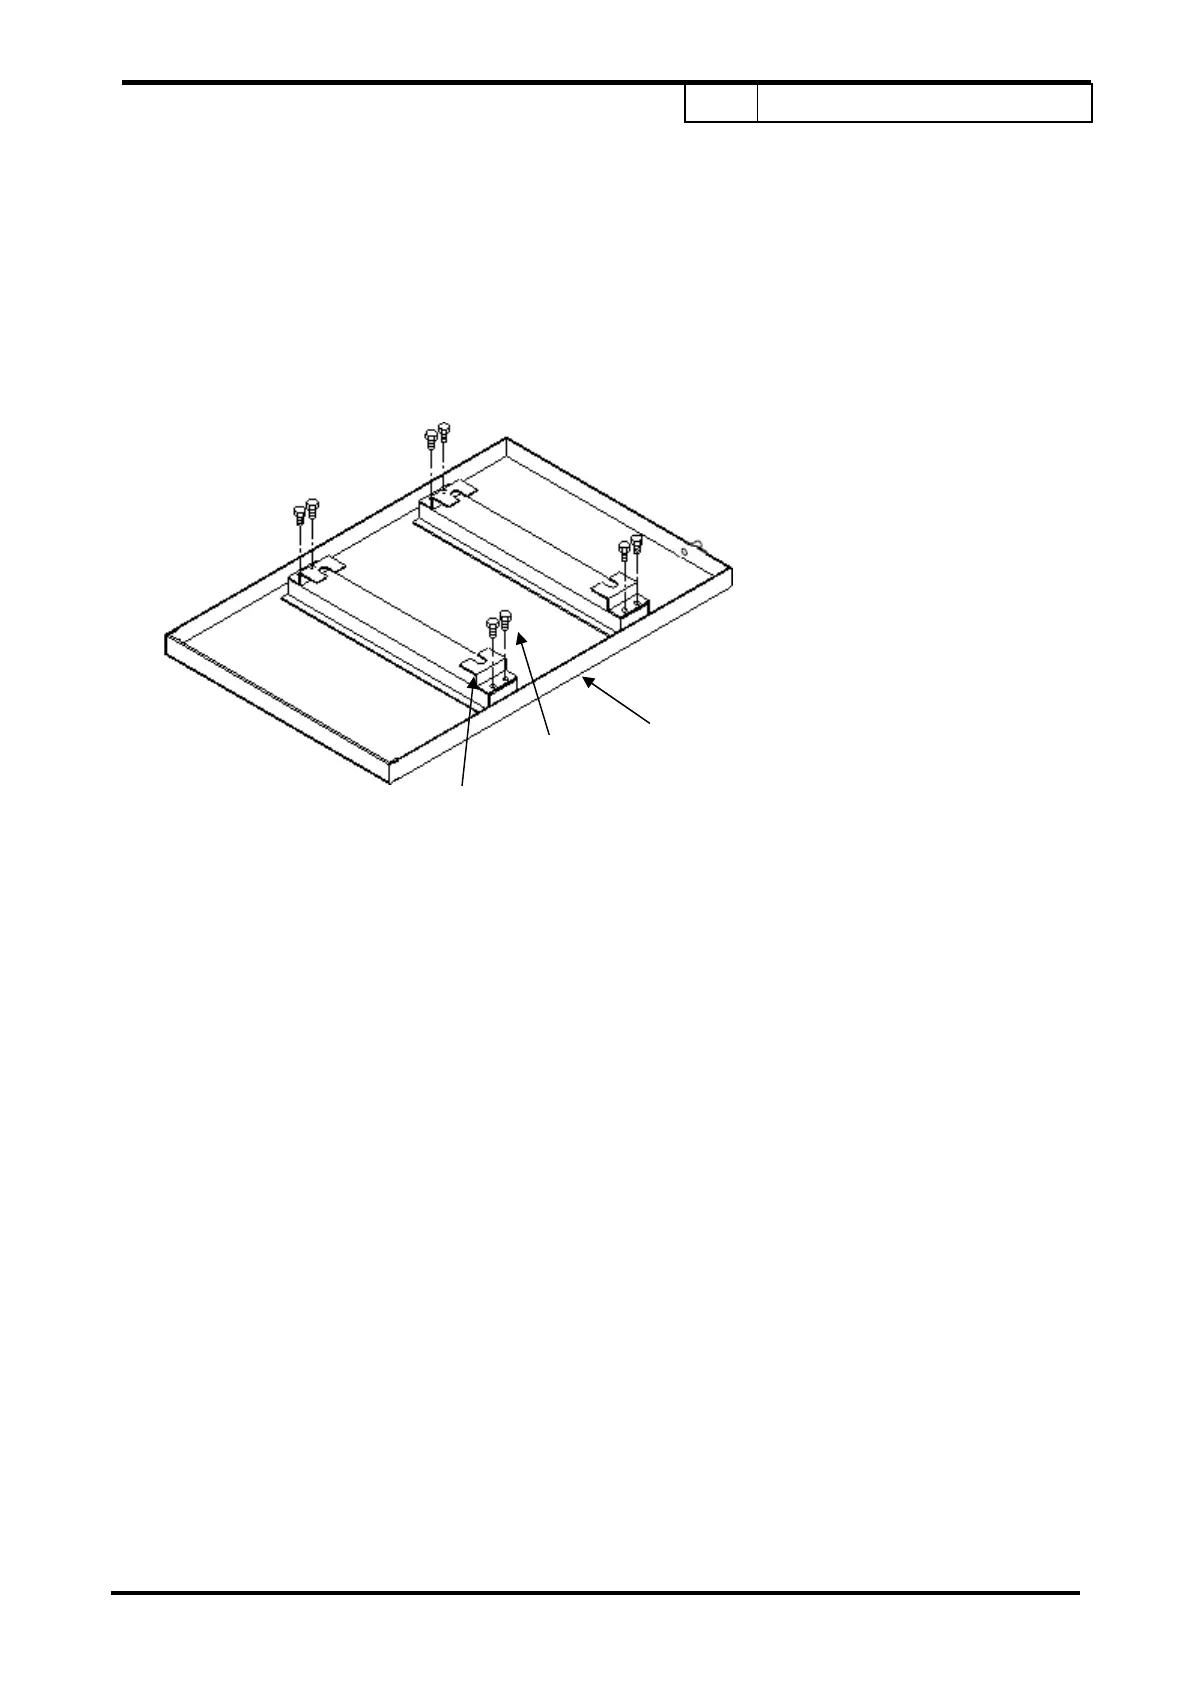
4-2. Dew tray for stand
< Procedure >
1) Place the dew tray for stand
①
where the chamber to be placed. Place the chamber on the dew tray.
2) Apply the silicon sealant included as accessory to the shaded area
③
of the dew tray for the stand.
(10mm wide, 3mm thick)
* Degrease the area to apply the silicon sealant using alcohol or paint thinner.
3) Secure the front frame of the dew tray
②
to the dew tray with the four screws
⑤
.
4) Connect the front frame
②
and the dew tray
①
with aluminum tape
④
as detailed in Fig. 1.
(Aluminum tape cannot be used for silicon sealant covered area. If silicon sealant remains, clean by
alcohol or thinner before covering with aluminum tape.)
5) Apply the silicon sealant to the corner formed by the front frame
②
and the dew tray
①
as shown in
Fig. 2.
6) Secure the stand bracket
⑦
to the stand by two fixing bolts (M8) included as accessories for the stand
⑥
. (2 places).
*There are two types of brackets for the stand as accessories. Use proper type for each stand.
*Anchor bolts (M12) for fixing to the floor is provided by customer side.
②
③
①
 Loading...