9
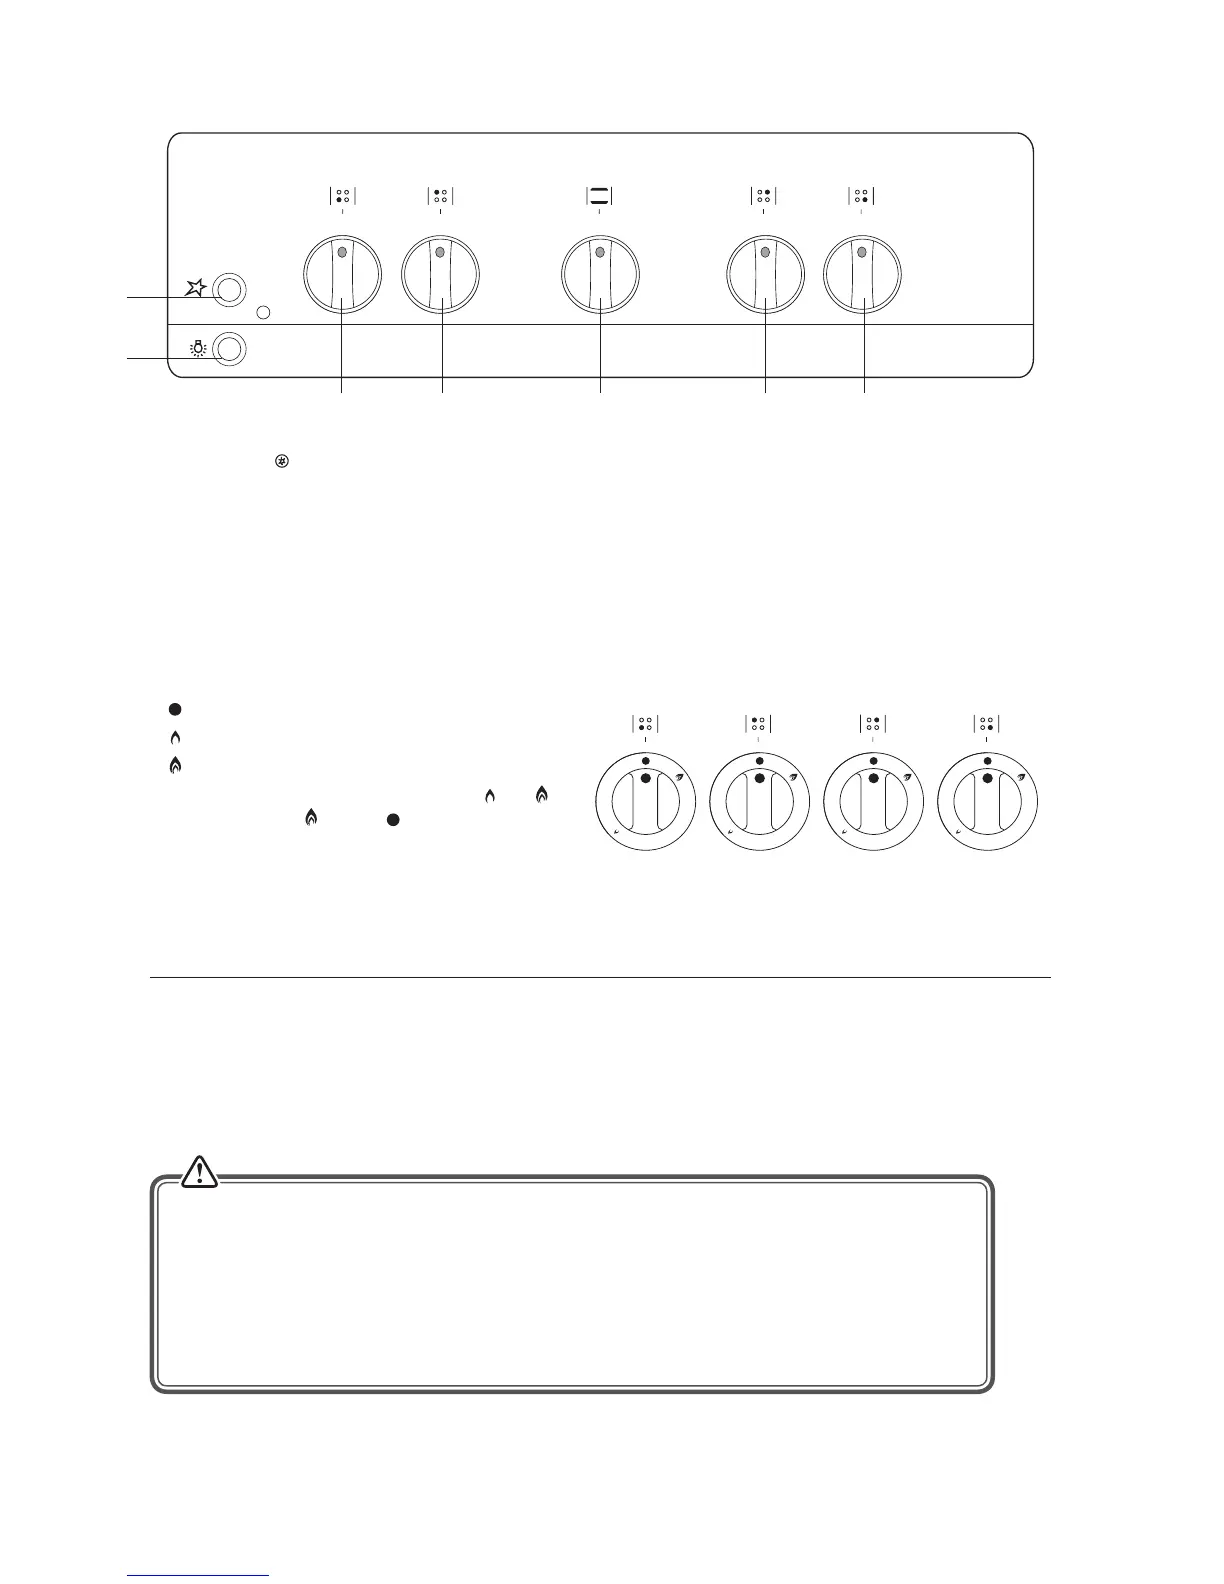
Control Panel
1. Ignition Switch
2. Oven Light Switch
3. Front Left Burner (Large) Control
4. Rear Left Burner (Standard) Control
5. Oven Control
6. Rear Right Burner (Standard) Control
7. Front Right Burner (Small) Control
Gas Burners
The relevant controls adjust the ow of gas through each of the burners.
•
= OFF
•
= Minimum Flame
•
= Maximum Flame
You can cook at any heat setting between
and ,
but never between and the position.
1
2
3 4 5
6
7
* All images are for indication only; please refer to your individual unit for actual item.
Before Using Your Cooker
Before using your new cooker, please:
• Read this instruction/installation manual, taking special note of the "Safety Warnings" section.
• Make sure all the controls are turned o.
• Turn the mains power on.
• This appliance is for cooking purposes only. It must not be used for other purposes, for example
room heating.
• The use of a gas cooking appliance results in the production of heat, moisture and products
of combustion in the room in which it is installed. Ensure that the kitchen is well ventilated
especially when the appliance is in use: keep natural ventilation holes open or install a mechanical
ventilation device (mechanical extractor hood). Prolonged intensive use of the appliance may
call for additional ventilation, for example opening of a window, or more eective ventilation, for
example increasing the level of mechanical ventilation where present.