25 / 53
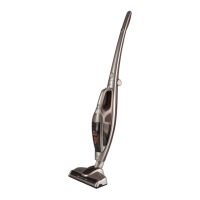
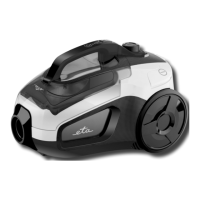
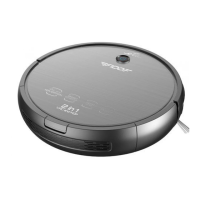
II. EQUIPMENT AND ACCESSORIES OF VACUUM CLEANER (Fig. 1)
A – vacuum cleaner
A1 – button A4 – handle
A2 – light signaling A5 – vacuum cleaner lid lock button
A3 – container lock button
B - dust container
B1 – HEPA filter B3 – microfilter 1
B2 – separator B4 – microfilter 2
C - extension adapter
C1 – button C3 – handle lid lock button
C2 – nozzle lid lock button
D - floor nozzle with rotation brush
E - accessories
E1 – upholstery nozzle E3 – crevice nozzle
E2 – brush
F – holder
G – support
G1 – support lid lock button
H – power cord
III. VACUUM CLEANER PREPARATION
Remove all the packing material, take out the vacuum cleaner and the accessories.
Assembling holder (i.e. charging base)
Insert support G to holder F by slight pushing to the maximum position (you will hear
a snapping sound). To remove the support from the holder you have to push lock button
G1 and then to pull the support out (Fig. 2).
Assembling extension adapter
Straighten the handle of extension adapter C to the maximum working position (you will
hear a snapping sound). For tilting the handle you have to push lock button C3 (Fig. 3).
Slide floor nozzle D slightly to extension adapter C to the maximum position (you will hear
a snapping sound). After taking the nozzle from the adapter you have to push lock button
C2 and then to pull the nozzle out (Fig. 4).
Fixing vacuum cleaner into adapter
Put vacuum cleaner A to adapter C with the suction vent and they tilt the vacuum cleaner
to the aperture to the maximum position (you will hear a snapping sound). After taking the
vacuum cleaner from the adapter you have to push lock button A5 and then to pull the
vacuum cleaner out (Fig. 5).
Crevice/upholstery nozzle, brush
When connecting and disconnecting the accessories, follow the procedure in Fig. 6.
Slide the selected adapter to the hole in dust container B to the maximum position.
Remove the adapter in the opposite direction (Fig. 7).
GB