22
GB
/ 54
IV. USING OF THE VACUUM CLEANER
Remove all packing material, take out the vacuum cleaner and the accessories. Pull out
necessary length of power cord A17 and plug the power cord into a socket. Assemble
the vacuum cleaner accessories. If the cleaner is tted with telescopic tube B3, adjust its
length to t your gure (Fig. 5).
Floor nozzle B1 is designed to be used to clean carpets or smooth ooring (Fig. 6). If the
oor nozzle is tted with a brush, pull it out by switching over a ap when vacuuming hard
oorings. You can use crevice nozzle C3 for vacuuming places that are hard to access
(Fig. 7). Upholstery nozzle C1 or brush C2 can be used to clean various types of furniture
(Fig. 8, 9). The vacuum cleaner can be switched on or off by pushing button A4 marked
with the symbol
(Fig. 10). The suction power can be adjusted with the control on hose
handle B2 (Fig. 11) or by setting regulation A6 (Fig. 10). The minimum suction power
is recommended for ne fabrics (e.g. curtains, drapes). The maximum suction power is
recommended for oor coverings (e.g. heavy-duty carpets). After nishing work, switch
off the vacuum cleaner and unplug it from the power supply. By switching button A5 with
symbol
(Fig. 10) the power cord will be wound automatically. The vacuum cleaner can
be held and carried by handle A9.
Note
If the rotation brush is blocked during operation (e.g. due to sucking in large foreign
objects, due to winding carpet piles, threads or hair on them etc.) turn off the vacuum
cleaner by switch A4. Then remove the cause of blocking or clean the rotation brush if
necessary (see par. V. MAINTENANCE).
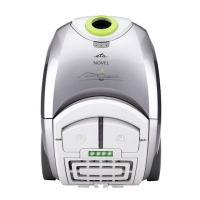
Dust lter fullness indication
If two red indicators light up on indicator A8 when the oor nozzle is lifted over the
vacuumed surface and the suction power is set to max. (pic. 12), the dust lter needs to be
changed. Disregard changes in indication during vacuuming.
Replacing the dust lter
Tip out the lid A1 of the cleaner by pressing closure A2 (pic. 13). Pull the dust lter A14
out of the guiding grooves of the holder A13 (pic. 14) and dispose it with common house
waste. Slide the front of the new dust lter (direction of the arrow) into the holder in the
suction space of the vacuum cleaner and push all the way. Press to close the lid of the
cleaner.
Note
– Safety lock A12 will not allow the lid to close if you forget to insert the dust filter.
– Make sure that the bearing area and sealing elements are functional.
Dust lter replacement UniBag
By lifting off blocking lock D1, dust lter A16 will be released from the adapter (Fig. 17).
Dispose of the dust lter with common municipal waste. Slide the projections on the head
of the new dust lter into the holes in the adapter D and secure the head by slight pushing
(you will hear a snapping sound). Check proper fastening of the carton front by slight
pulling of the dust lter. Slide the front part of the dust lter to holder in the suction space of
the vacuum cleaner and push it to the maximum position. Close the vacuum cleaner lid by
snapping it shut. You will hear a clicking sound.