ETC Service Note
Congo™ Power Supply Cable Upgrade Kit
Congo™ Power Supply Upgrade Kit Service Note Page 3 of 6 Electronic Theatre Controls, Inc.
Step 5: Install the new power supply cable loom #2, provided in the Upgrade Kit.
a: Connect the power supply cable loom #2 to the power supply.
b: Connect the first female connector to the hard-disk connector.
c: Route the cable through the opening of the EMC cage.
d: Connect the second connector to the main board 12V extension.
e: Connect the third connector to the VGA card extension.
f: Route the cable through the opening of the EMC cage.
g: Connect the fourth female connector to the floppy disk drive.
Step 6: Install the Reset / LED cable loom provided in the Upgrade Kit.
a: Disconnect the existing Reset / LED cable loom connected between the
transition board and the main processor board.
Note:
Be careful to retain the grommet in place around the metal edge of the EMC cage.
Note:
Be careful to retain the grommet in place around the metal edge of the EMC cage.
Note:
The Reset / LED loom is a 4 wire assembly (yellow/red/brown/orange).
CAUTION:
Do not connect to the headers near the edge of the board, example J7 / J12.
System damage will occur.
PC Supply
male
female
Hard Drive Power
ATX 12V Power
VGA Card Power
Floppy Disk
1
2
3
4
EMC Cage
female
female
female
connect
here
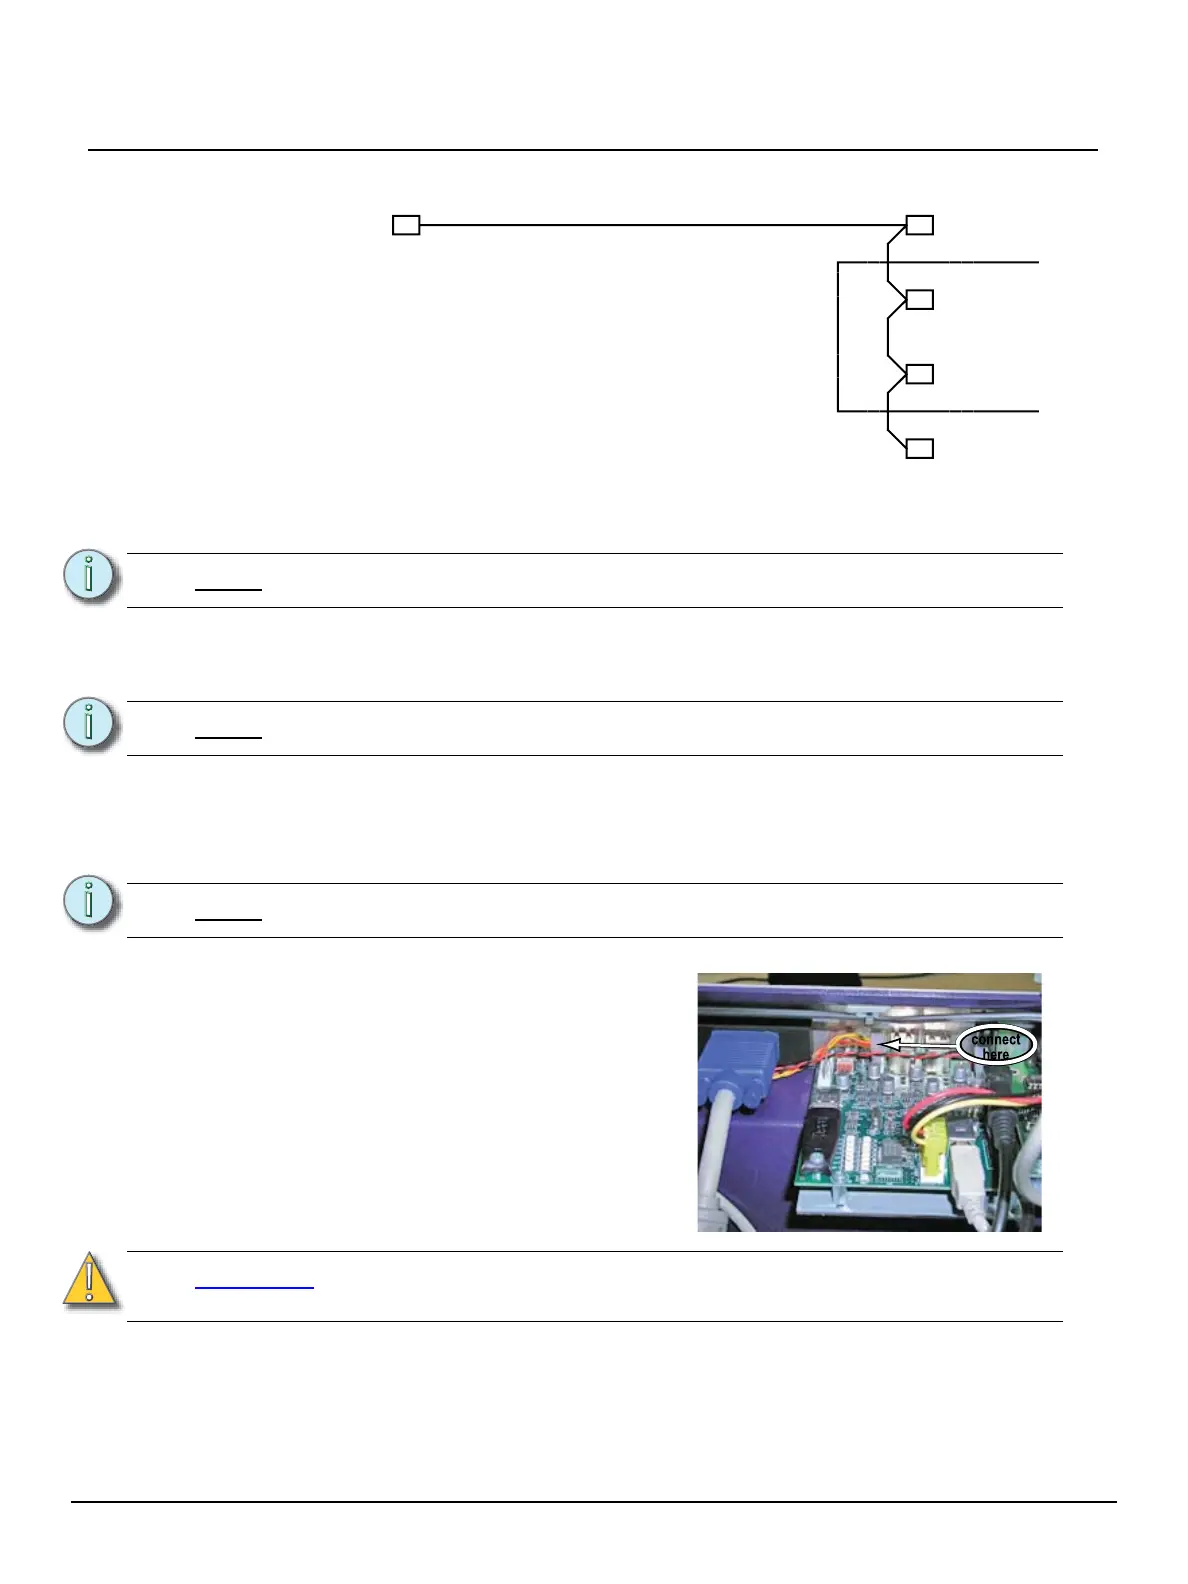
b: Connect the new Reset / LED cable
loom to J11 of the transition board
4250B5008. This is the connector
next to the USB ports.
 Loading...