2 The Retrofit 11
Finishing Touches
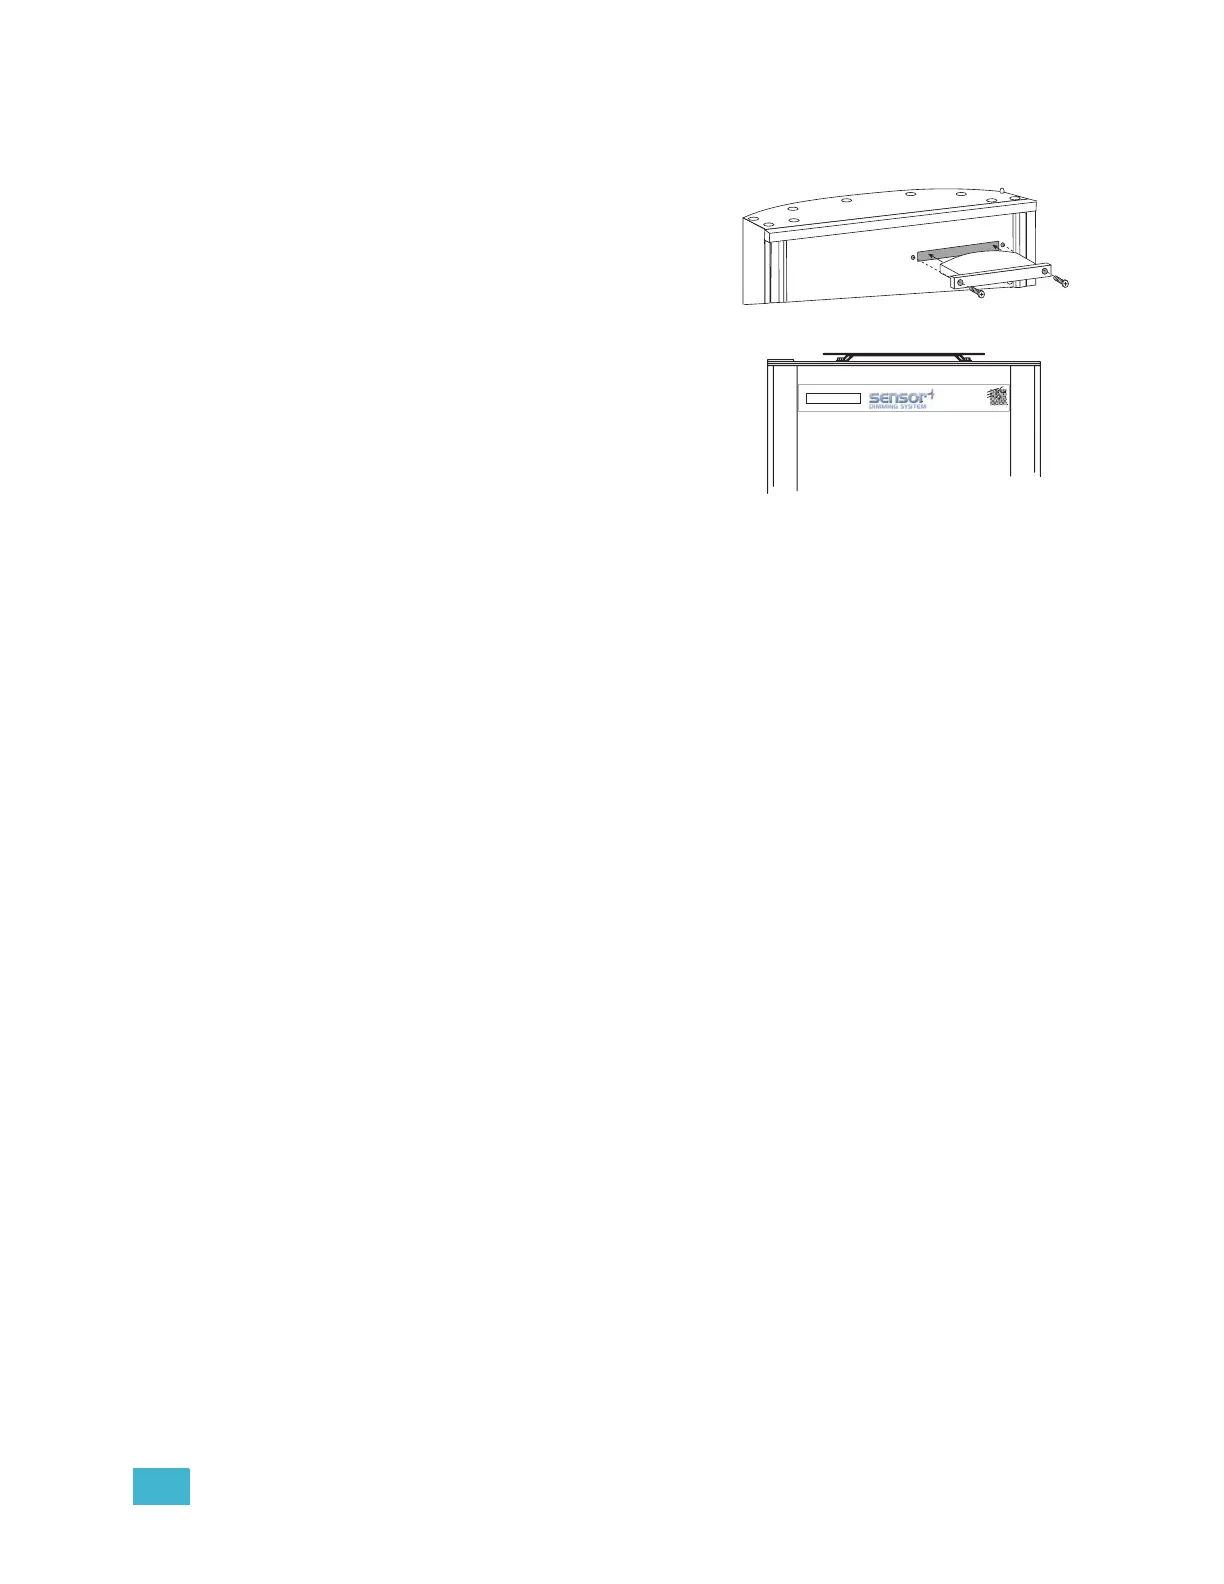
Step 1: Remove the old Sensor beacon acrylic in the door and discard.
Step 2: Install the Sensor+ beacon acrylic in
the door.
Step 3: Remove old Sensor label from the front
of the door and discard.
Step 4: Clean the door surface to remove any
dirt or old adhesive.
Step 5: Apply the new Sensor+ label to the
front of the door. Line up the label
around the opening for the acrylic in the
door and be sure the label is straight.
Use a piece of cloth or paper towel to
make sure the label is flat & smooth
and properly adhered to the rack door.
Repeat the above steps for the remainder of connected racks.
Verify the Retrofit
Step 1: Put the dimmer modules back in the rack in the correct/original order.
Step 2: Put the CEM+ in the rack.
Step 3: Power up the rack.
Step 4: Check that the CEM+ powers up and the rack fan turns on. (The only rack errors
should be a lack of DMX on the ports if the DMX source is not present.)
Configure the CEM+
Step 1: Configuration of the CEM+ is done via the front face panel interface or via a
graphical HTML interface called Sensor+ Connect that is resident in the CEM+.
Step 2: Configure the rack to reflect the rack type and dimmer module types installed.
Step 3: Configure the data types that will be used (DMX and EDMX) including the rack
patch.
Step 4: For detailed configuration information, please refer to the CEM+ Configuration
Manual.