11
6. OPERATING INSTRUCTIONS
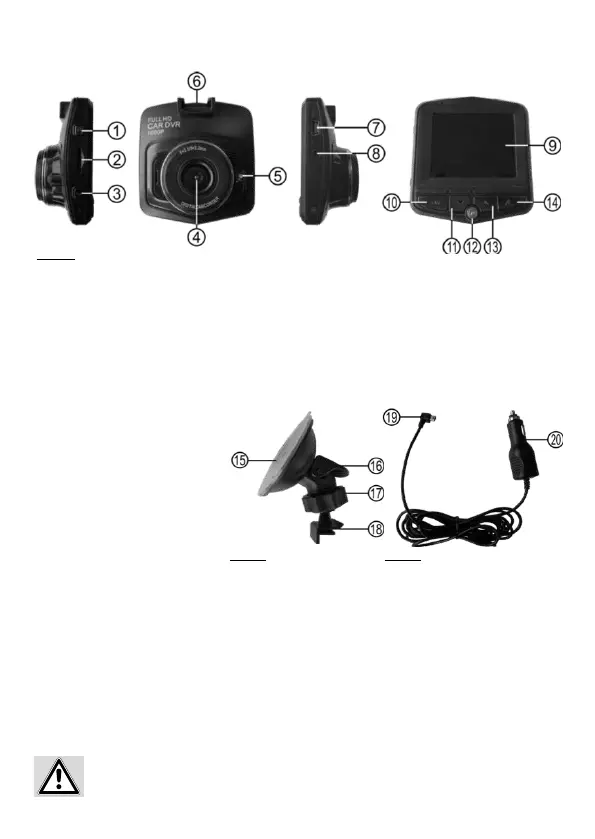
Figure 1: Camera
6.1 OVERVIEW
1 ON/OFF switch
2 Slot for memory card
3 Menu button
4 Lens
5 Power-LED
6 Mounting point
7 USB socket
8 AV output
9 Display
10 OK-button
11 Cursor button, down
12 Parking mode button
13 Cursor button, up
14 Mode button
15 Suction base
16 Lever
17 Coupling nut / ball joint
18 Camera mount
19 USB connector
20 Vehicle connector
Figure 2: Suction base mount Figure 3: Charging cable
Inserting the memory card
Make sure that the dashboard camera has been switched o. Insert the micro-SD into the slot (Position 2
in the overview). Pay attention to ensure that the memory card is correctly positioned. The contacts of the
memory card must face in the direction of the lens. Carefully push the memory card into the slot until it
engages with a soft click.
6.2 MEMORY CARD
Removing the memory card
Switch the camera o. To remove the memory card, press down and release. The card will pop up and you
can remove it.
Removing the memory card with the camera switched on may result in a loss of data or damage
to the device.