12
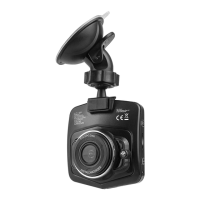
Clean the section of the windscreen where the camera is to be mounted. Put the camera mount (Position 18
in the overview) into the mounting point (Position 6 in the overview) of the camera. Press the suction base
(Position 15 in the overview) against the windscreen. Flip the lever (Position 16 in the overview). Undo the
coupling nut (Position 17 in the overview) on the ball joint. Align the camera. Tighten the coupling nut up
again.
Plug the USB connector (Position 19 in the overview) of the charging cable into the USB socket (Position 7
in the overview) of the camera. Lay out the charging cable in such a way that it does not impede visibility
and does not hinder you during the journey. Plug the vehicle connector (Position 20 in the overview) of the
charging cable into the 12 V socket of your vehicle.
Long press: Switches the camera on/o.
Video recording is started directly after the camera is switched on.
Brief press: Switches the Power-LED (Position 5 in the overview) on/o.
In Standby mode: A brief press starts video recording (red dot ashes on the display)
A second brief press stops video recording.
In Photo mode: A brief press takes a photograph.
In Play mode: A brief press plays the recorded video.
ON/OFF switch (Position 1 in the overview)
OK button (Position 10 in the overview)
6.3 INSTALLATION
6.4 CONNECTING THE CAMERA
6.5 FUNCTIONS
Lighting compensation: Here you can set the brightness of the video recording.
+2.0 …+0.0 … -2.0
Motion detector: When the motion detector is activated, the camera automatically starts
recording when motion is detected.
Switch o – open (switched on)
Video audio: Switches the audio on/o
Switch o – open (switched on)
Date stamp: The date is shown on the video.
Switch o – open (switched on)
In Standby mode: A brief press opens the menu for the video settings. With the cursor buttons
(Positions 11 and 13 in the overview), you can select the various menu items.
Press the OK button to open the selected menu item. Use the cursor buttons to
select the setting in the menu item, and conrm by pressing the OK button.
Settings in the video menu (symbol shows a video camera in the top left of the display):
Menu button (Position 3 in the overview)
Resolution: FHD – HD - 720P 1280x720 - WVGA 848x480 - VGA 640x480
Loop recording: Here, the camera records short video passages. When the memory is full, the
oldest recording will always be deleted.
Switch o –1 minute –2 minutes –3 minutes –5 minutes –10 minutes