10
English English
11
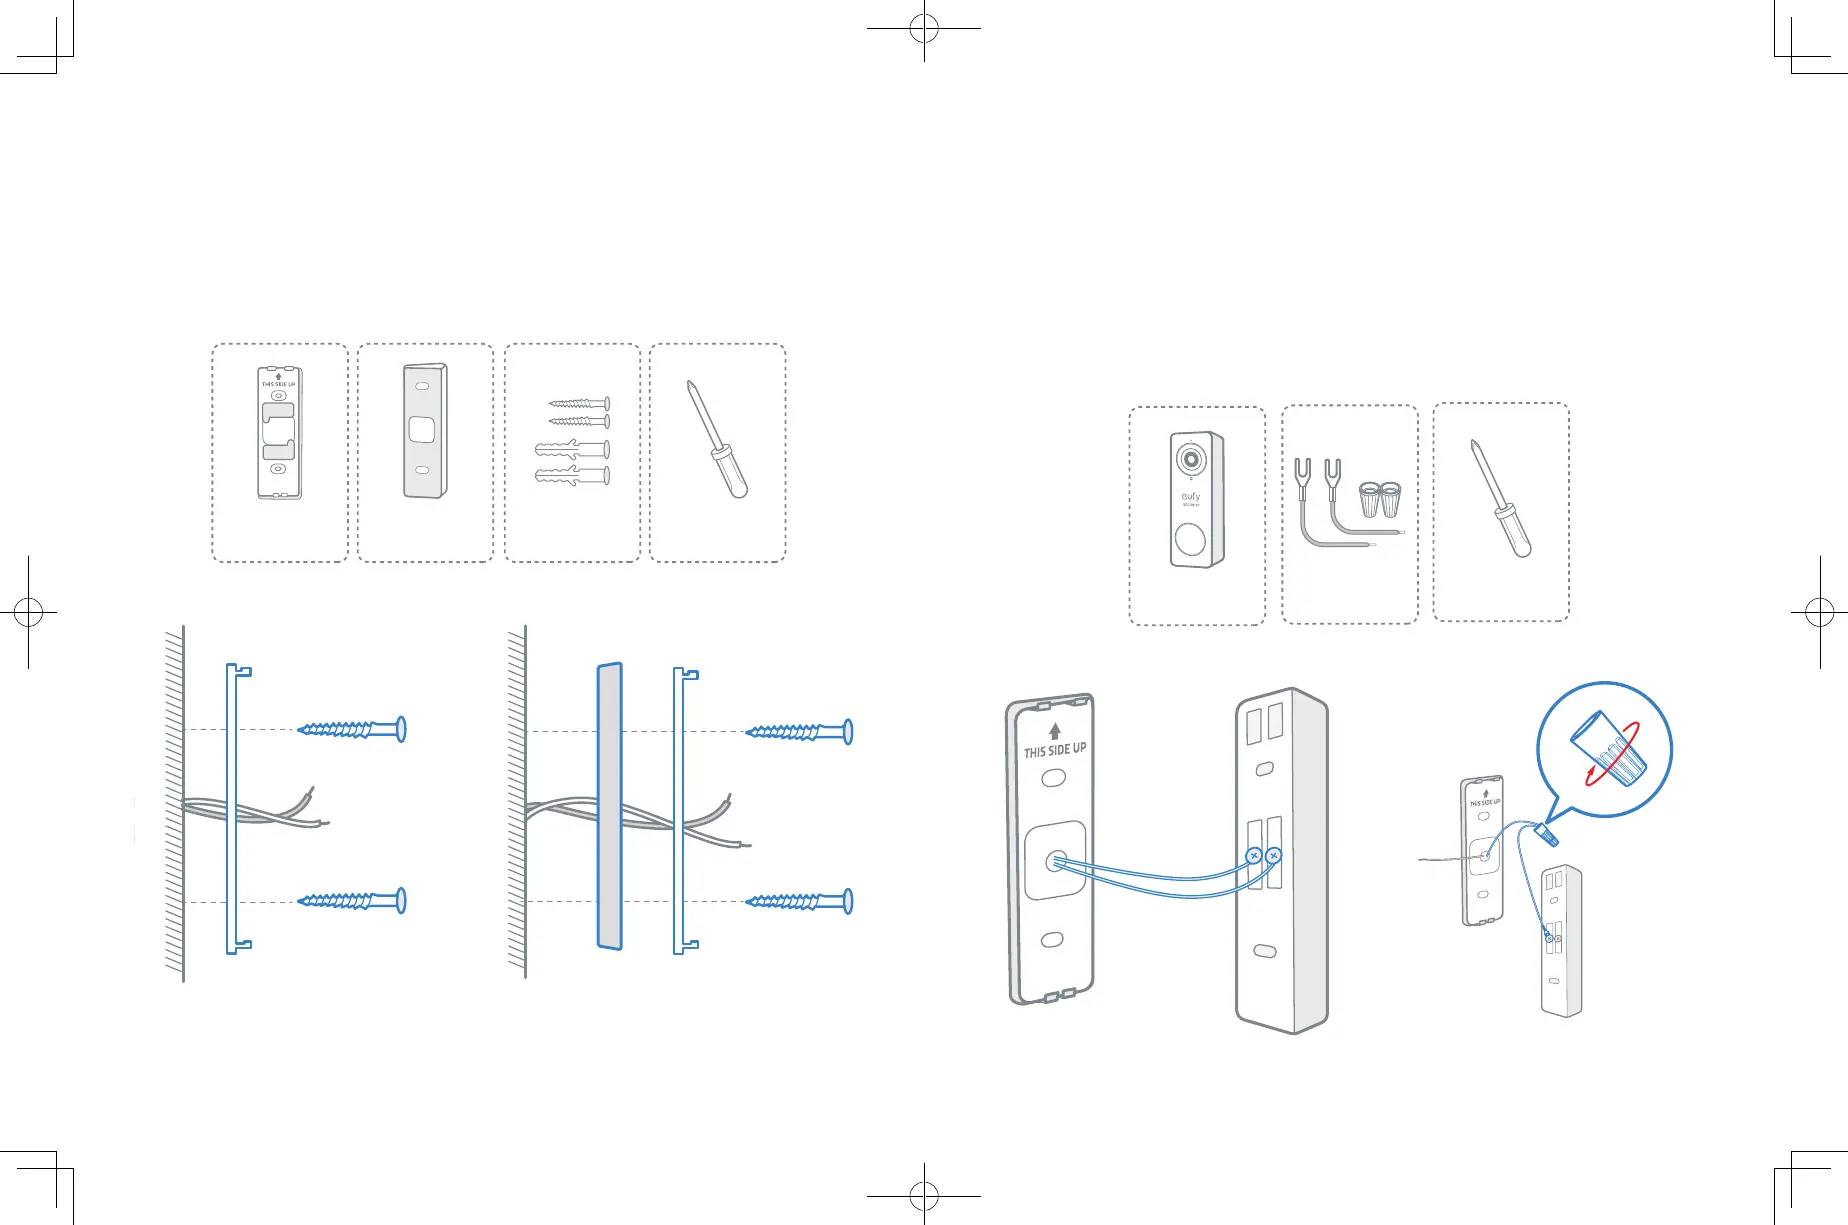
Step 7
Lead the two doorbell wires through the central square hole on the bracket before start mounting.
Insert the two screws provided through the screw holes or through the 15° mounting wedge(Install
the mounting bracket to the 15° mounting wedge in prior), and fasten the screws tightly.
What are required: Mounting Bracket / Screw Packs / 15° Mounting Wedge(Optional) / Phillips-
Head Screwdriver
Screw Packs (Anchors
are optional)
Phillips-Head Screwdriver
(User provides it.)
Mounting Bracket
(Attached to 15° Mounting Wedge)
15° Mounting
Wedge (Optional)
Without 15° Mounting Wedge
Mounting
Bracket
Wall
With 15° Mounting Wedge
Mounting
Wedge
Mounting
Bracket
Wall
Step 8
Connect the wires to the two terminals at the back of the doorbell, then tighten the terminal
screws.
Wire can connect to any terminal as the electric current is alternating current.
Note: To prevent short-circuit, make sure the wires are not touching each other after connecting
them to the terminals. If the wires are too short, use the extension wires and wire nuts provided to
make them longer. Use electrical wiring tape to secure the connection if the wall doesn't have space
for wire nuts.
What are required: Extension Wires and Wire Nuts (Optional) / Video doorbell / Philips-Head
Screwdriver
Phillips-Head Screwdriver
(User provides it.)
Video Doorbell 2K (Wired)
Model: T8200
Extension Wires and
Wire Nuts (Optional)