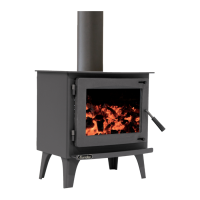
Jasper Freestanding Jasper Freestanding
!
WARNING
READ AND FOLLOW THESE INSTRUCTIONS FULLY AND CAREFULLY
BEFORE INSTALLING AND USING THIS APPLIANCE.
To aid heater installation, remove door, bae system, and rebricks to reduce
overall heater weight. Refer to the set-up section of this manual.
!
WARNING
Safety warnings
• A ue re with resulting damage may occur if the appliance is not
installed and maintained as per this booklet.
• Never place combustible materials such as wood, paper or furniture near
the appliance.
• This appliance is designed to burn dry hardwood. Do not burn
rubbish, driftwood, ammable liquids, pressurised canisters, or any
substance containing salt or corrosives.
• This appliance must not be installed and operated in an area where
kerosene, petrol, paint thinners, or other ammable liquid is used or stored.
• The ue system must be inspected and cleaned annually or sooner if
required. Failure to do so could result in excessive build up of creosote
which may result in a ue re, which may damage the ue or cause
damage to your home.
• The surface of the appliance becomes hot during operation. Do not
touch the surface of this appliance. Keep children away from the
appliance during operation. Do not allow anyone to operate this
appliance who is not familiar with this instruction booklet.
!
WARNING
Paint curing and care
• Your heater is coated with the best available heat resistant paint. Even
though the paint has been baked after application, it may require further
temperature curing. It may discolour if you overre the the heater on its
rst re. Please follow these instructions carefully to ensure the quality of
the paint on your heater is maintained.
• For the rst two or three rings, never exceed Medium air setting and
do not load the re more than half full. Do not use softwood fuel (cut up
pallets etc.) other than for kindling when rst lighting the re.
• Ensure that the lower air slide is fully closed once the re is established
during the curing process.
• On the initial re up you may detect smoke coming from the paint nish,
and from any oils that may be impregnated in the steel of the rebox.
This is normal. It is suggested to well ventilate your home on the initial
re up.
• Do not wipe the heater while the paint is curing. After the paint has
cured, the only maintenance required to maintain the heater’s nish is
to wipe it with a soft cloth (with water if necessary). DO NOT USE ANY
COMMERCIAL CLEANERS OR SOLVENTS ON THE PAINT FINISH.
• We are proud of the presentation of our products. If at any time you need
to freshen up the paint, your local Eureka dealer has touch-up
paint available for purchase.
The heater is painted in Stove Bright Metallic Black - Paint code 6309.
If you have any enquiries, please contact the dealer from whom you purchased your heater.
PLEASE COMPLETE:
Dealer Name:
Dealer Address:
Email: Phone:
1 14
Troubleshooting + Tips
• Sluggish or Lazy Fire
• A sluggish or lazy re can be caused by a number of dierent factors, or a combination of several factors.
• Ensure that the wood you are burning is of good quality, and has been well seasoned to ensure its moisture
content is below 16%. Overly wet wood will cool the re, smoke excessively, and cause your unit to run poorly.
The best way to determine the moisture content of your wood is to use a digital moisture meter. Wood that looks
dry on the outside can still be high in moisture on the inside.
• Ensure that there is not a negative pressure inside your house. Wood burning res consume air as part of the
combustion process. They need a constant supply of air to function correctly. If your home is overly sealed and air
is unable to get to the re as needed, it will create a negative pressure inside the house compared to the outside,
which will cause your re to smoke and run poorly. Running extraction fans in your kitchen or bathroom can also
impact on this in well sealed modern homes. The best way to test for this is to try opening an external door or
window near the heater while it is running, to determine whether it runs better with ready access to outside air.
• Non-standard ue installations can also cause your re to run poorly if not correctly installed. The addition of
bends and elbows in the ue will restrict the ow of ue gasses more than normal, meaning that you may need
to t an aditional length of ue in order for your heater to draw properly.
• Environmental factors such as consistent wind, structures or vegetation near the ue outlet, or other unforseen
factors can have a dramatic impact on the performance of your heater. These can usually be overcome by tting
an extra length of ue, or through the tment of a specialty cowl such as a wind chaser or a vertical discharge
cowl.
• Ensure you are putting enough wood in your re. Modern replaces are designed to run hotter and cleaner than
older designs. This means that they perform best when they are well stocked with wood and have a hefty bed
of hot coals. You will become familiar with the unit as you use it, and learn what sort of operation best suits your
needs and wood type. As a general rule it is best to start out by building a big re and then reducing the fuel load
to a level that you nd suitable for your needs. This allows the ue to reach an appropriate operating temperature
for it to draw properly from the beginning, which will promote an active re and good heat output.
 Loading...