Jasper Freestanding Jasper Freestanding 7 8
Installation (continued)
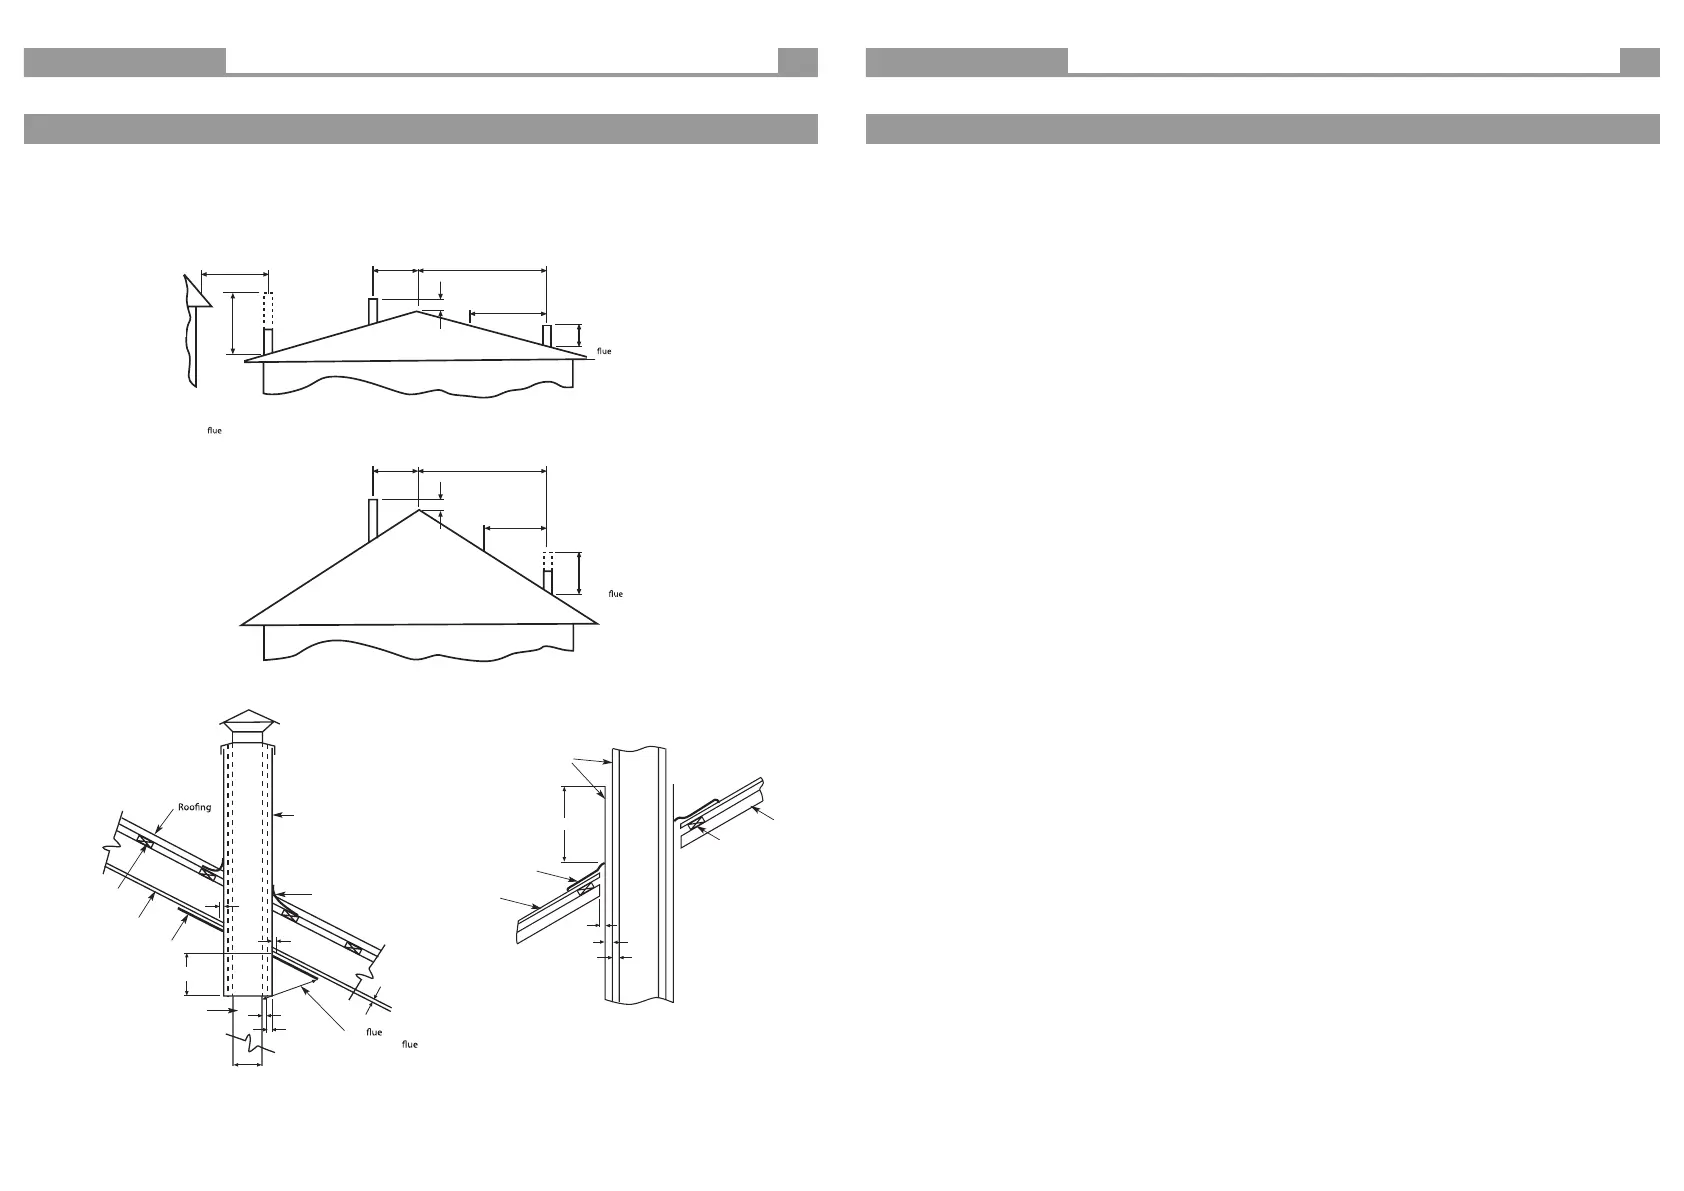
Flue and chimney requirements
The ue pipe shall extend not less than 4.6m above the top of the oor protector.
Note: Installation must be caried out by a licensed installer in accordance with AS/NZS 2918:2018.
6000mm
3000mm
3000mm
1000mm
min if clear
within
3000mm of
top
Increase from
1000mm min
until clear
within 3000mm
of
top
600mm min
More than 3000mm
600mm min
More than 3000mm
or less
3000mm
or less
Increase as
necessary
until
nothing
within
6000mm of
top
Any nearby
structure
3000mm
Flue pipe casing
Flashing
3 x diameter
from active
to
heat sensitive
surface
Batten
Flue
pipe
Flashing
Flue pipe casings
Heat sensitive roof
25mm
25mm
25mm
Flue pipe
Gap 25mm
Gap 25mm
Batten
Ceiling
Ceiling Plate
See clause 4.6.3(a) of AS/NZS 2918:2018
25mm
12mm
25mm
150mm dia
Rafter
See clause 4.8 of AS/NZS 2918:2018
Figure 6
Figure 8
Figure 7
REFERENCE : AS2918:2018 FIGURE 4.9 - MINIMUM HIGHT OF FLUE SYSTEM
REFERENCE : AS2918:2018 FIGURE 4.6 - TYPICAL EXAMPLE OF
A SLOPED PENETRATION FOR AN UNTESTED FLUE-SYSTEM
REFERENCE : AS2918:2018 FIGURE 4.8 - EXAMPLE OF ROOF
PENETRATION
Installation (continued)
Fitting the Door
The cast iron door of your Eureka Jasper is attached to your heater with two hinges. Excercise caution when handling the
door assembly, as it is bulky and heavy. Fitment is as follows:
1. Stand the door up so that is vertical, in the same orientation that it will be tted to the heater.
2. Hold the door at 45 - 90 degrees from the door opening, positioning the hinges over the hinge pins of the rebox.
3. Lower the door so that the hinges locate on the hinge pins, ensuring that you do not let go until you are certain
that the hinges are correctly located.
Removal of the door is carried out in reverse order of installation.
Final Inspection Prior to Use
Before lighting the rst re in your Eureka Jasper, check the following list of items to ensure that your heater will perform
correctly, and safely:
• Ensure Lower and Upper Baes are correctly and securely tted.
• Ensure that the rebricks are installed correctly with their retainer.
• Ensure the door is correctly tted, and that the door catch can be engaged/disengaged as required.
• Check that both the upper and lower air slides can be operated within their full range.
• Check that the door seals are in place and tting correctly.
 Loading...