EasyManua.ls Logo

Eureka Timberline - User Manual

Eureka Timberline
7 pages
Print Icon
To Next Page IconTo Next Page
Loading...
ASSEMBLY INSTRUCTIONS FOR THE
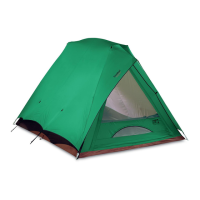
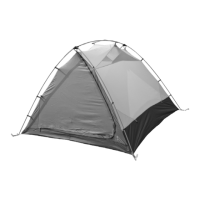
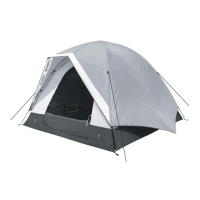
TIMBERLINE and TIMBERLINE OUTFITTER TENTS:
Component List:
1 Tent Body, 1 Tent Bag 4 Poles 1 Spanner
1 Tent Fly, 2 Fly Rods 1 Pole Bag
2 Junction Tubes 1 Stake Bag and Stakes
• Unroll and unfold the tent and lay it on the ground. Remove
the fly and open the tent door. Do not stake down the tent just yet;
But in windy conditions, stake down one front corner into wind.
NOTE: Do not drop tent bag or pole bag on its end. Do not bounce tent
bag on its end to get tent out. These actions may cut the shock cord and/or
damage the pole ends.
• Assemble all the shock-corded poles. Make sure each pole section has firmly
seated into the adjacent section. Try to keep the poles from snapping together
as this can damage the rod ends. Through usage, the aluminum frame may
bend slightly and take a "set" this normally does not affect performance.
Place the tapered end of a pole onto the diagonal hole in the junction tube.
The junction tube is marked UP RT- [TOP RIGHT on TL6]- so the pole will
seat at the correct angle.
Insert a corner pin into the other end of the pole.
See fig.1.
• Repeat with the second pole and at the back of the tent with the last two
poles and the remaining junction tube.
Disconnect the rods in the middle of the spanner. Place one end of
the spanner through the center hole of the first junction tube. Place
the opposite end of the spanner
through the center hole in
second tube.
See fig.2.
Push down on the disconnected
rods until they join together. This forms
the free standing frame. See fig.3.
Connect the tent to frame by pulling the shock-corded loops, at the
peaks of the tent, over the junction tubes. Snap tent clips to the poles.
NOTE: Junction tubes can be tied to the tent with the strings provided.
Tie one end to the shock-cord loop. Pass the other end through the
1/8" hole in the junction tube and tie a knot.
See fig.4.
Orient the tent in the desired location and stake it down.
Fit each of the fly rods over the tip of the spanner section protruding
through each junction tube.
Drape the fly over tent so the center S-hooks [ sewn on the underside
of the fly ] line up with the rods.
Insert the center S-hook into one end of the fly rod. Pull the opposite
S-hook and insert it into the end of the second fly rod.
TIMBERLINE SERIES TENTS ARE EQUIPPED WITH
HIGH / LOW VENTING DOORS:
To allow cool air into the tent, unzip the low vent on the door
and hold open with the hook and loop tab.
To vent the fly, unzip the two zippers at the base of the vestibule.
To allow warm, moist air to escape, unzip the peak of the door
and roll down and/or the peak of the back window.
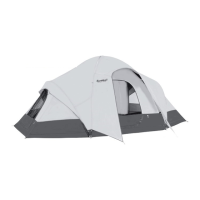
OPTIONAL EQUIPMENT:
Annex: Front awning for storing gear and cooking.
Gear Loft: Mesh hammock attaches to rings inside the tent
for drying clothes or storing accessories.
Floor Saver: Place under tent to protect the floor and keep
it clean. Also provides an additional moisture barrier.
fig.1
fig.2
fig.3
fig.4
IMPORTANT:
Do not attempt this assembly with the spanner joined.
Connect the snaps on the underside of the fly to the rings on side of
the tent. See fig.5.
Connect four shock-corded S-hooks, located at fly corners, to the
ring and pin assemblies at base of each pole.
Stake down the two pull outs on the sides of the Fly.
See fig.6.
TL6 only
RECOMMENDATIONS:
During strong winds, tie extra ropes [ not included ] to the
storm rings on the fly and stake down securely. Note staking pattern.
See fig.6.
Take-down task sequence:
Remove fly and open door.
Disconnect hooks and peak shock-cords.
Remove clips from the tent poles; then pull the pins
out from the pole ends.
REV E 4.09
fig.6.
fig.5.
Pull out
Stake
Storm Ring
Stake
Question and Answer IconNeed help?

Do you have a question about the Eureka Timberline and is the answer not in the manual?

Summary

Eureka Timberline Tent Assembly & Care

Tent Components and Initial Setup

Lists tent components and provides initial setup instructions including pole assembly.

Frame Assembly and Tent Attachment

Details on connecting tent poles to form the frame and attaching the tent body.

Ventilation Features and Recommendations

Explains high/low venting doors, offers recommendations, and lists optional equipment.

Seam Sealing, Staking, and Guy Lines

Covers seam sealing, proper staking techniques, and the use of guy lines for stability.

Tent Care and Maintenance

Provides guidance on condensation, UV protection, general pole care, and tent maintenance.

Storage, Cleaning, and Modifications

Instructions for storage, cleaning, color transfer prevention, and warnings against modifications.

Limited Warranty Information

Details what is covered and not covered under the product's limited warranty.

Obtaining Warranty Service and Repairs

Explains how to get warranty service, repairs, and the relationship with state law.

Overview

This document provides assembly instructions, care guidelines, warranty information, and a description of the Eureka! Timberline and Timberline Outfitter tents.

Function Description

The Eureka! Timberline and Timberline Outfitter tents are designed for outdoor use, providing shelter for camping. They feature a free-standing frame structure and are equipped with high/low venting doors to manage internal climate. The tents are designed to be robust, with specific instructions for assembly and staking to ensure stability in various weather conditions, including strong winds. Optional equipment like an Annex (front awning for gear and cooking), Gear Loft (mesh hammock for drying clothes or storing accessories), and Floor Saver (under-tent protection and moisture barrier) enhance functionality.

Important Technical Specifications

  • Components:
    • 1 Tent Body
    • 1 Tent Bag
    • 1 Tent Fly
    • 2 Fly Rods
    • 2 Junction Tubes
    • 4 Poles
    • 1 Pole Bag
    • 1 Spanner
    • 1 Stake Bag and Stakes
  • Frame: Aluminum frame, shock-corded poles.
  • Venting: High/Low venting doors, roof vents, short-sheeted flys (bottom venting), and vestibule pull-outs for airflow.
  • Fabric: UV-resistant nylon/polyester fabric, treated for flame resistance (meets CPAI-84 flammability requirements).
  • Seams: Factory-taped seams, with recommendations for additional sealing of exposed seams (floor and fly seams, reinforcements) using products like Kenyon Seam Sealer 3 or McNett Outdoor SeamGrip®.

Usage Features

Assembly:

  1. Unpack and Lay Out: Unroll and unfold the tent body, lay it on the ground, remove the fly, and open the door. Avoid staking immediately unless windy, in which case one front corner can be staked into the wind.
  2. Pole Assembly: Assemble all shock-corded poles, ensuring each section is firmly seated. Avoid snapping poles together to prevent damage to rod ends.
  3. Frame Construction:
    • Place the tapered end of a pole into the diagonal hole of a junction tube (marked UP RT- [TOP RIGHT on TL6]).
    • Insert a corner pin into the other end of the pole.
    • Repeat for the second pole and the back of the tent with the remaining poles and junction tube.
    • Disconnect the rods in the middle of the spanner.
    • Place one end of the spanner through the center hole of the first junction tube, and the opposite end through the center hole of the second tube.
    • Push down on the disconnected rods until they join, forming the free-standing frame.
  4. Tent Body Attachment: Pull shock-corded loops at the tent peaks over the junction tubes. Snap tent clips to the poles. Junction tubes can be tied to the tent using provided strings.
  5. Staking: Orient the tent and stake it down.
  6. Fly Rods: Fit each fly rod over the tip of the spanner section protruding through each junction tube.
  7. Fly Drape and Attachment: Drape the fly over the tent, aligning center S-hooks (sewn on the underside of the fly) with the rods. Insert one center S-hook into one end of a fly rod, pull the opposite S-hook, and insert it into the end of the second fly rod.
  8. Fly Snaps and S-hooks: Connect snaps on the underside of the fly to rings on the side of the tent. Connect four shock-corded S-hooks at fly corners to the ring and pin assemblies at the base of each pole.
  9. Pull Outs: Stake down the two pull-outs on the sides of the fly.

Venting:

  • Low Vent: Unzip the low vent on the door and hold open with the hook and loop tab to allow cool air in.
  • Vestibule Vent: Unzip the two zippers at the base of the vestibule to vent the fly.
  • Peak Vent: Unzip the peak of the door and roll down, or the peak of the back window, to allow warm, moist air to escape.
  • Cross Ventilation: Leave windows partially open at night.

Staking in Special Conditions:

  • Sand: Use long, broad stakes with plenty of surface area.
  • Hard, Rocky, or Frozen Soil: Use steel stakes. Store separately to prevent damage to fabric and rust stains.
  • Snow: Use "dead man" anchors (buried objects like branches, tent bags, stuff sacks filled with snow, snowshoes, skis, or ski poles).

Guy Lines:

  • Attach guy lines (not included) to storm rings on the fly during strong winds.
  • If no loops/rings, attach guy lines 1/3 to 1/2 way up the framework on main sidewalls.
  • Run two cords at an angle from the side of the guy out.
  • Attach parachute cord to loops/rings and stake them 3-4 feet from the tent edge.

Take-down Task Sequence:

  1. Remove fly and open door.
  2. Disconnect hooks and peak shock-cords.
  3. Remove clips from tent poles.
  4. Pull pins out from pole ends.

Maintenance Features

General Tent Care:

  • Floor Protection: Sweep the tent floor daily to prevent damage from stones. Use a ground cloth whenever possible.
  • Footwear: Avoid wearing shoes inside the tent.
  • Food Storage: Do not keep food inside to deter animals.
  • Cleaning:
    • Set up the tent and wipe it down with a mild soap (liquid hand soap) and lukewarm water solution.
    • Rinse thoroughly and dry completely.
    • Never use detergent, washing machines, or dryers, as they can damage protective coatings and seams.
    • Ensure the tent is completely dry, especially double-stitched areas, before storing to prevent mold/mildew.
    • Clean tent poles with a cloth and lubricate with silicone spray, especially after ocean-side camping.
    • Clean zippers with a quick dip in water and dry them off, particularly after camping in sandy/dirty locations, to prevent wear.

Storage:

  • Ensure the tent is completely dry before storing.
  • Store loosely rolled in a dry, cool place, covered with a cloth to allow fabric to breathe and prevent dust accumulation.
  • Ideally, store tent poles in their fully assembled state to reduce tension on the shock cord.
  • The tent bag is for carrying only, not storage.

UV Protection:

  • Use the rain fly even on clear days as a sunscreen for the tent fabric to minimize UV degradation, which can cause fabric to become brittle and tear.
  • Erect tents on shaded sites to reduce direct sunlight exposure.

Pole Care:

  • Avoid snapping poles together.
  • Do not drop tent or pole bags on their ends or bounce them to remove contents, as this can damage shock cords and pole ends.
  • Aluminum frames may bend slightly over time, which is normal and does not affect performance.

Seam Sealing:

  • Work in a fully ventilated area.
  • Set up the tent or lay it flat to ensure taut seams for even application.
  • Seal seams exposed to rain, runoff, or ground-level water (floor and fly seams, reinforcements).
  • Apply sealant to both inside and outside of exposed seams in several thin layers.

Warranty:

  • Limited Lifetime Warranty: Johnson Outdoors Gear LLC warrants products to the original purchaser against defects in material and workmanship for the life of the product (until no longer serviceable due to normal wear and tear).
  • Exclusions: Natural breakdown of materials (UV damage, exhausted zippers), defects from accident, abuse, alteration, animal attack, storm damage, misuse, or improper care are not covered.
  • Service: Contact Customer Satisfaction Department (1-800-572-8822) for return authorization. Products requiring repair due to normal wear and tear or excluded causes can be serviced for a reasonable charge, plus shipping and handling, provided they are properly cleaned.

Eureka Timberline Specifications

General IconGeneral
BrandEureka
ModelTimberline
CategoryTent
LanguageEnglish

Related product manuals