16
EN
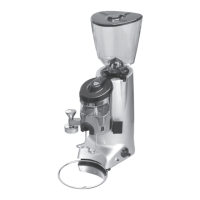
Zenith E- Zenith Club E
6. LOCKING THE CONTAINER
Before operating the appliance, it is necessary to fit the coffee bean container (7).
Insert the container(7) into its seat (see Fig. 2), positioning it so that the hole lines up with
the screw on the back part of the appliance.
Tighten the lock screw (see Fig. 3).
7. INSTRUCTIONS FOR USE
7.1 INTRODUCTION
This appliance can make very precise doses as it refers to grinding time.
It is furthermore necessary to set up the appliance before operating, by determining first of
DOOWKHFRIIHHEOHQGW\SHPRUHURDVWHGRUOHVVDQGWKHGHJUHHRIJULQGLQJ*ULQGLQJWLPHLV
then set for each dose key by weighting the grinding product.
After having plugged the appliance in, pull the tab (8) at the bottom of the coffee bean
container (7) to close it (see Fig. 4).
Remove the cover (6) from the container (7) and fill it with coffee beans.
Bring the switch (13) to on position.
Push the tab (8) permitting passage of coffee beans.
Select the single or double dose through the corresponding keys (3)
or (5) .
Place the filter holder onto the fork (12) and insert it against the filter holder restraint, push
it forward until it touches the key (11) to dispense the ground coffee from the correspond-
ing spout (10) (see Fig. 8). Dispensing stops once the preset time has elapsed.
7.2 GRINDING SETTING
6HWJULQGLQJE\PHDQVRIWKHDGMXVWLQJNQRE(9), by rotating it clockwise to make powder
finer or anticlockwise to increase the size of its grain as shown on the knob (see Fig. 5).
Setting is stepless; it is to be gradually performed, by grinding some coffee every two
notches maximum.
When knob is rotated of a turn with stationary motor, the appliance may stop.
7.3 SPOUT ORIENTATION ADJUSTMENT DISPENSING
$FFRUGLQJWRILOWHUKROGHUXVHGDGMXVWKHLJKWRIWKHGLVSHQVLQJVSRXW(10)in order to permit
a correct coffee dispensing (see Fig.6).
7.4 FILTER HOLDER FORK HEIGHT ADJUSTMENT (Fig. 7)
By using a crosshead screwdriver, loosen the fastening screw of the filter holder fork (12)
It is recommended not to unscrew the screw completely.
5DLVHRUORZHUWKHIRUNLQRUGHUWRDGMXVWLWDFFRUGLQJWRILOWHUKROGHUGLPHQVLRQV
Once having reached the correct position, tighten the fork fastening screw (12).
The appliance is equipped with a filter holder retaining device.

 Loading...
