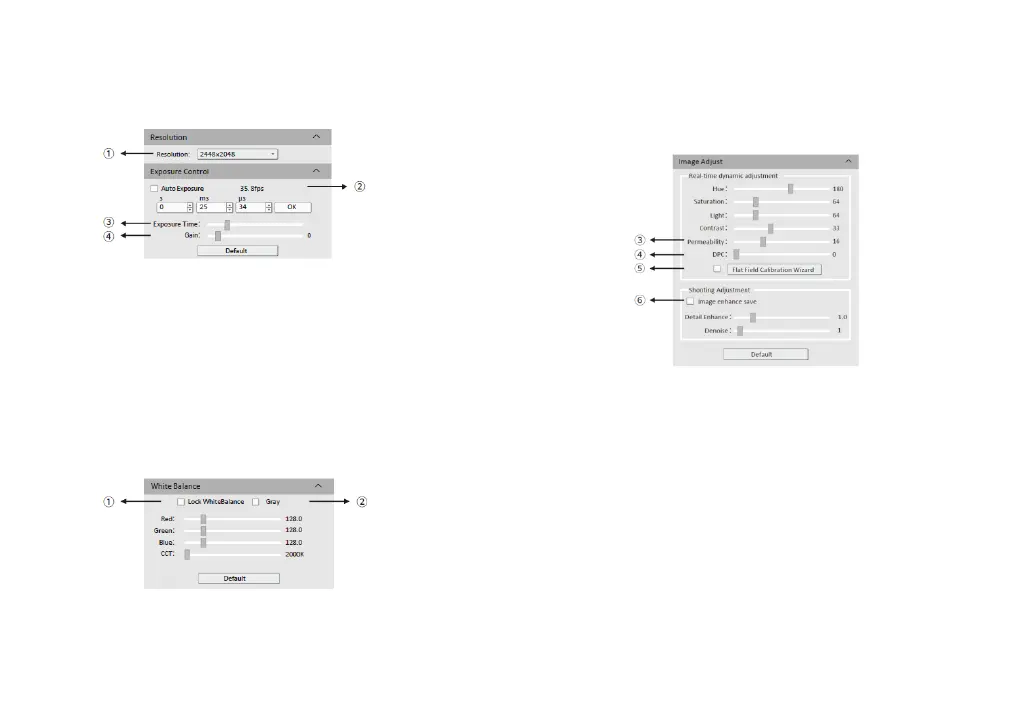
① Click the resolution drop-down box to select the working resolution.
② Display and view the live preview frame rate.
③ Observe the preview screen, and select the automatic or manual
exposure setting according to the actual application requirements to obtain
the desired image intensity.
④ Depending on the application requirements, adjust the gain value to
obtain the required image signal enhancement effect.
③ When the preview shows a hazy effect, adjust [Permeability] to restore
the clear picture.
④ When the preview image has dead pixels and color points, adjust [DPC]
the dead pixel correction function to effectively remove the dead pixels to
obtain a cleaner image.
⑤ When the light source is not uniform, or the preview image has dirty
spots, use the [Flat Field Calibration Wizard] option to correct the image
default background and obtain greater uniformity.
⑥ Check [Image enhance save] to perform detail enhancement and noise
reduction processing to obtain the desired image effects. This function is
only effective when image capture is saved, and real-time effect preview is
not supported.
Note: CMEX -f series cameras do not support color temperature, hue, light,
permeability and image enhancement.
4. Software Settings
4.1.Basic Settings
4.2. Image Adjustment
① Move the sample under the objective to an evenly illuminated
featureless position to set white balance, then check the option [Lock White
Balance].
This will prevent the camera from performing automatic white balance
recalculation, which would result in chromatic aberration.
② After selecting [Gray], the preview screen will turn into monochrome
mode.
-5- -6-