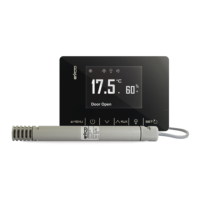
EVCO S.p.A. | EVJ 200 | Instruction sheet ver. 2.0 | Code 104J200I203 | Page 2 of 4 | PT 18/17
2.
Touch the UP or DOWN key within 15s to select a label.
LAB.
DESCRIPTION
LS view HACCP alarm information
rLS
delete HACCP alarm information
3.
Touch the SET key.
4.
Touch the UP or DOWN key to select an alarm code (to select
label “LS”) or to set “149” (to select label “rLS”).
COD.
DESCRIPTION
AL low temperature alarm
AH
high temperature alarm
id
open door alarm (if i4 = 1)
PF
power failure alarm (available in EVJ213, EVJ214, EVJ214N7VXXRXV, EVJ215,
EVJ234 and EVJ235 or in EVJ203, EVJ204, EVJ205, EVJ224 and EVJ225 with
interface EVIF25TBX connected)
5.
Touch the SET key.
6.
Touch the ON/STAND-BY key (or do not operate for 60s) to exit
the procedure.
Example of alarm information (e.g. a high temperature alarm).
8.0
critical value (calculated cabinet/product temperature)
was 8.0 °C/°F
Sta
(available in EVJ213, EVJ214, EVJ214N7VXXRXV, EVJ215, EVJ234
and EVJ235 or in EVJ203, EVJ204, EVJ205, EVJ224 and EVJ225 with
interface EVIF25TBX connected)
y15
alarm signalled in 2015
n03
alarm signalled in March
d26
alarm signalled on 26 March 2015
h16
alarm signalled at 16:00
n30
alarm signalled at 16:30
dur
h01
alarm lasted 1h
n15
alarm lasted 1h 15min
5.5 View/delete compressor functioning hours
Check that the keypad isn’t locked.
1.
Touch the DOWN key for 1s.
2.
Touch the UP or DOWN key within 15s to select a label.
LAB.
DESCRIPTION
CH1
view compressor functioning hundreds of hours
CH2 view second compressor functioning hundreds of hours (if u1c... u5c = 1)
rCH delete compressor and second compressor functioning hours
3.
Touch the SET key.
4.
Touch the UP or DOWN key to set “149” (to select rCH).
5.
Touch the SET key.
6.
Touch the ON/STAND-BY key (or do not operate for 60s) to exit
the procedure.
5.6 View the temperature detected by the probes
Check that the keypad isn’t locked.
1.
Touch the DOWN key for 1s.
2.
Touch the UP or DOWN key within 15s to select a label.
LAB.
DESCRIPTION
Pb1
cabinet temperature (if P4 = 0, 1 or 2)
inlet air temperature (if P4 = 3)
Pb2
evaporator temperature (if P3 = 1 or 2)
Pb3
auxiliary temperature (if P4 = 1, 2 or 3)
Pb4 calculated product temperature (CPT; if P4 = 3)
3.
Touch the SET key.
4.
Touch the ON/STAND-BY key (or do not operate for 60s) to exit
the procedure.
6
DATA-LOGGER MODULE on SD CARD (not available in
EVJ224 and EVJ225)
6.1 Initial information
The data-logger module makes it possible to write information about the device on an SD card
(in CSV format ), in HACCP or service mode.
Data-logger module configuration parameters.
PAR.
DEF.
PARAMETER
MIN... MAX.
Sd0
30
SD card writing interval in HACCP
mode
1... 30 min
Sd1
1
SD card writing interval in service
mode
1... 30 min
Sd2 60 service mode duration 1... 240 min
Sd3 0 enable critical temperature recording 0 = no 1 = yes
Sd4 1 enable cabinet temperature recording 0 = no 1 = yes
Sd5 1 decimal separator type 0 = comma 1 = point
6.2 Writing in HACCP mode
Writing in HACCP mode is always activated, it generates a daily file and a monthly file.
Information written in HACCP mode.
- cabinet temperature (if Sd4 = 1, default “no”)
- critical temperature (if Sd3 = 1, default “no”)
- device switched on/off
- defrost activated/completed
- energy saving activated/deactivated
- alarm activated/restored
- power supply restored
The date and time is written for each piece of information.
6.3 Writing in service mode
Writing in service mode must be manually activated.
Information written in service mode.
- temperature detected by all probes
- enable/disable probes
- device switched on/off
- functions on/off
- defrost activated/completed
- energy saving activated/deactivated
- alarm activated/restored
- power supply restored
The date and time is written for each piece of information.
6.4 Activate/deactivate writing in service mode
Check that the keypad isn’t locked.
1.
Touch the DOWN key for 1s.
2.
Touch the UP or DOWN key within 15s to select the label “SEr”.
3.
Touch the SET key.
4.
Touch the UP or DOWN key within 15s to set “1” (activate
writing) or “0” (deactivate writing).
5.
Touch the ON/STAND-BY key (or do not operate for 60s) to exit
the procedure.
6.5 File names
Example of a daily file name written in HACCP mode (e.g. the file “log001_2015_03_26.csv”).
001 the device address is 1 (parameter LA)
2015 the file was written in 2015
03 the file was written in March
26 the file was written on 26 March 2015
Example of a monthly file name written in HACCP mode (e.g. the file “log001_2015_m03.csv”).
001 the device address is 1 (parameter LA)
2015 the file was written in 2015
m03
the file was written in March 2015
Example of a file name written in service mode (e.g. the file “log001_2015_0001.csv”).
001 the device address is 1 (parameter LA)
2015 the file was written in 2015
0001 sequence number
6.6 View data-logger module alarms
Check that the keypad isn’t locked.
1.
Touch the DOWN key for 1s.
2.
Touch the UP or DOWN key within 15s to select the label “Err”.
3.
Touch the SET key.
4.
Touch the UP or DOWN key within 15s to see the alarm code.
LAB. DESCRIPTION
FUL
no space left on SD card alarm
Sd
SD card not inserted or not recognised alarm
5.
Touch the ON/STAND-BY key (or do not operate for 60s) to exit
the procedure.
7 SETTINGS
7.1 Setting configuration parameters
1.
Touch the SET key for 4s: the display will show the label “PA”.
2.
Touch the SET key.
3.
Touch the UP or DOWN key within 15s to set the PAS value
(default “-19”).
4.
Touch the SET key (or do not operate for 15s): the display will
show the label “SP”.
5.
Touch the UP or DOWN key to select a parameter.
6.
Touch the SET key.
7.
Touch the UP or DOWN key within 15s to set the value.
8.
Touch the SET key (or do not operate for 15s).
9.
Touch the SET key for 4s (or do not operate for 60s) to exit the
procedure.
7.2 Set the date, time and day of the week (available in EVJ213, EVJ214,
EVJ214N7VXXRXV, EVJ215, EVJ234 and EVJ235 or in EVJ203, EVJ204, EVJ205,
EVJ224 and EVJ225 with interface EVIF25TBX connected)
N.B.
- If the device is connected to the interface EVIF25TBX, do not disconnect the device
from the mains within two minutes since the setting of the time and day of the
week.
- If the device communicates with the APP EVconnect, the date, time and day of the
week will automatically be set by the smartphone or tablet.
Check that the keypad isn’t locked.
1.
Touch the DOWN key for 1s.
2.
Touch the UP or DOWN key within 15s to select the label “rtc”.
3.
Touch the SET key: the display will show the label “y” followed
by the last two figures of the year.
4.
Touch the UP or DOWN key within 15s to set the year.
5. Repeat actions 3 and 4 to set the next labels.
LAB.
MEANING OF THE NUMBERS FOLLOWING THE LABEL
n month (01… 12)
d day (01… 31)
h time (00… 23)
n
minutes (00… 59)
6.
Touch the SET key: the display will show the label for the day of
the week.
7.
Touch the UP or DOWN key within 15s to set the day of the
week.
LAB.
DESCRIPTION
Mon Monday
tuE Tuesday
UEd Wednesday
thu
Thursday
Fri Friday
Sat Saturday
Sun Sunday
8.
Touch the SET key: the device will exit the procedure.
9.
Touch the ON/STAND-BY key to exit the procedure beforehand.
7.3 Reset the factory settings
N.B.
Check that the factory settings are appropriate; see the section CONFIGURATION
PARAMETERS.
1.
Touch the SET key for 4s: the display will show the label “PA”.
2.
Touch the SET key.
3.
Touch the UP or DOWN key within 15s to set “149”.
4.
Touch the SET key (or do not operate for 15s): the display will
show the label “dEF”.
5.
Touch the SET key.
6.
Touch the UP or DOWN key within 15s to set “1”.
7.
Touch the SET key (or do not operate for 15s).
8. Interrupt the power supply to the device.
9.
Touch the SET key for 2s before action 6 to exit the procedure
beforehand.
8 CONFIGURATION PARAMETERS
N. PAR. DEF. SETPOINT MIN... MAX.
1 SP 0.0 setpoint r1... r2
N. PAR. DEF. ANALOGUE INPUTS MIN... MAX.
2
CA1
0.0
cabinet probe offset
-25... 25 °C/°F
if P4 = 3, air in probe offset
3 CA2 0.0 evaporator probe offset -25... 25 °C/°F
4 CA3 0.0 auxiliary probe offset -25... 25 °C/°F
5 P0 1 probe type 0 = PTC 1 = NTC
6 P1 1 enable °C decimal point 0 = no 1 = yes
7
P2
0
temperature unit of
measurement
0 = °C 1 = °F
8
P3
1
evaporator probe function
0 = disabled
1 = defrost + fan
2 = fan
9
P4
0
configurable input function
(option 4 only available in
EVJ224, EVJ225, EVJ234 and
EVJ235)
0 = digital input
1 = condenser probe
2 =
critical temperature probe
3 = air out probe
4 = evaporator 2 probe
if P4 = 3, regulation temperature
= product temperature (CPT)
10
P5
0
value displayed
0 = regulation temperature
1 = setpoint
2 = evaporator temperature
3 = auxiliary temperature
4 = air in temperature
11
P7
50
inlet air weight for calculated
product temperature (CPT)
0... 100 %
CPT = {[(P7 x (inlet air T)] +
[(100 - P7) x (outlet air T)] :
100}
12
P8 5 display refresh time 0... 250 s : 10
N.
PAR.
DEF.
REGULATION
MIN... MAX.
13
r0
2.0
setpoint differential
1... 15 °C/°F
if u1c... u5c 1, proportional
band
14
r1 -40 minimum setpoint -99 °C/°F... r2
15
r2 50.0
maximum setpoint r1... 199 °C/°F
16
r3 0 enable setpoint block
0 = no 1 = yes
17
r4 0.0 setpoint offset in energy saving 0... 99 °C/°F
18
r5
0
cooling or heating operation
0 = cooling
1 = heating
19
r6
0.0
setpoint offset in
overcooling/overheating
0... 99 °C/°F
20
r7 0 overcooling/overheating duration 0... 240 min
21
r12
1
position of the r0 differential
0 = asymmetric
1 = symmetric
N. PAR. DEF. COMPRESSOR MIN... MAX.
22
C0
0
compressor on delay after
power-on
0... 240 min
23
C1
5
delay between 2 compressor
switch-ons
0... 240 min
24
C2 3 compressor off minimum time 0... 240 min
25
C3 0 compressor on minimum time 0... 240 s
26
C4
10
compressor off time during
cabinet probe alarm
0... 240 min
27
C5
10
compressor on time during
cabinet probe alarm
0... 240 min
28
C6
80.0
threshold for high condensation
warning
0... 199 °C/°F
differential = 2 °C/4 °F
29
C7
90.0
threshold for high condensation
alarm
0... 199 °C/°F
30
C8 1 high condensation alarm delay 0... 15 min
31
C10
0
compressor hours for service
0... 999 h x 100
0 = disabled
32
C11 10 compressor 2 on delay 0... 240 s
33
C12
2
compressor hours weight for
balancing hours and switch-ons
(BHC) - (only available in
EVJ224, EVJ225, EVJ234 and
EVJ235)
0... 10
BHC = {[C12 x (compressor
hours)] + [C13 x
(compressor switch-ons)]}
34
C13
1
compressor hours switch-ons for
balancing hours and switch-ons
(BHC) - (only available in
EVJ224, EVJ225, EVJ234 and
EVJ235)
0... 10
BHC = {[C12 x (compressor
hours)] + [C13 x
(compressor switch-ons)]}
35
C14
1
tie between compressors (only
available in EVJ224, EVJ225,
EVJ234 and EVJ235)
0 = according to C11
1 = according to r0
N. PAR. DEF. DEFROST (if r5 = 0) MIN... MAX.
36
d0
8
automatic defrost interval
0... 99 h
0 = only manual
if d8 = 3, maximum interval
37
d1
0
defrost type
0 = electric
1 = hot gas
2 = compressor stopped
38
d2 2.0 threshold for defrost end -99... 99 °C/°F
39
d3
30
defrost duration
0... 99 min
se P3 = 1, maximum duration
40
d4 0 enable defrost at power-on 0 = no 1 = yes
41
d5 0 defrost dealy after power-on 0... 99 min
42
d6
1
value displayed during defrost
0 = regulation temperature
1 = display locked
2 = dEF label
43
d7 2 dripping time 0... 15 min
44
d8
0
defrost interval counting mode
0 = device on hours
1 = compressor on hours
2 = hours evaporator
temperature < d9
3 = adaptive (if P4 = 4,
device on hours)
4 = real time
45
d9
0.0
evaporation threshold for
automatic defrost interval
counting
-99... 99 °C/°F
46
d11 0 enable defrost timeout alarm 0 = no 1 = yes
47
d15
0
compressor on consecutive time
for hot gas defrost
0... 99 min
48
d16
0
pre-dripping time for hot gas
defrost
0... 99 min
49
d18
40
adaptive defrost interval
0... 999 min
if compressor on + evapora-
tor temperature < d22
0 = only manual
50
d19
3.0
threshold for adaptive defrost
(relative to optimal evaporation
temperature)
0... 40 °C/°F
optimal evaporation
temperature - d19
51
d20
180
compressor on consecutive time
for defrost
0... 999 min
0 = disabled
52
d21
200
compressor on consecutive time
for defrost after power-on and
overcooling
0... 500 min
if (regulation temperature -
setpoint) > 10°C/20 °F
0 = disabled
53
d22
-2.0
evaporation threshold for
adaptive defrost interval counting
(relative to optimal evaporation
temperature)
-10... 10 °C/°F
optimal evaporation
temperature + d22
54
d25
0
enable air out probe for defrost
during evaporator probe alarm
0 = no 1 = yes
55
d26
6
defrost interval during
evaporator probe alarm
0... 99 h
0 = only manual
if d25 = 1
N.
PAR.
DEF.
ALARMS
MIN... MAX.
56
A0
0
select value for high/low
temperature alarms
0 = regulation temperature
1 = evaporator temperature
57
A1
0.0
threshold for low temperature
alarm
-99... 99 °C/°F
58
A2
0
low temperature alarm type
0 = disabled
1 = relative to setpoint
2 = absolute
 Loading...