This appliance is designed to be highly
efficient in energy savings. Follow these
recommendations for greater efficiency.
1) Select a thermostat setting that suits your
comfort needs and leave at that chosen
setting.
2) The air filter is very efficient in removing
airborne particles. Keep the air filter clean at
all times.
3) Use drapes, curtains or shades to keep
direct sunlight from penetrating and heating
room, but do not allow drapes or curtains to
obstruct the air flow around the unit.
4) Start your air conditioner before the outdoor air
becomes hot and uncomfortable. This avoids an
initial period of discomfort while the unit is cooling
off the room. Use of the automatic start / stop
programmable TIMER feature can be a major
asset in this regard if utilized to the fullest extent.
5) When outdoor temperatures are cool enough,
turn the air conditioner off and use the FAN
MODE on HIGH, MED or LOW. This circulates
indoor air, providing some cooling comfort and
utilizes less electricity.
The exhaust/window kit must be installed at all times
when the unit is operating under the COOLING mode.
There should be at least 11.8"(30 cm) clearance
between the unit and any other objects or building
structure. The unit should be installed on a level
surface. The window kit does not have to be installed
during operation of the remaining two modes.
(Dehumidifying/Fan).
Energy-Saving Tips
Window Installation
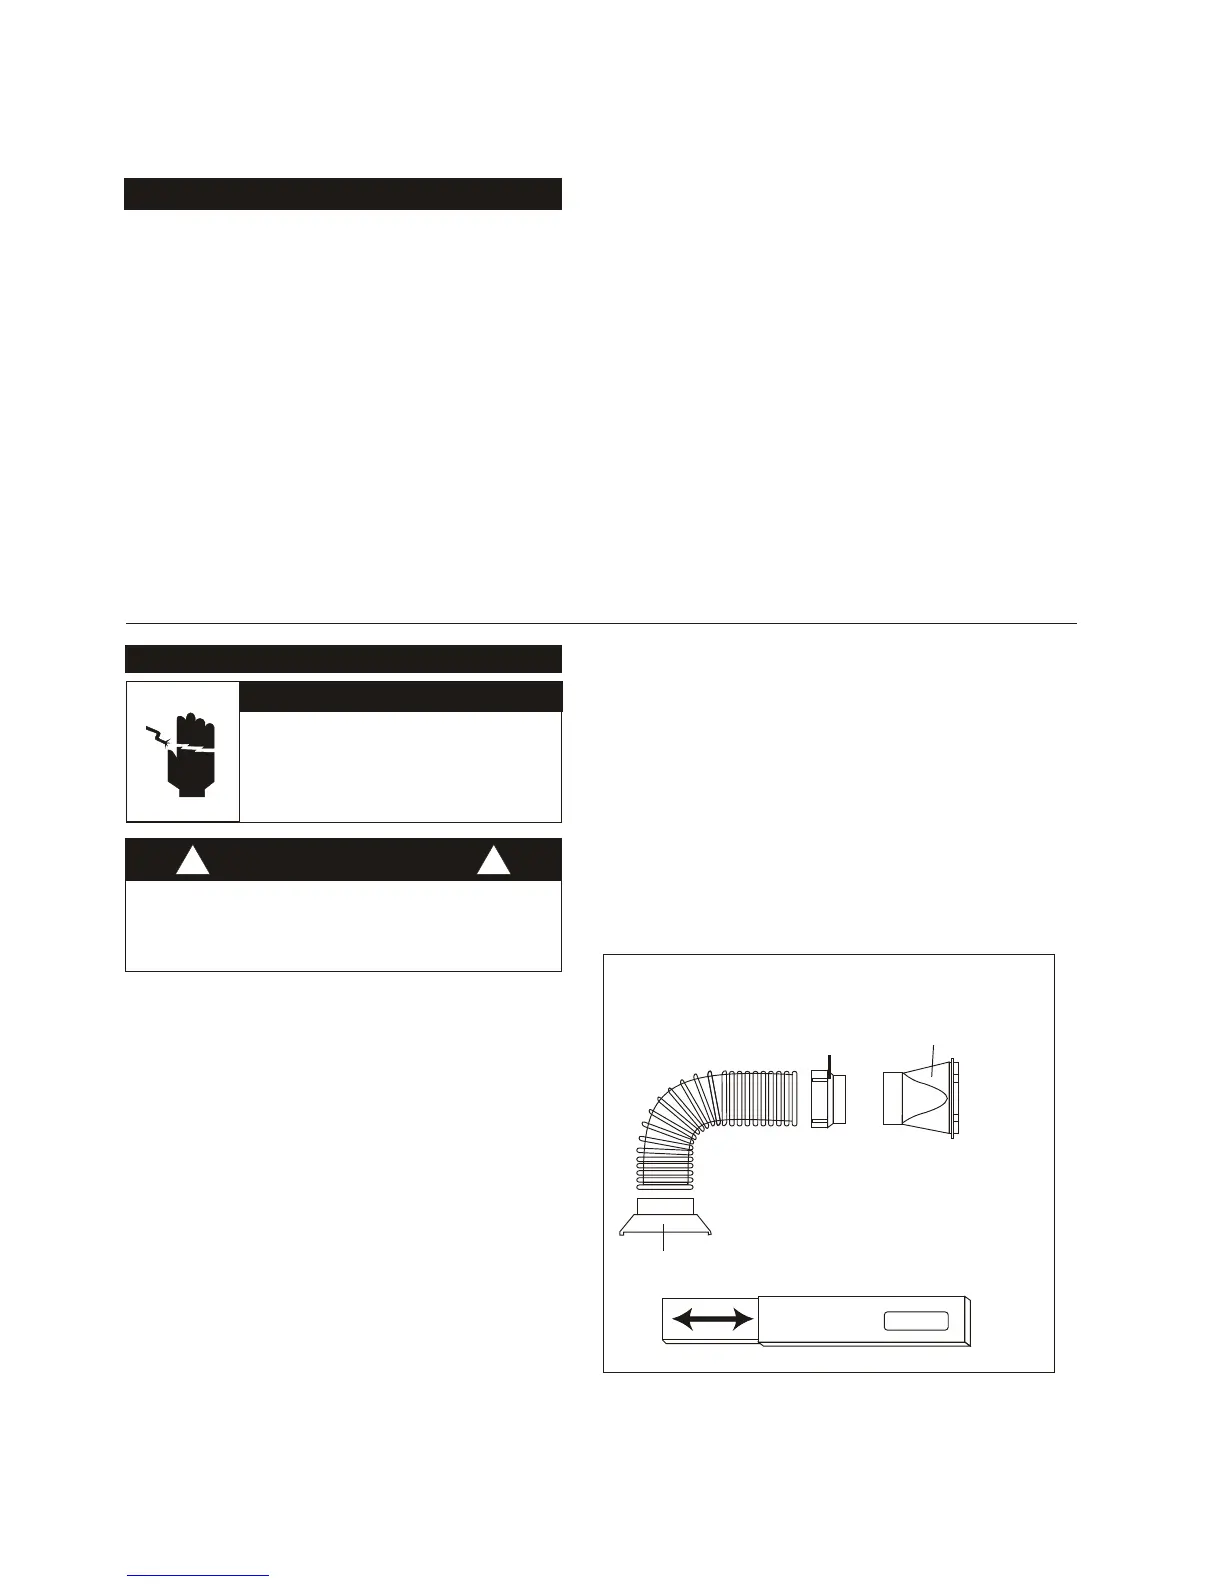
Installation Accessories Fig.1
Description Qty
Flexible exhaust hose with adapters.........3/pc
stretches from 31" (79cm) up to 89" (226cm)
Window exhaust adapter(flat mouth)...........1pc
Adjustable window/window slider kit....2/pc
17
from 26 / " (67.3cm) up to 47 / "(121.6cm)
28
Drain hose connector..................................1 pc
SPECIAL NOTE: Exterior drain hose extension
(direct drain) is not included with this unit and can
be purchased through any local Hardware Store.
Electric Shock Hazard
To avoid the possibility of personal
injury, disconnect power to the unit
before installing or servicing.
To avoid installation/operation difficulties,
read these instructions thorughly.
4
Fig. 1 Installation Accessories
Window Exhaust
Adapter
Transition Adapter
Unit Connection
Flexible Exhaust Hose
31 - 89""
CAUTION
!
!