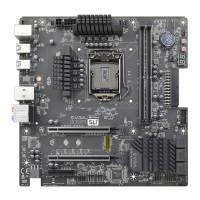
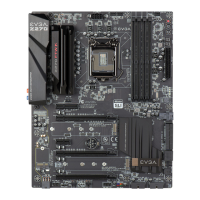
EVGA Z370 MICRO (121-KS-E375)
- 18 -
19. USB 2.0 Headers
The USB2.0 header is used to connect additional USB interface plugs to the
motherboard; these headers are most often used to connect the motherboard to
the chassis to enable the USB2.0 ports on the chassis. These will function
similarly to the USB2.0 ports found on the motherboard’s hardwired I/O hub,
but these can also be used for the chassis’ front panel USB, auxiliary ports that
mount in the card slots, and certain devices that directly connect to the header.
USB 2.0 standard is 500mA @ 5V per port (header total is 1000mA) for
unpowered devices. If your USB device requires more power, it is
recommended to attach a powered USB Hub.
20. Front Panel Audio Connector
This motherboard header is used to plug in the audio cable included with most
PC chassis. This connector is required for audio recording and/or playback via
the audio connectors on the chassis. This header has a connector that looks
similar to the USB2.0 header and uses the standard “HD Audio” jack. Some
chassis may provide two headers: one labeled HD Audio, and one labeled
AC’97 – an AC’97 cable is not compatible with this header on the Z370 Micro.
21. Front Panel Connectors
The Front Panel Connectors are the four main chassis connections. These
include the Power Switch, Power LED, Reset Switch, and HDD LED. The
Power and Reset switches are “Momentary Switches,” rather than “Latching
Switches,” which means the connection between two posts only needs a brief
moment to turn on the device, as opposed to requiring a constant connection.
For example, the Power and Reset switches can be triggered instantly with a
screwdriver by simultaneously touching the + and - posts.
The Power LED will power on with the system, indicating the system is on and
can blink in conjunction with CPU activity.
HDD LED will blink during access to the SATA ports and M.2 SSDs.
22. BIOS Select Switch
This switch toggles between physical BIOS chips. The Z370 Micro features
two BIOS chips soldered to the PCB. Each chip holds only the settings and
profiles that have been saved to the BIOS chip while active. This allows you to
swap between two physically different BIOS chips. If instructions are needed
for hotflashing a BIOS, please contact EVGA Customer Service (Page 122 for
contact info).