04 05 06
STEP STEP STEP
Align rdius on the bottom of rubber to the rdius on the drive
side chin sty. Apply pressure to secure lower corner of rubber.
Evenly pply pressure from front to bck dhering the rubber to
the chin sty.
Firmly pply pressure to ll surfces of the rubber dhering ll
sides the chin sty. Finl loction shown.
CHAIN RUBBER INSTALL
REPLACEMENT KITS AVAILABLE ONLINE
DECAL INSTALL
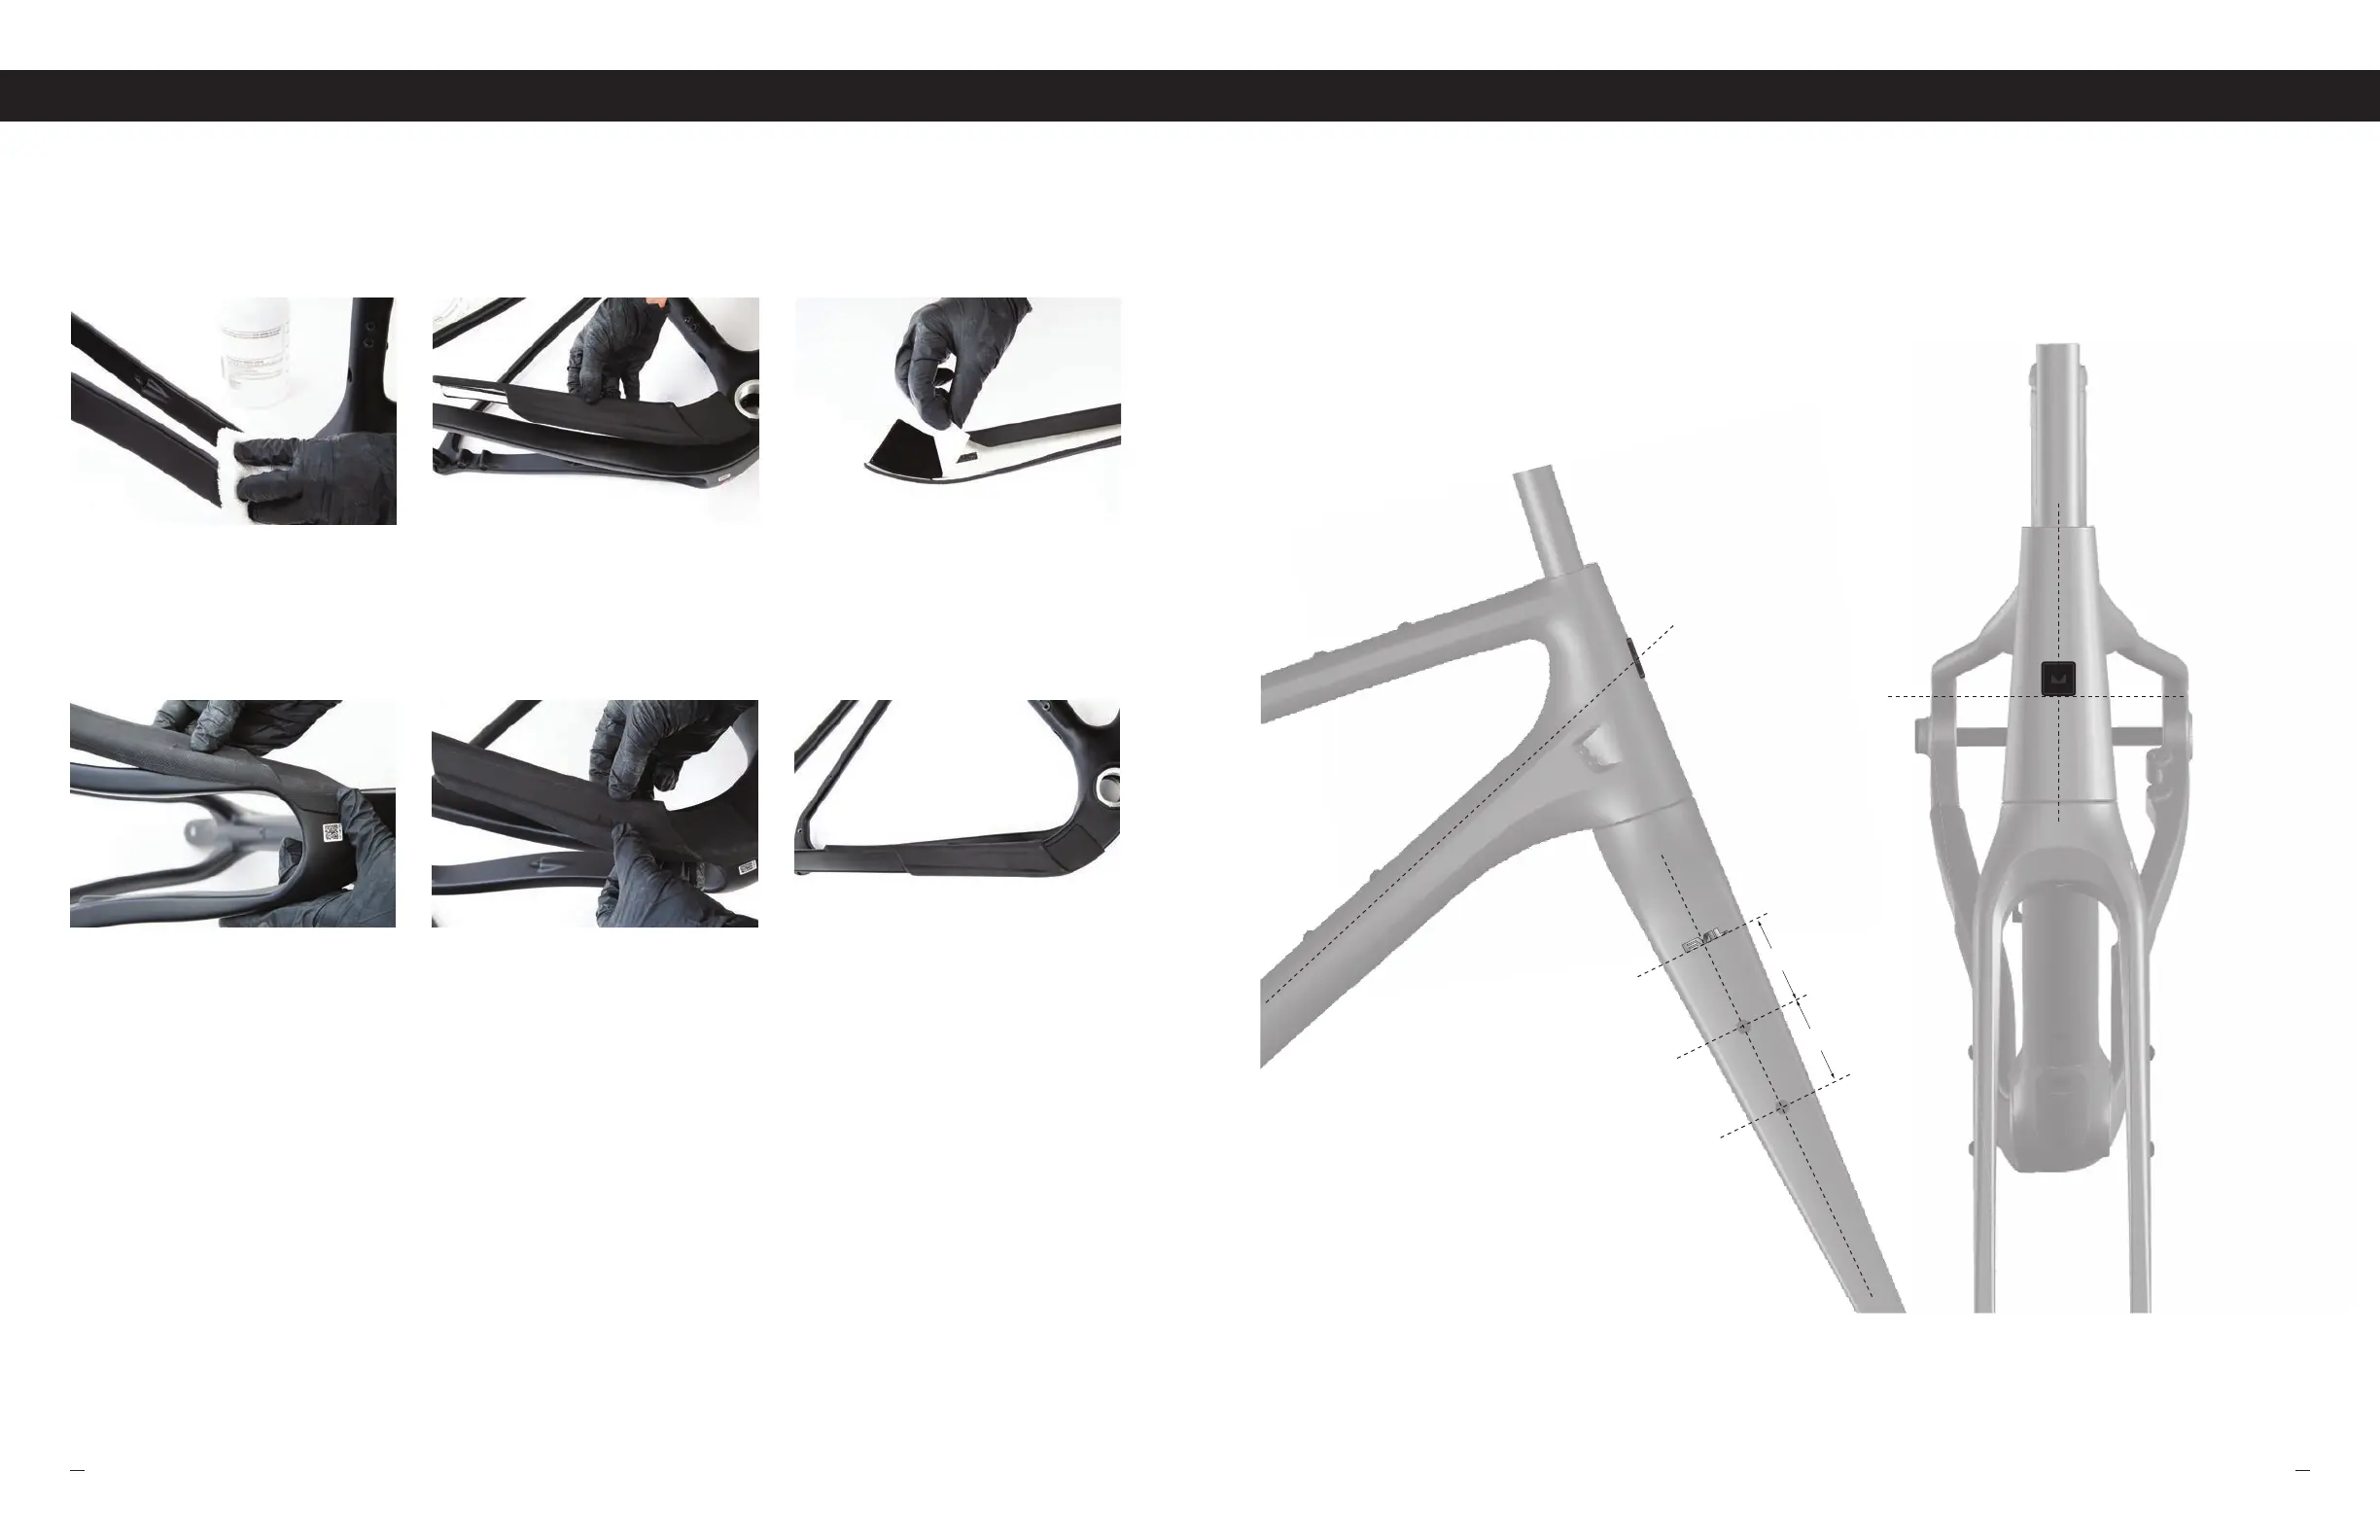
ALN WTH DOWN TUBE
ROUHLY N THE ENTER OF
OF THE HEAD TUBE
ENTER SQUARE
ON HEAD TUBE
ALN SQUARE
AND ENTERED
mm FROM ENTER
OF TOP NSERT
mm
mm
CUSTOMIZE YOUR RIDE
Evil believes in leving the fl vor in your hnds. We've provided removble decls in order for you to hve the option to trick
out your bike how ever you like. With tht sid, here re instructions on how to pply the current fctory plced grphics.
15 16
FRAME PROTECTION
Protecting your bike from dmge in common wer zones is criticl to the longevity of your frme. Re-instlling fctory
rubber protection is simple nd esy.
len drive side chin sty nd bottom brcket re with
isopropyl lcohol. Mke sure no dirt or residue is left on frme.
PROTECTION INSTALL
01 02 03
STEPSTEP STEP STEP
Remove protective fi lm from chin sty rubber dhesive tpe Locte correct instll position nd loction on frme before
instll
FIND OUT MORE AT EVIL-BIKES.COMBLEED BLACK, RIDE EVIL
 Loading...