69
www.evolutionpowertools.com
PL
RYS. 5
RYS. 6
RYS. 7
Your vac contains a blowing feature. It has the capability to blow sawdust and other
debris. It can be used to blow dust and debris out of garages or off patios and
driveways. Follow the steps below to use your vac as a blower.
1. Locate blowing port on your vac.
2. Insert one end of the 1-1/4 in. x 6 ft. hose into the blowing port.
3. Turn vac “ON”.
8
WARNING: To reduce the risk of injury from accidental starting, unplug power
cord before changing
WARNING: To avoid injury to bystanders, keep them clear of blowing debris.
CAUTION: Wear a dust mask if blowing creates dust which might be inhaled.
CAUTION: To reduce the risk of hearing damage, wear ear protectors when
using the vac/blower for extended hours or when using it in a noisy area.
CARE AND MAINTENANCE
FILTER REPLACEMENT
WARNING!
To reduce the risk of injury from accidental starting, unplug power cord before changing
or cleaning filter.Your filter should be cleaned often to maintain peak vacuum
performance.
IMPORTANT
To avoid damage to the blower wheel and motor, always reinstall the reusable dry filter
before using the vacuum for dry pickups and always reinstall the foam filter before
using the vacuum for wet pickups.
IMPORTANT
After cleaning, check the filter for tears or small holes. Do not use a filter with holes or
tears in it. Even a small hole can cause dust to come out of your vacuum.
Replace it immediately.
NOTE
Before installing the filter on the vacuum, clean the area of the lid so that the clamp ring
will seal the bag against the lid and stop small particles from bypassing the filter bag. If
the filter is clean and not damaged, replace it on the filter cage. If it cannot be reused,
place a new filter over the filter cage.
NOTE
Clean the filter in an open area.
BLOWING OPERATION
7
WARNING!
To reduce the risk of injury from accidental starting, unplug power cord before emptying
the dust tank.
1. Remove the power head assembly of the wet/dry vac by pulling outward on the lid
clips located on each side of the vac. Lift off the power head assembly.
2. Dump the tank contents into the proper waste disposal container.
INSTALLING ACCESSORY BRACKET
1.Push the accessory bracket (A) in the recess.
2.Secure in place using the screws (B).
A
B
WET PICK-UP
1. Remove cartridge filter and replace it with foam filter when you do wet pickups.
2. This wet/dry vac is equipped with a float mechanism which will rise automatically
to cut off the airflow when the liquid in the tank reaches a predetermined level. When
this happens, turn off vac, unplug the power cord, and empty the dust tank. You will
know that the float has shut the airflow off because the suction ceases and the motor
noise becomes higher in pitch due to increased motor speed. The liquid capacity may
vary with the rate of pickup.
EMPTY THE TANK
Foam filter
Float in raised position
ODKURZANIE SUBSTANCJI SUCHYCH
UWAGA: Jeśli filtr piankowy znajduje się na klatce filtru, należy go
zdjąć przed zainstalowaniem wkładu filtracyjnego. Wkład filtracyjny
może służyć do odkurzania płynów lub substancji suchych;
instalacja odbywa się tak samo w obydwu przypadkach. Należy
zapoznać się z sekcją dotyczącą odkurzania płynów niniejszej
instrukcji, jeśli konieczne jest odkurzenie dużej ilości płynu. Wkład
filtracyjny umieszczony na klatce filtru może służyć do ogólnego
odkurzania materiałów suchych.
• Odwróć jednostkę napędową do góry nogami i przesuń
wkład filtracyjny po klatce. Dociśnij uszczelnienia filtru do
jednostki napędowej.
• Włóż element ustalający filtru do górnej części wkładu, chwyć
jednostkę napędową jedną ręką i obróć uchwyt elementu
ustalającego zgodnie z ruchem wskazówek zegara, aby go
docisnąć, co spowoduje zablokowanie filtru w odpowiedniej
pozycji. (Rys. 3)
• Aby wyjąć wkład filtracyjny na potrzeby czyszczenia, chwyć
jednostkę napędową i obróć element ustalający filtru w
kierunku przeciwnym do ruchu wskazówek zegara, aby go
poluzować i zdjąć. Zsuń wkład filtracyjny z klatki filtru.
• Aby wyczyścić wkład, strząśnij lub usuń szczotką nadmiar
brudu lub spłucz (od środka filtru) wodą, pozostaw do
całkowitego wyschnięcia (około 24 godziny) i zainstaluj
ponownie.
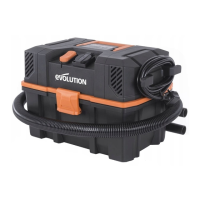
ODKURZANIE PŁYNÓW
• Wyjmij wkład filtracyjny i zastąp go filtrem piankowym na
potrzeby odkurzania płynów. (Rys. 4)
• Ten odkurzacz do pracy na sucho i mokro jest wyposażony
w pływak, który automatycznie się podniesie, aby odciąć
przepływ powietrza, gdy ilość płynu w zbiorniku osiągnie
określony uprzednio poziom. Należy wtedy wyłączyć
odkurzacz, odłączyć przewód zasilania z gniazda i opróżnić
zbiornik pyłu. Użytkownik zorientuje się, że pływak
spowodował odcięcie przepływu powietrza, ponieważ
urządzenie przestanie zasysać, a silnik zacznie wydawać
wyższy dźwięk na skutek pracy ze zwiększoną szybkością.
Pojemność płynu może się różnić w zależności od
intensywności odkurzania. (Rys. 5)
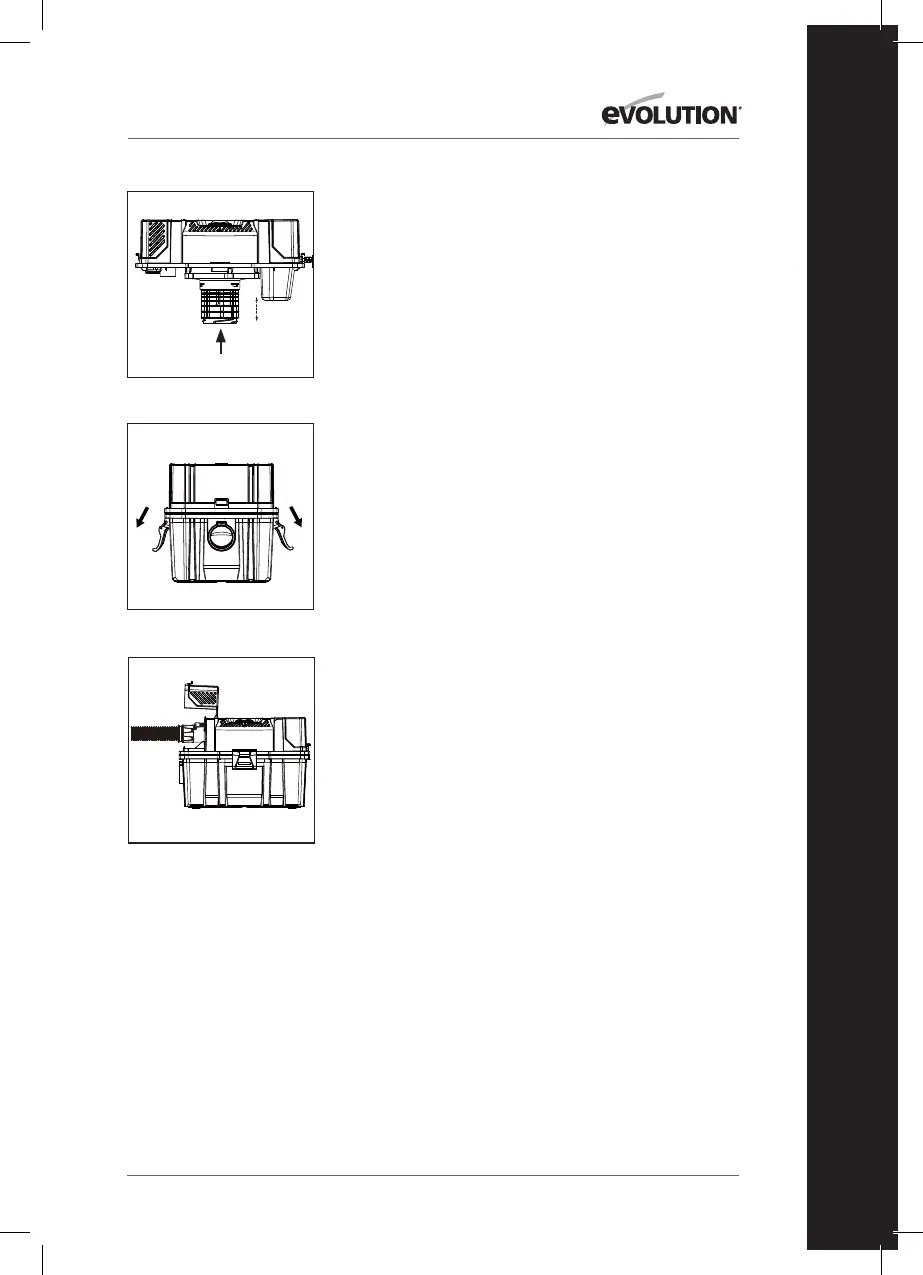
OPRÓŹNIANIEZBIORNIKA
OSTRZEŻENIE: Aby ograniczyć ryzyko doznania urazu na skutek
przypadkowego uruchomienia, należy odłączyć przewód zasilania
przed opróżnieniem zbiornika pyłu.
• Zdejmij zespół jednostki napędowej, odchylając na zewnątrz
zatrzaski mocujące pokrywy znajdujące się po bokach
urządzenia. Zdejmij zespół jednostki napędowej. (Rys. 6)
• Usuń zawartość zbiornika do odpowiedniego pojemnika na
odpady.
OPERACJA NADMUCHOWA
OSTRZEŻENIE: Aby ograniczyć ryzyko doznania urazu na skutek
przypadkowego uruchomienia, należy odłączyć przewód zasilania
przed wymianą. Aby zapobiec doznaniu urazów przez osoby
postronne, należy się upewnić, że znajdują się one w bezpiecznej
odległości od zdmuchiwanych odpadów.
PŁYWAK UNIESIONY
 Loading...